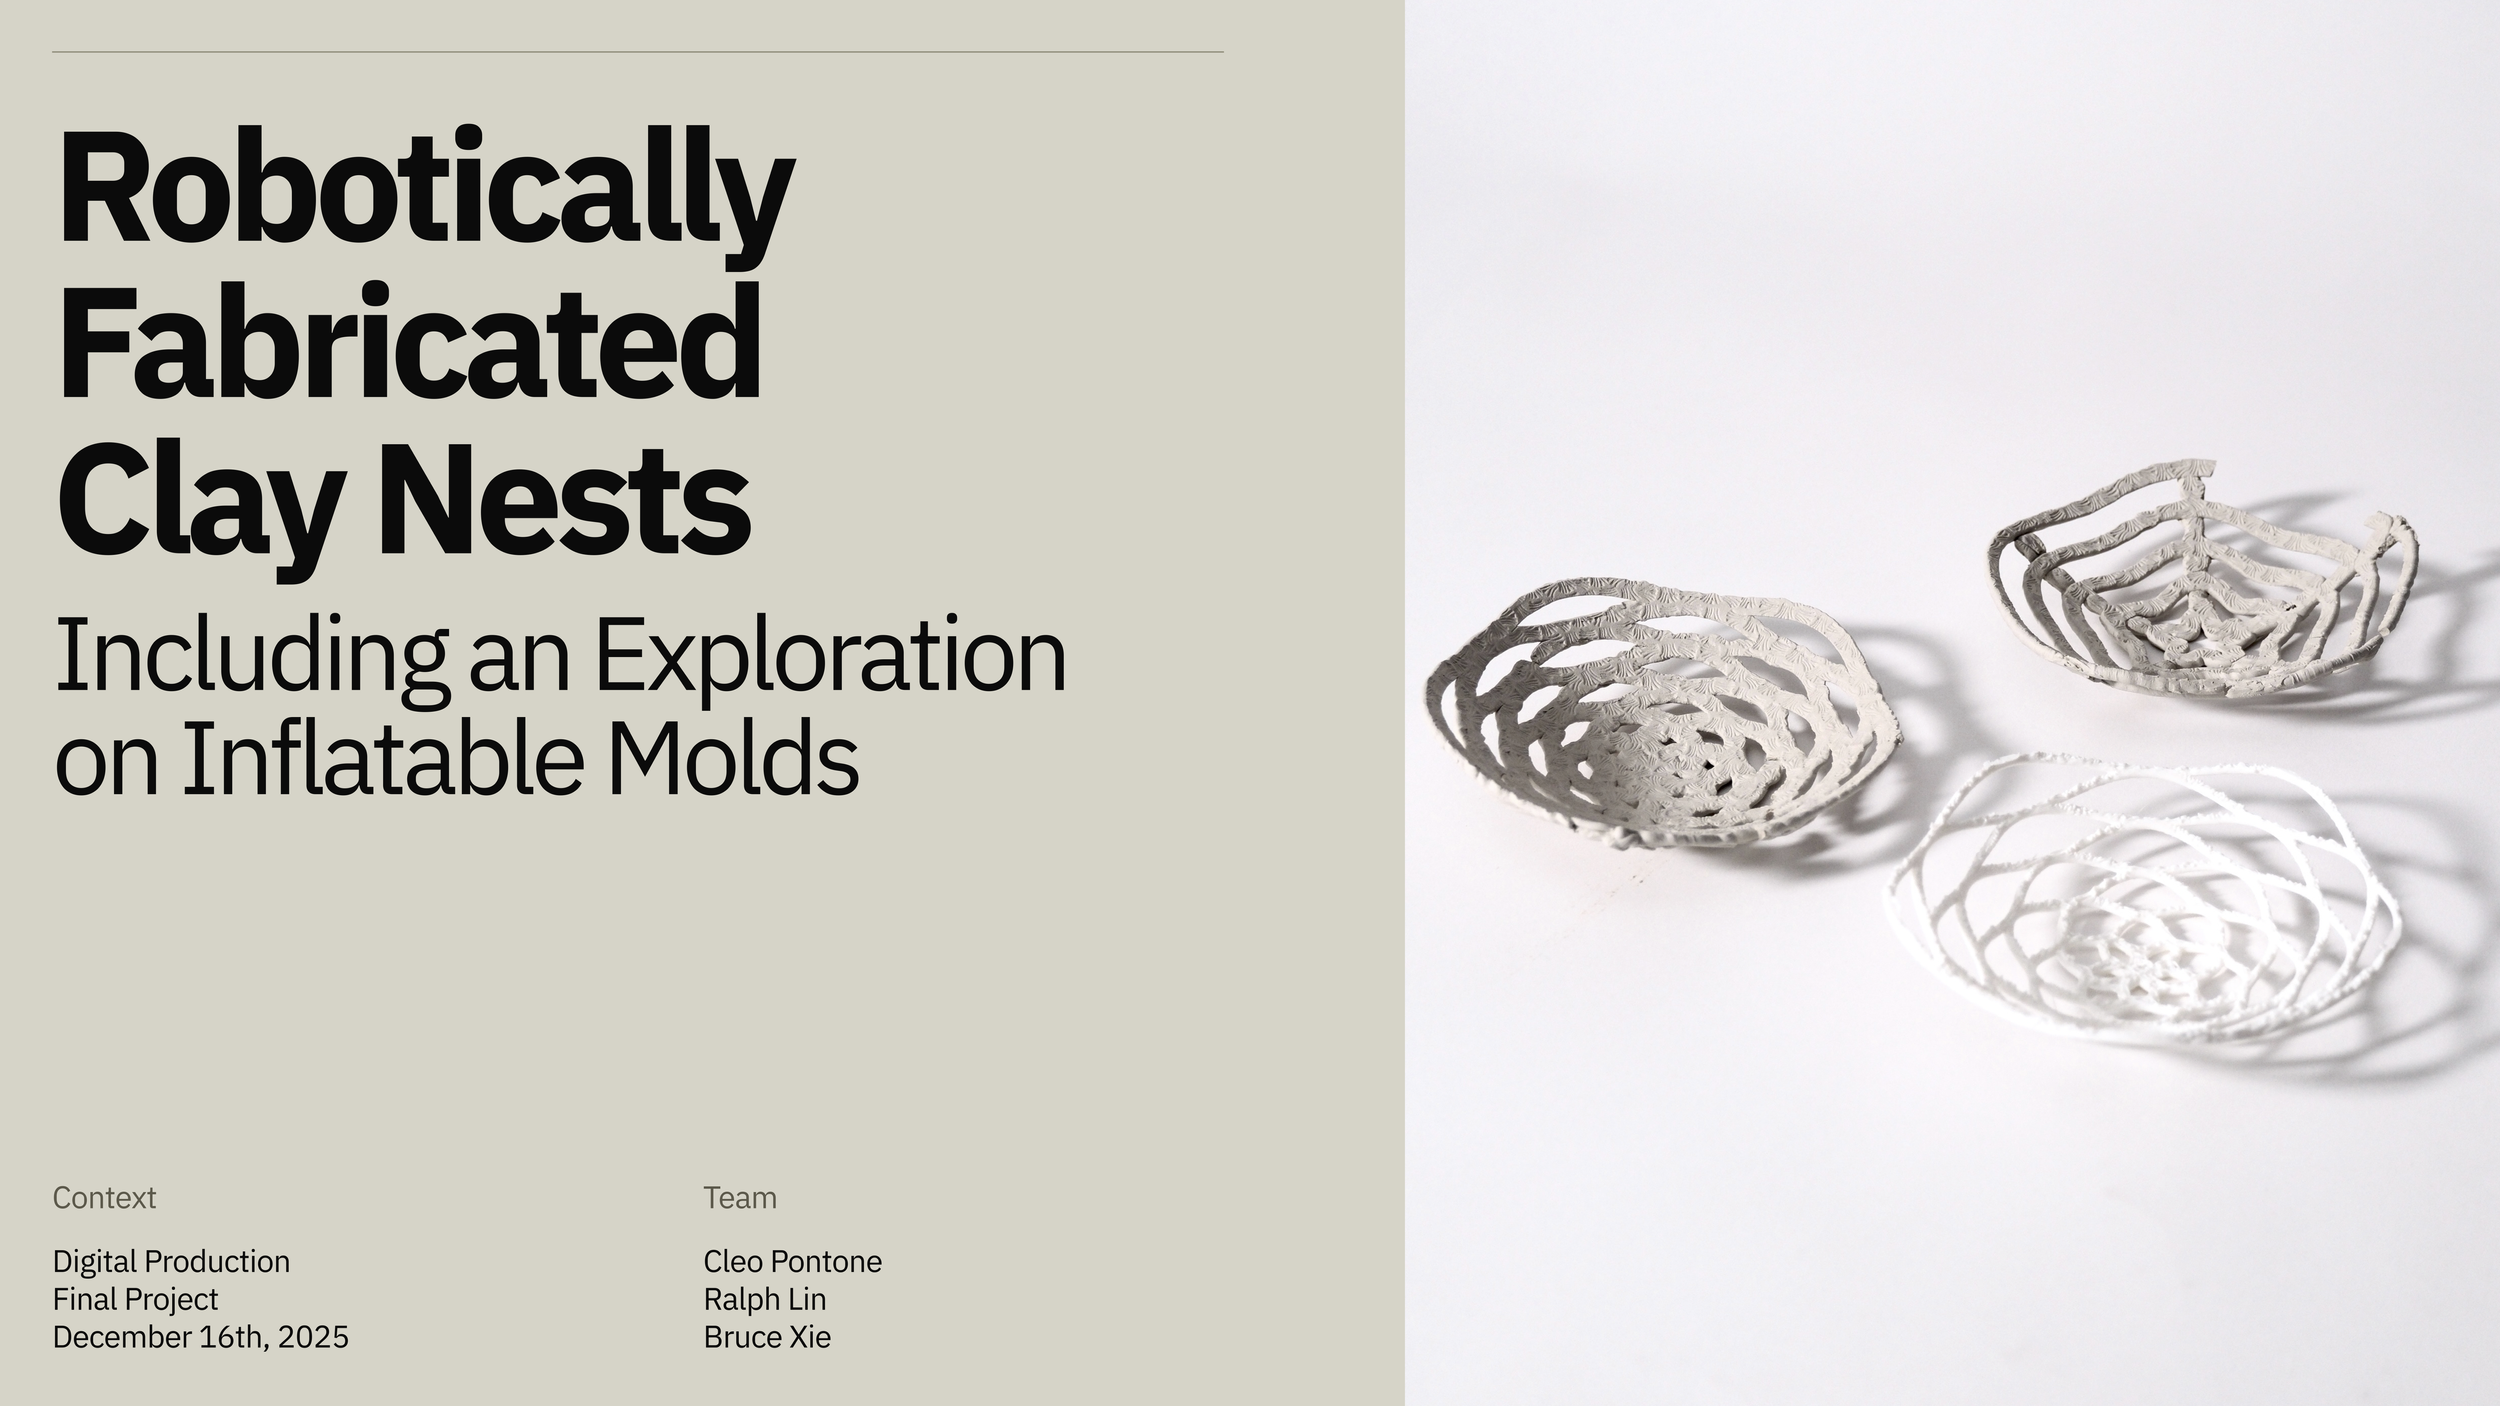
Robotically Fabricated Clay Nests: Clay 3D Printing on Non-Planar Inflatable Molds
November 2025 - December 2025
A fabrication research project exploring how a robotic arm can be programmed to extrude clay along non-planar toolpaths around inflatable molds to create nest-like forms.
Design Engineer
Role
Digital Production: Design, Materials, Fabrication (Yr. 1) at Harvard GSD
Context
Cleo Pontone, Ralph Lin, Bruce Xie
Team
Rhino, Grasshopper, Prusa 3D Printer
Tools
Professor Daniel Tish along with robotics support from Teacher’s Assistant Chi Zhang
Advisors
Overview
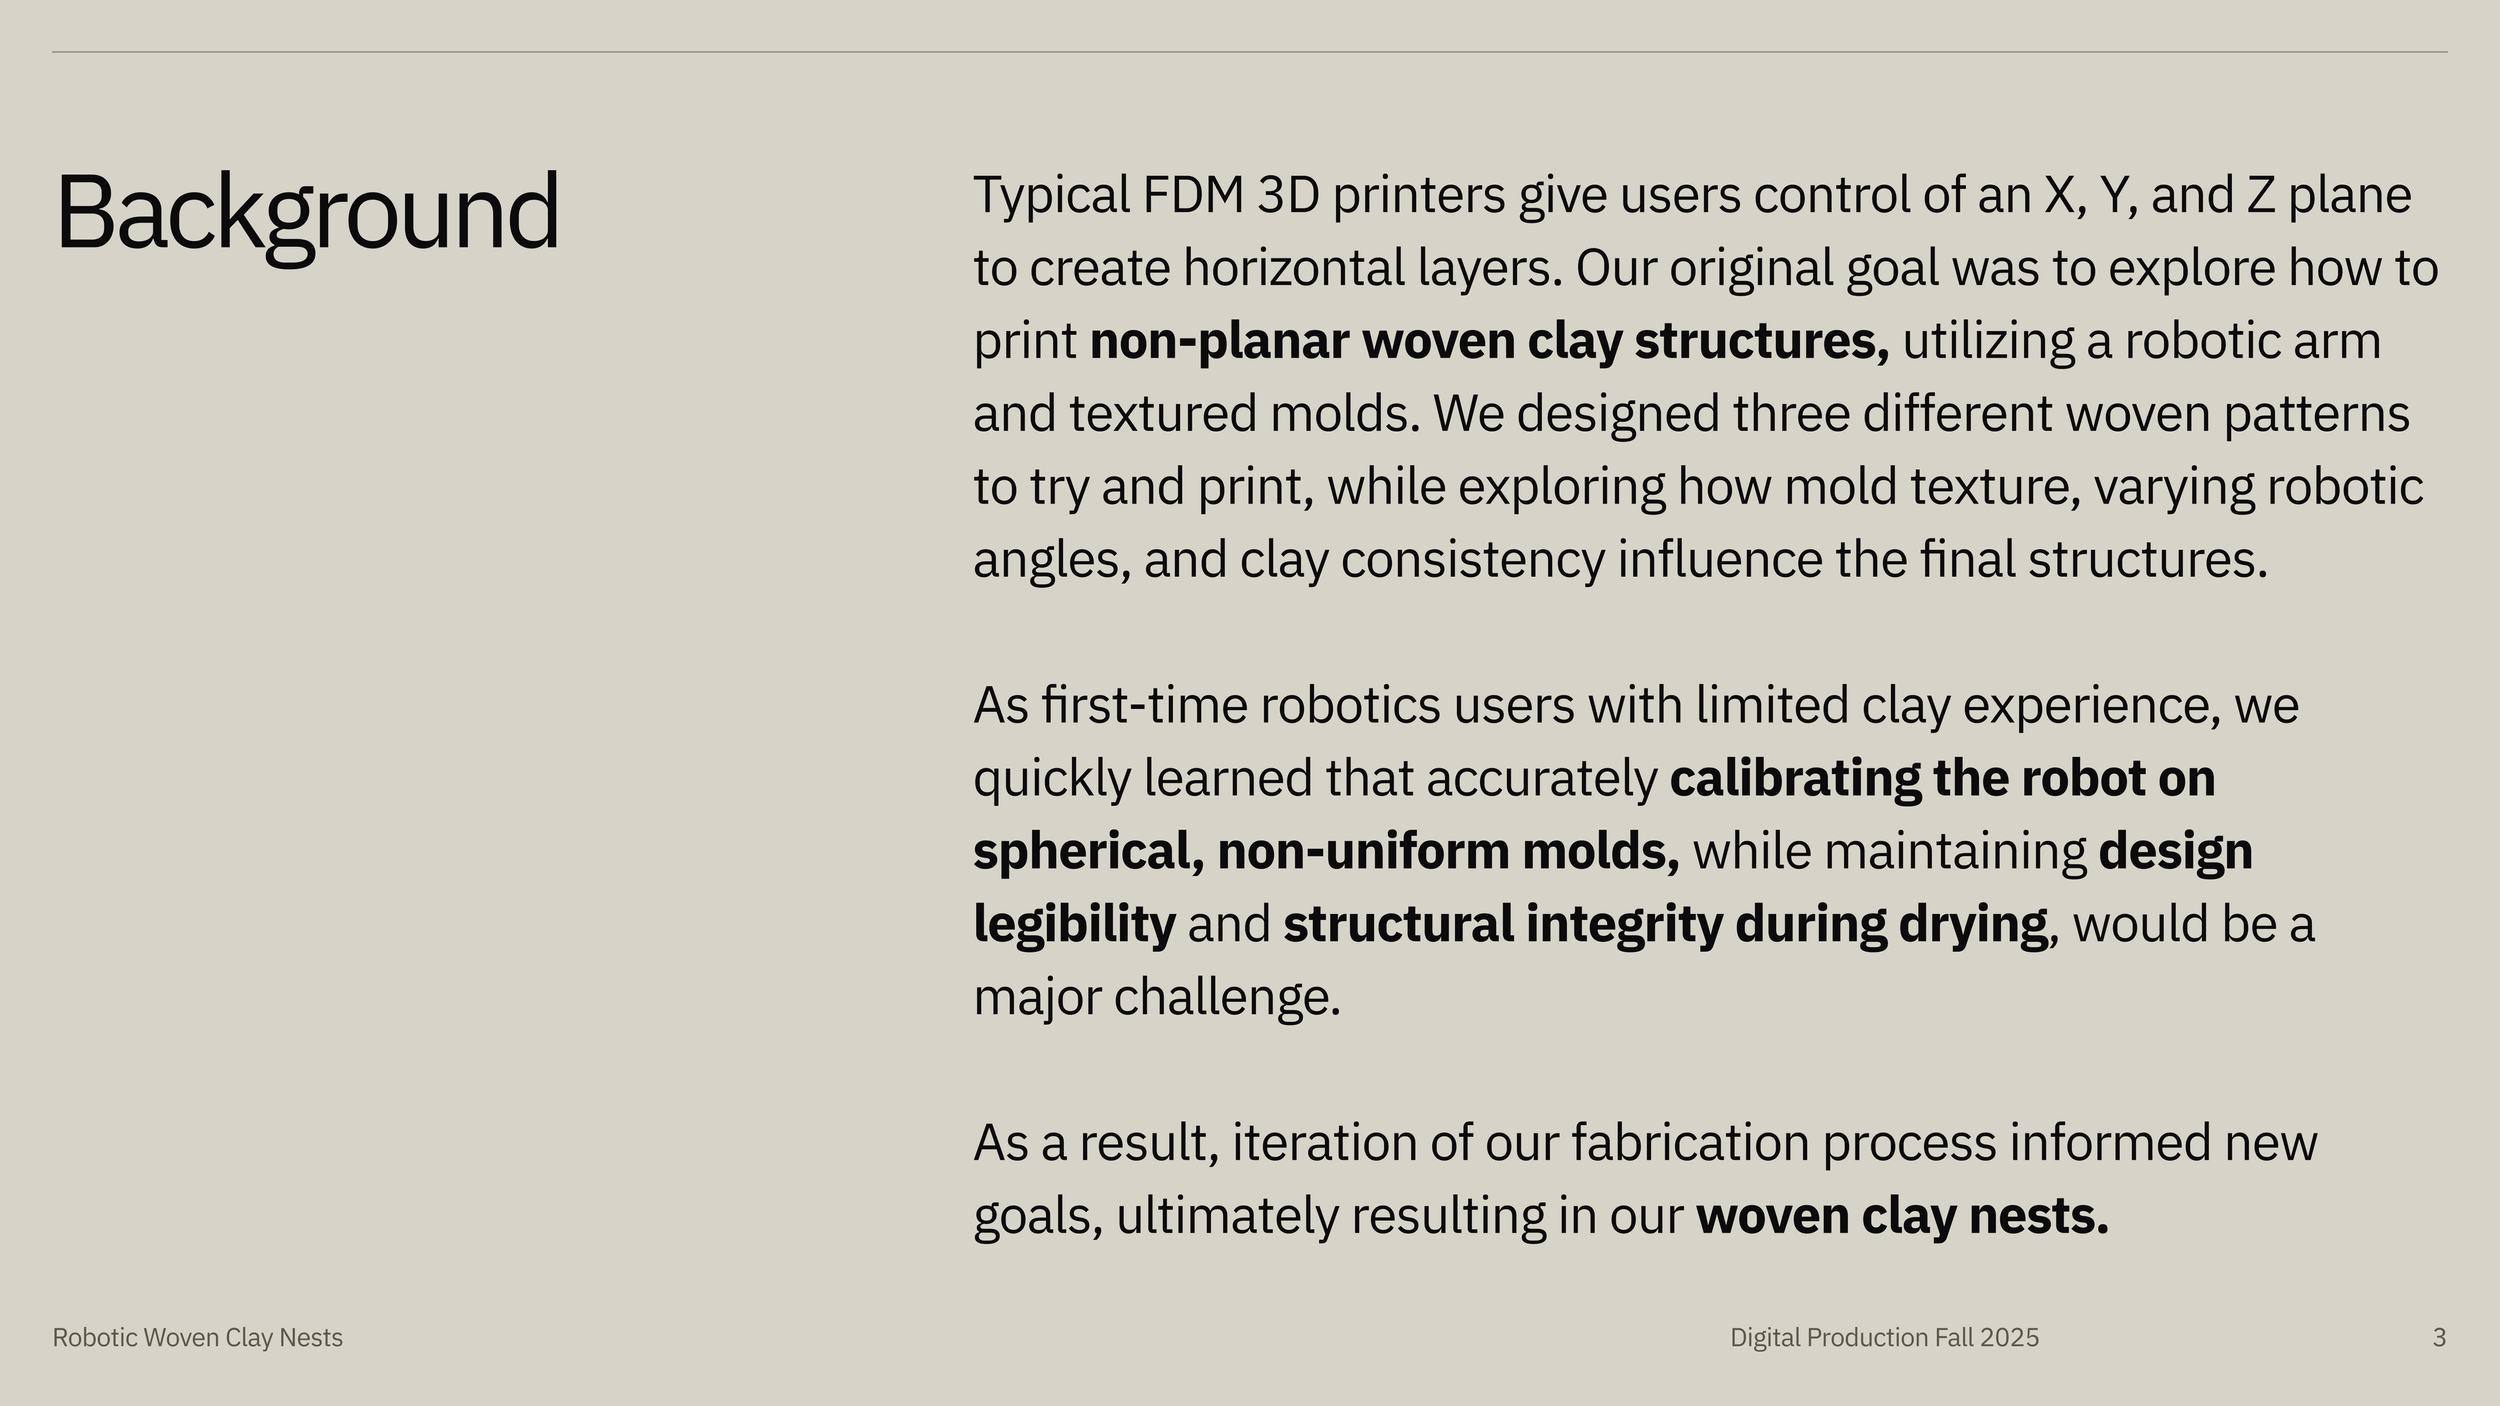
Additive manufacturing has traditionally relied on planar layering and controlled, predictable geometries to achieve precision and reproducibility. Yet, as robotic fabrication tools, such as typical FDM 3D printers, become more accessible in design education and practice, there is growing interest in how these systems can be used beyond the ideal conditions in real life scenarios. For example, this could include working with soft, deformable materials and non-uniform geometries when material behavior, gravity, and calibration are not particularly consistent or straightforward, and therefore uncertainty plays a large role in outcomes.
Clay extrusion challenges conventional digital fabrication as it introduces variability through moisture content, drying, shrinkage, and limited structural stability.
Context
Challenge
Fabricating intricate non-planar clay forms through automated processes is challenging due to the instability of soft materials, like clay, and the lack of rigid support. When combined with non-uniform molds, these conditions raise questions about how robotic fabrication can reliably and consistently produce complex geometries and patterns, challenging manual creation, while accommodating material variability and deformation.
Research Question
How can robotic clay extrusion be combined with inflatable spherical molds to produce intricate non-planar forms? What are the possibilities and limitations of this fabrication method givent he material and lack of rigid support?
Final Product
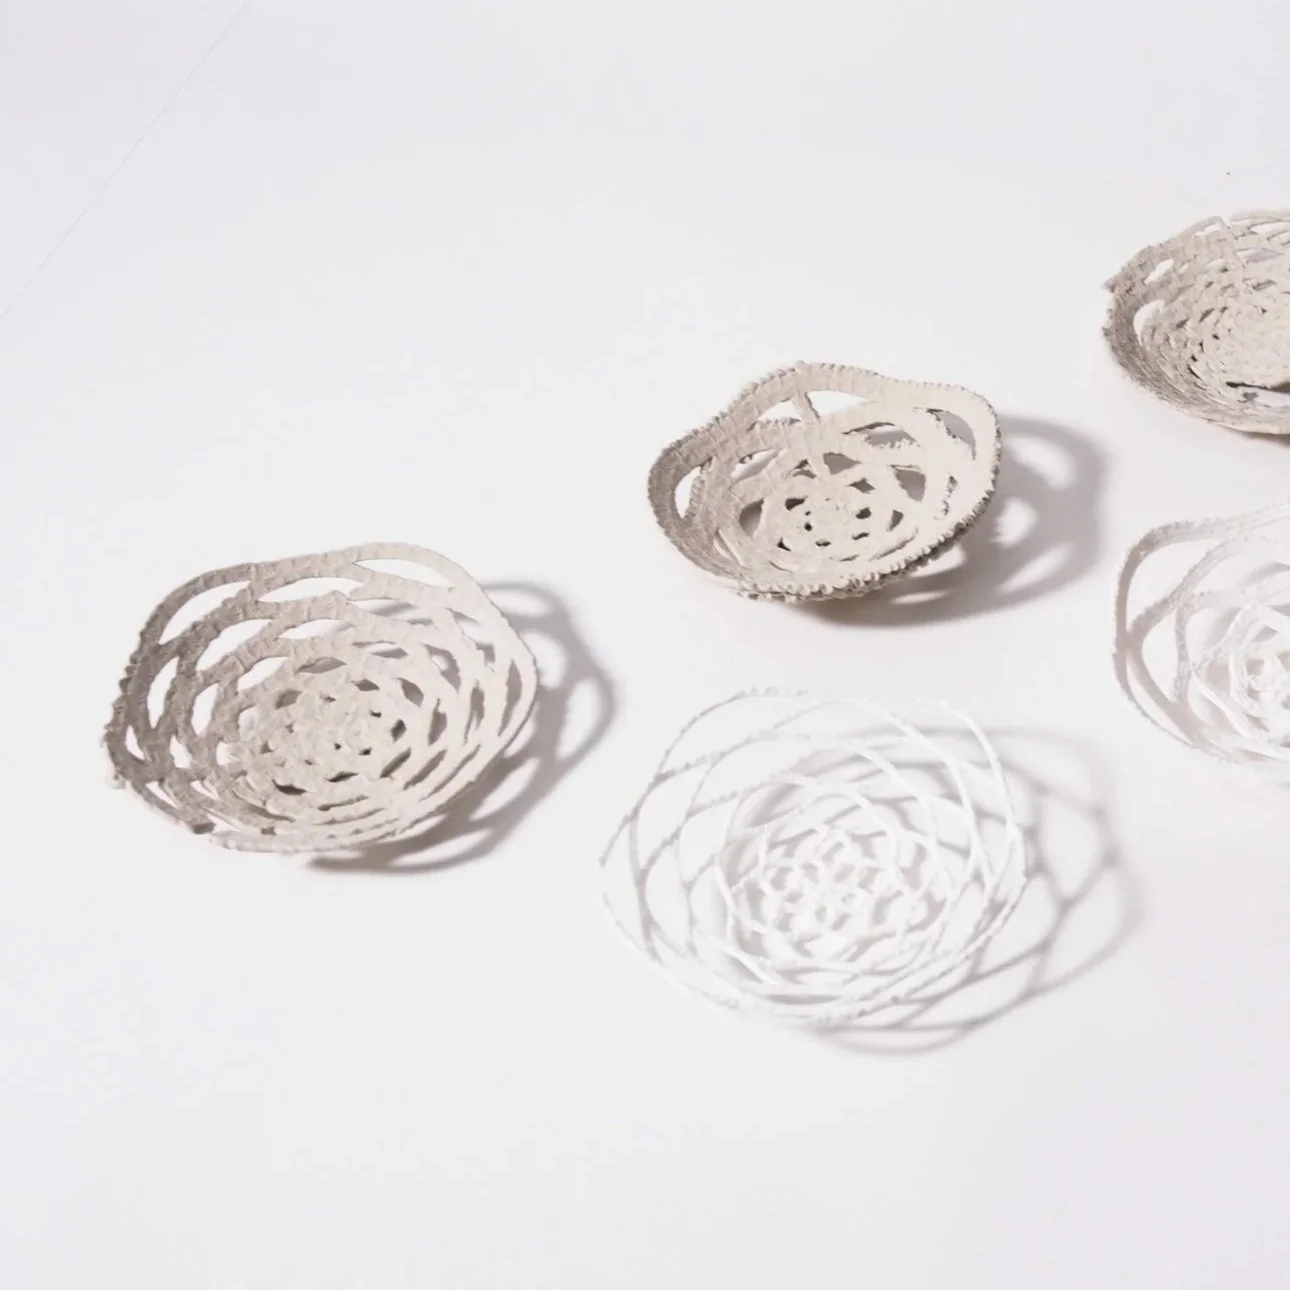
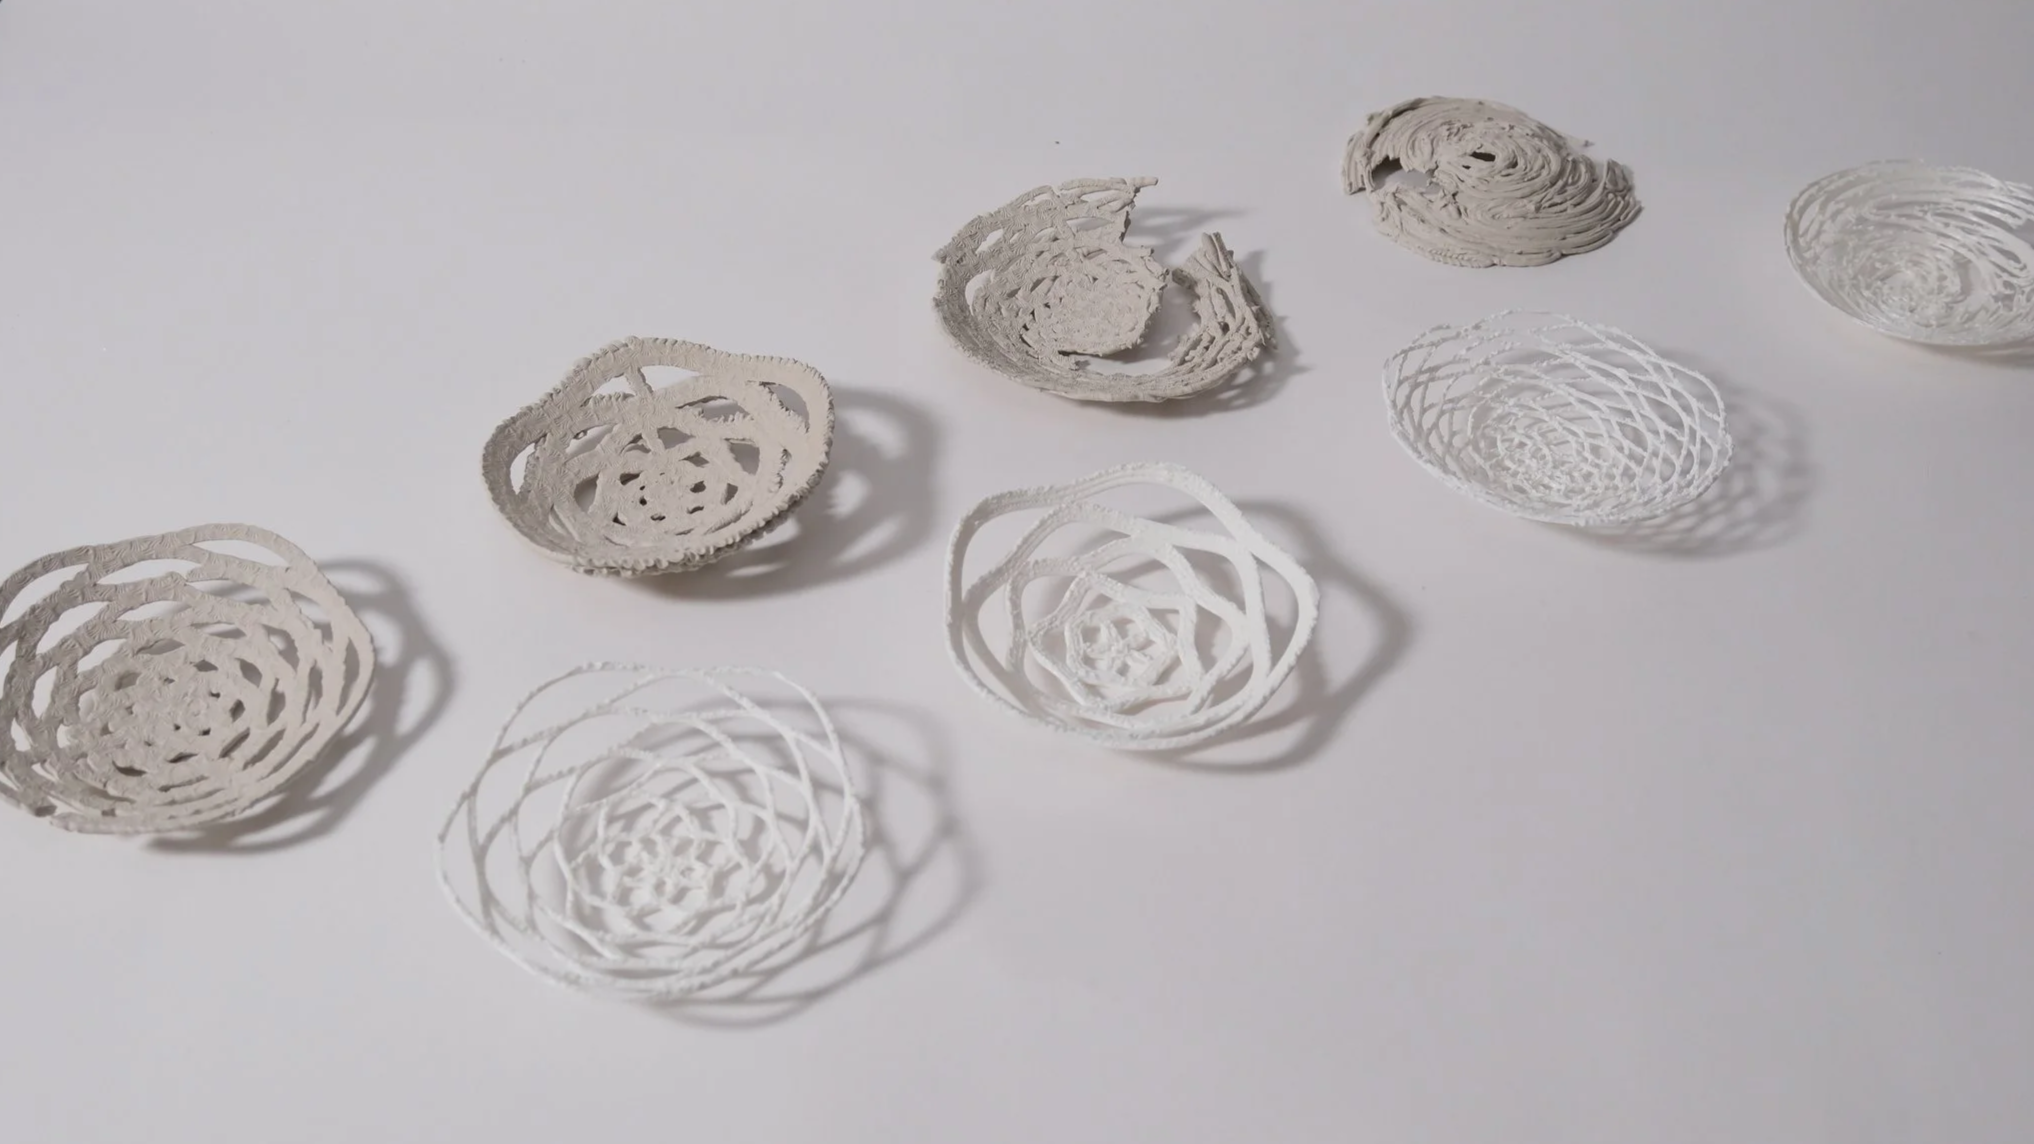
A series of four robotically fabricated clay “nests,” each exploring how different combinations of structural reinforcement (layer design and deposition sequence), extrusion speed, and clay viscosity influence structural integrity and form.
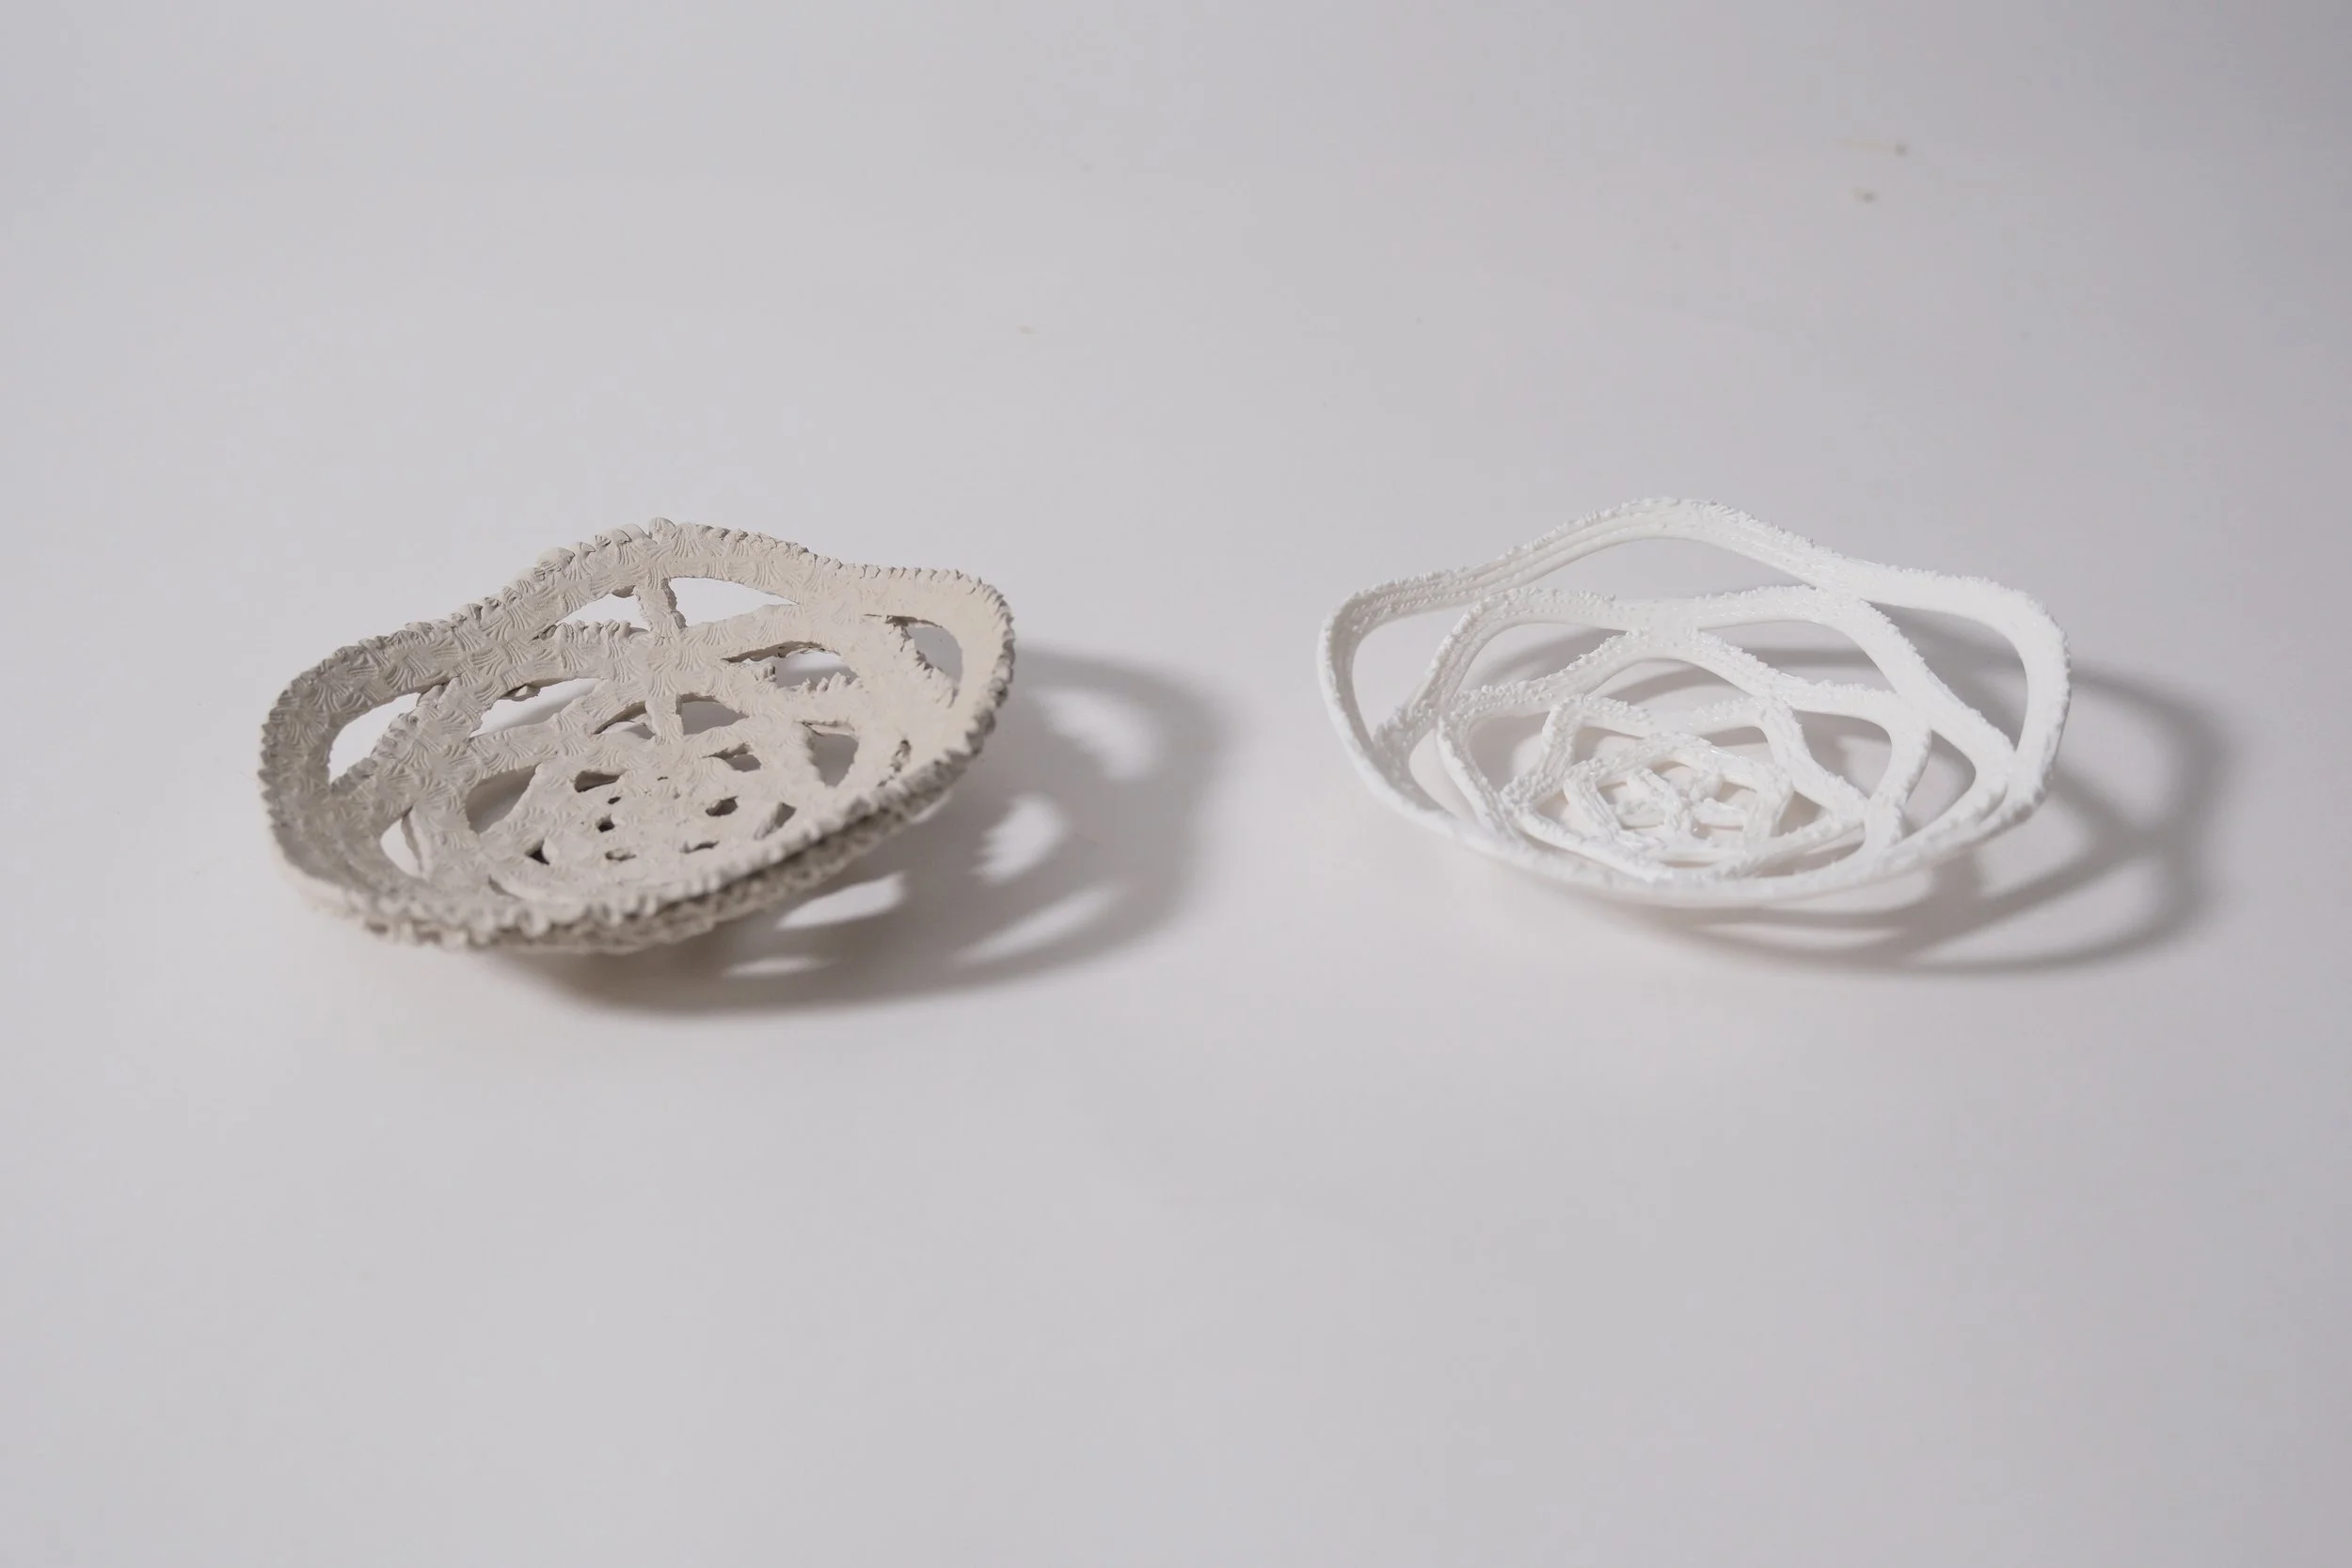
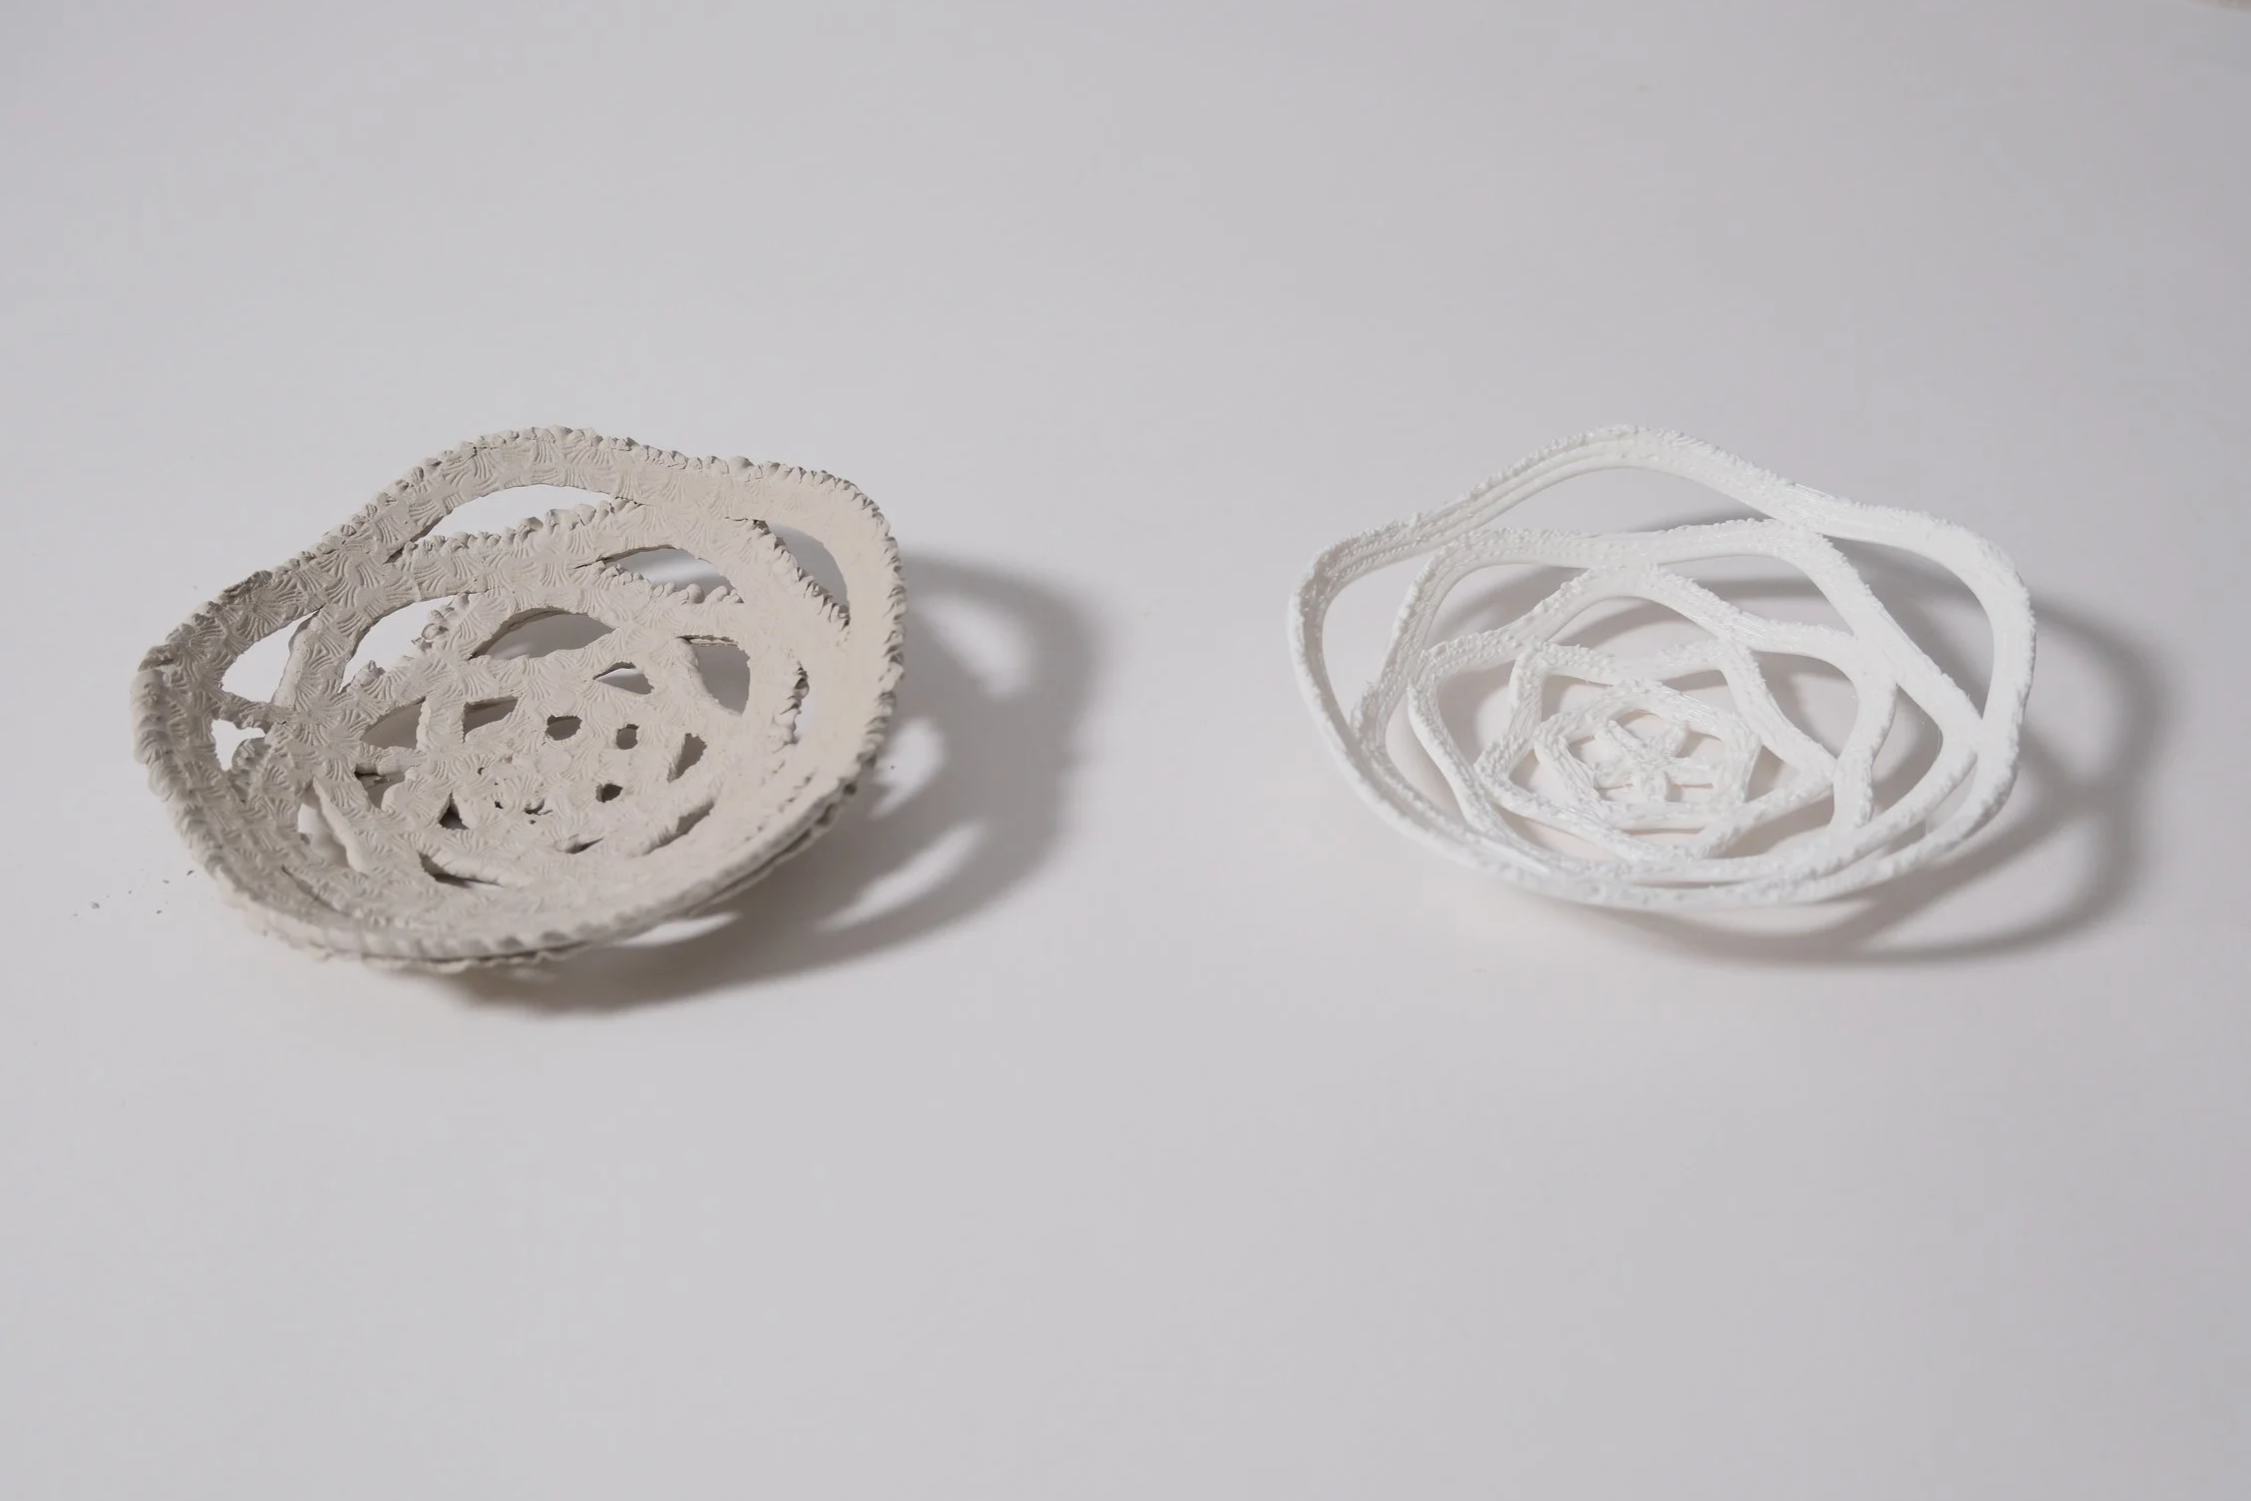
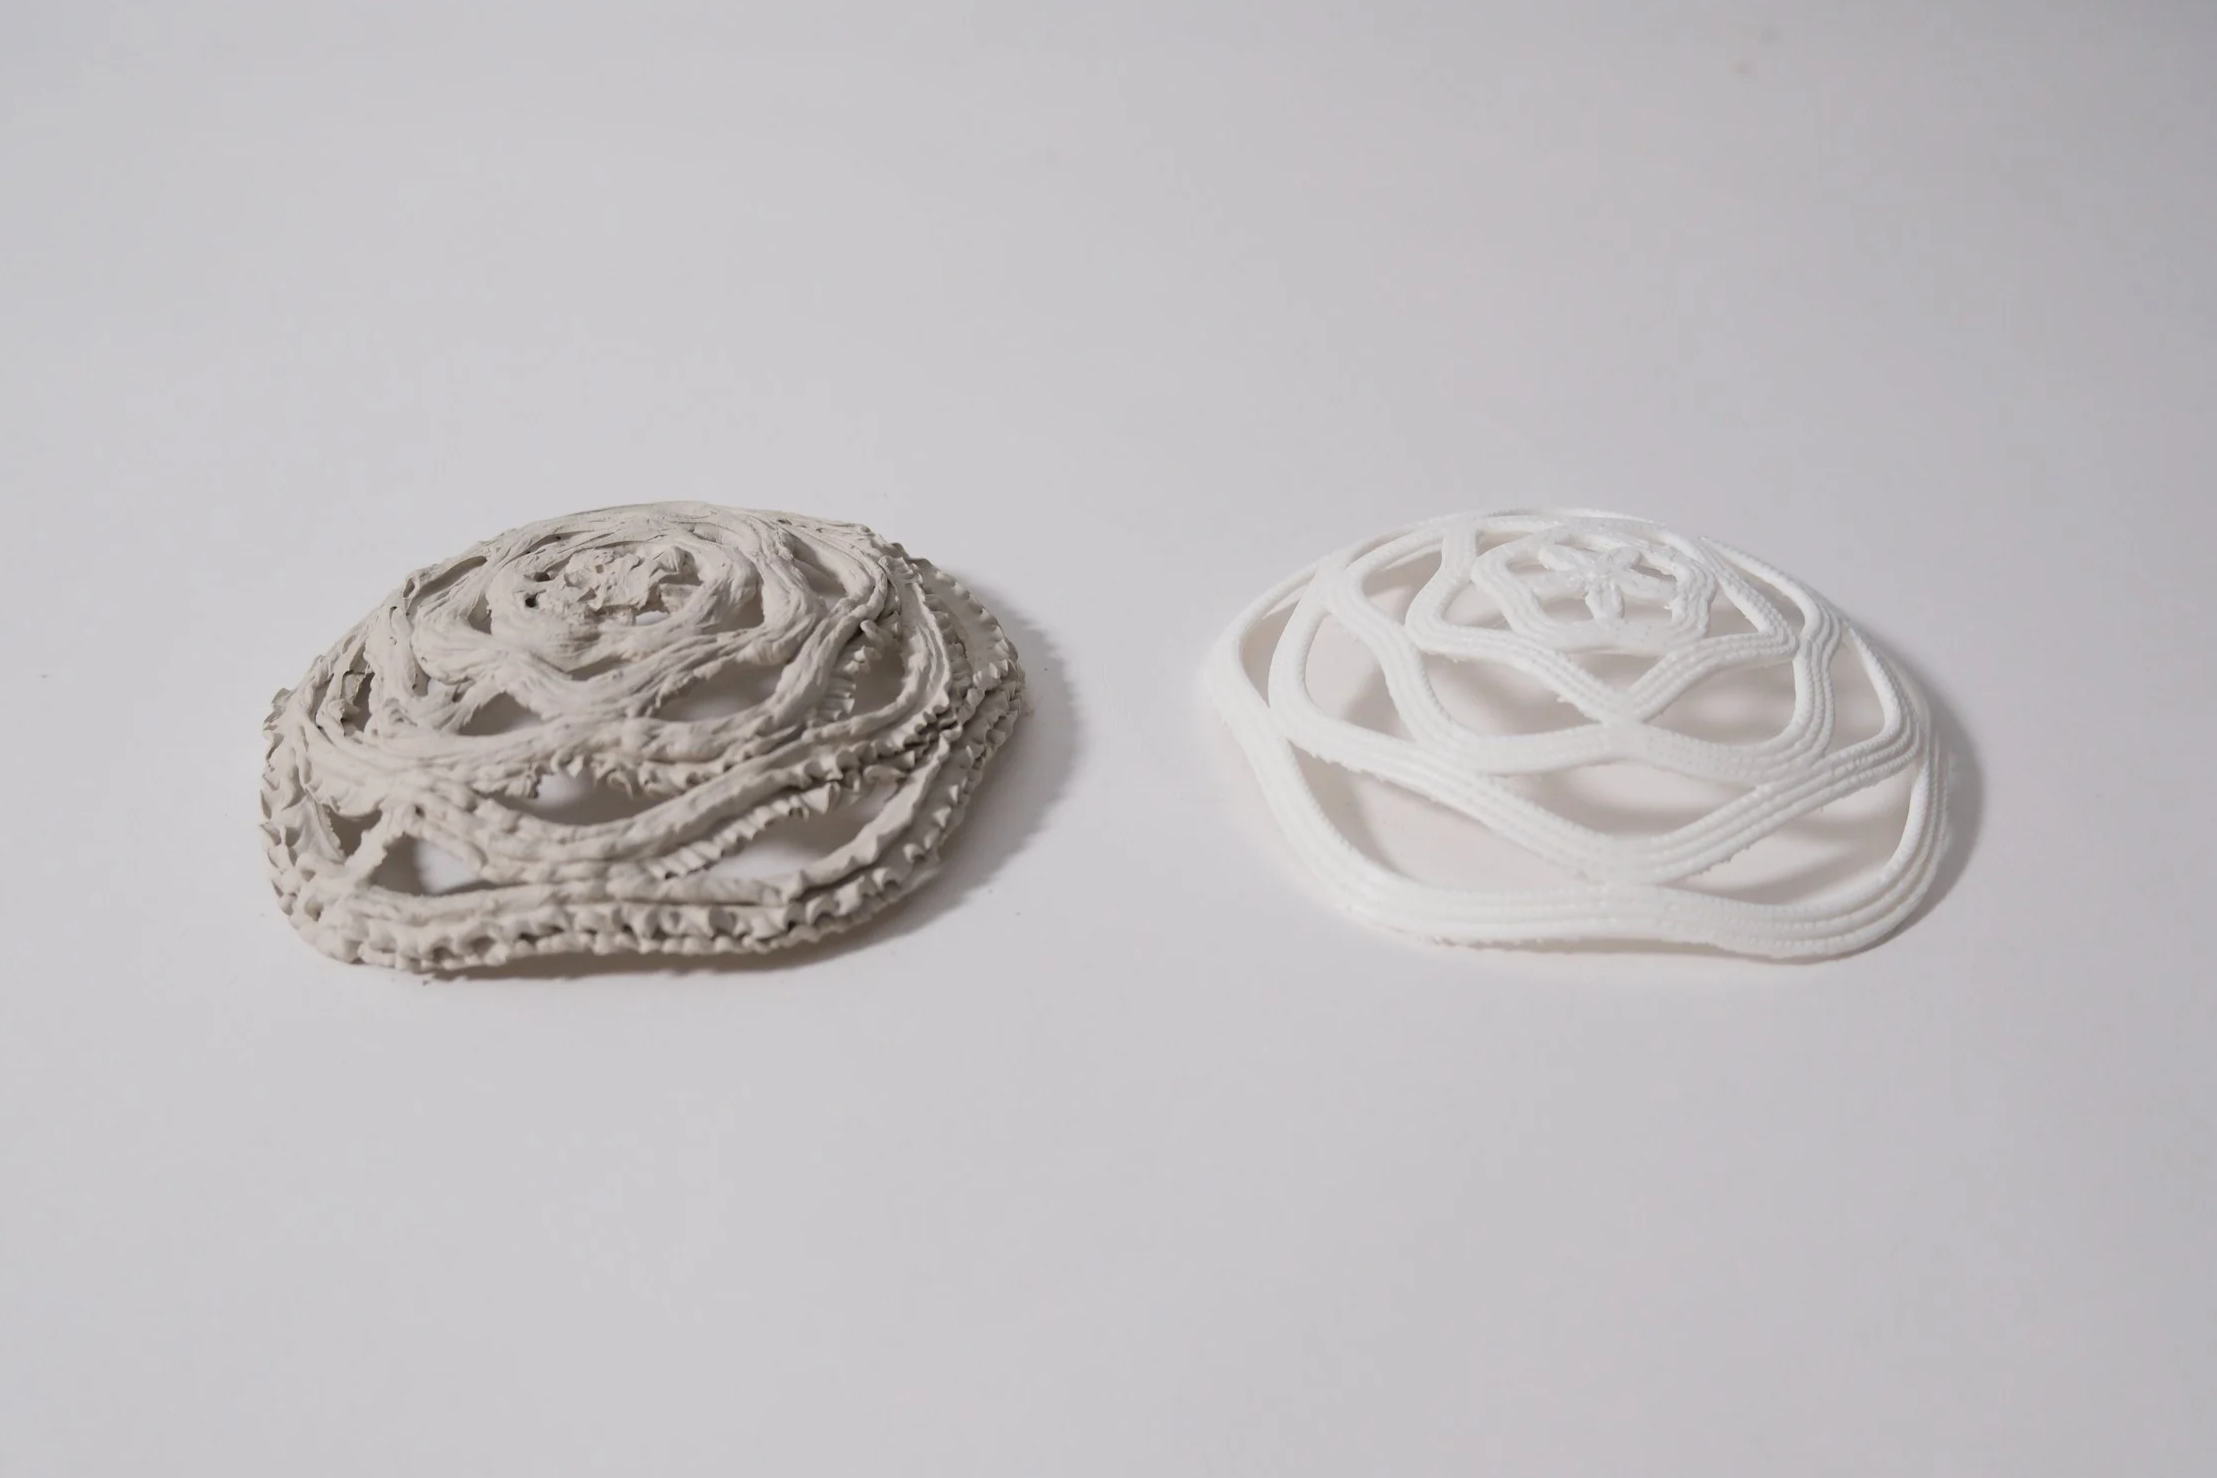
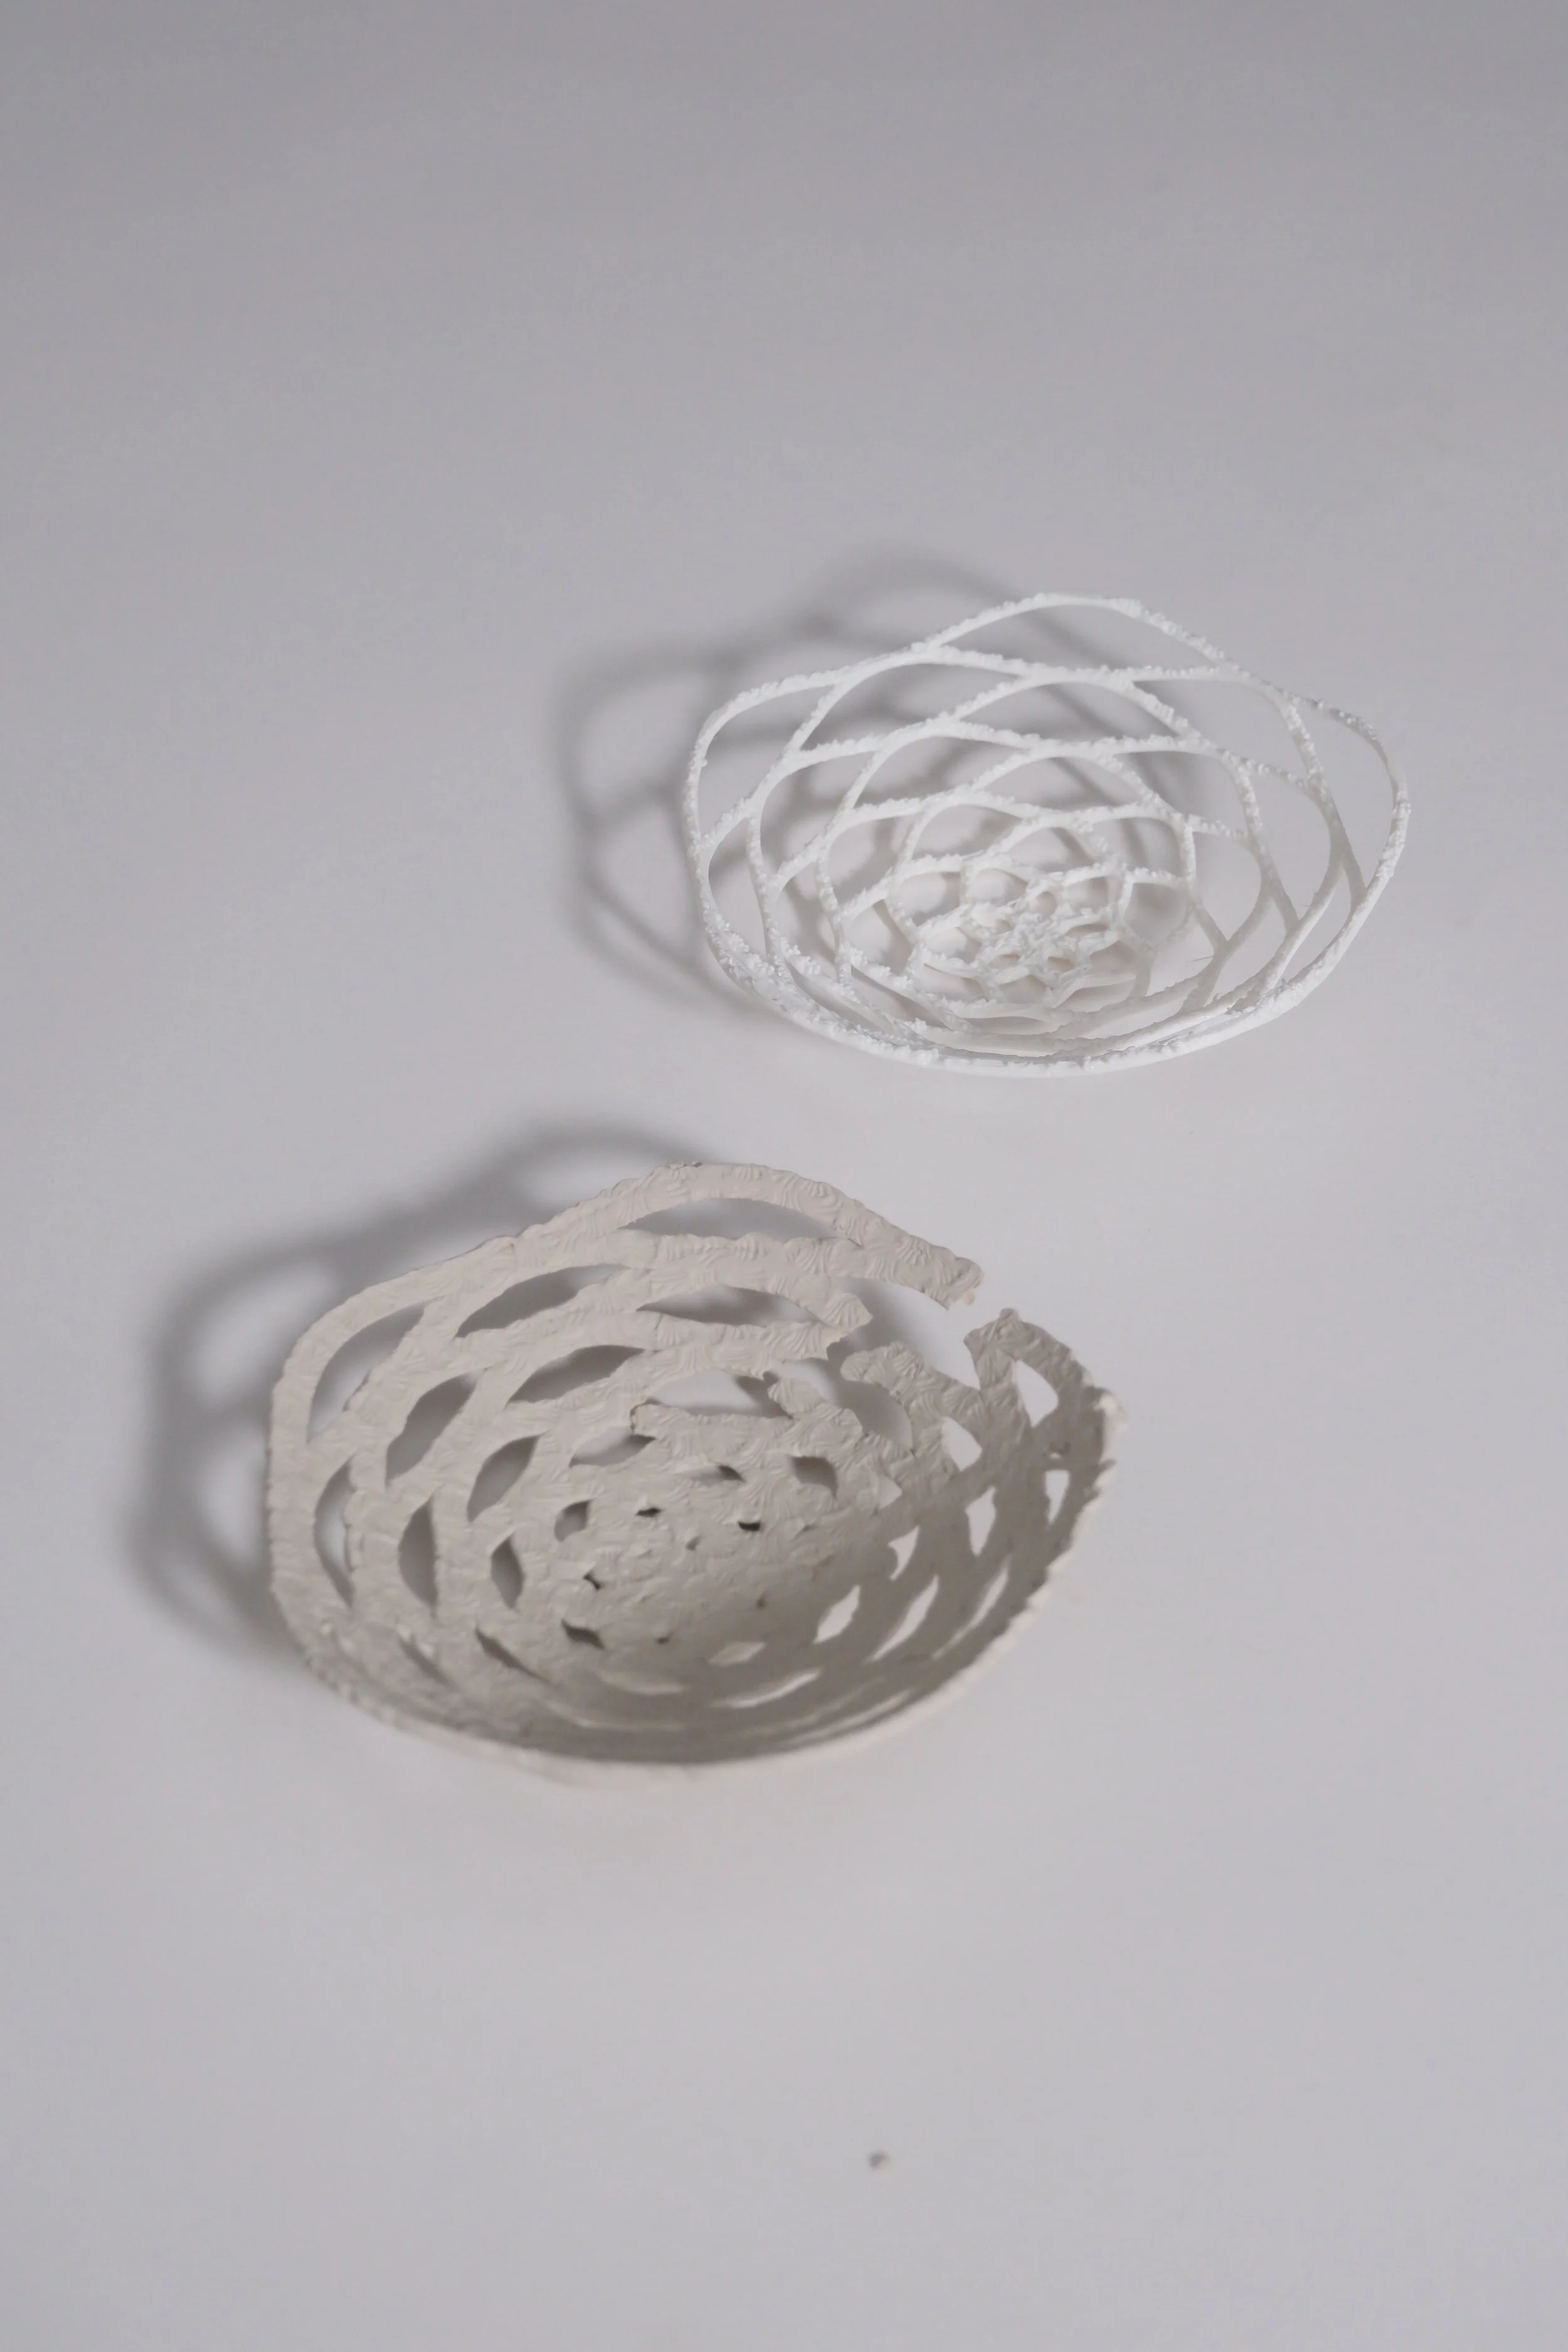
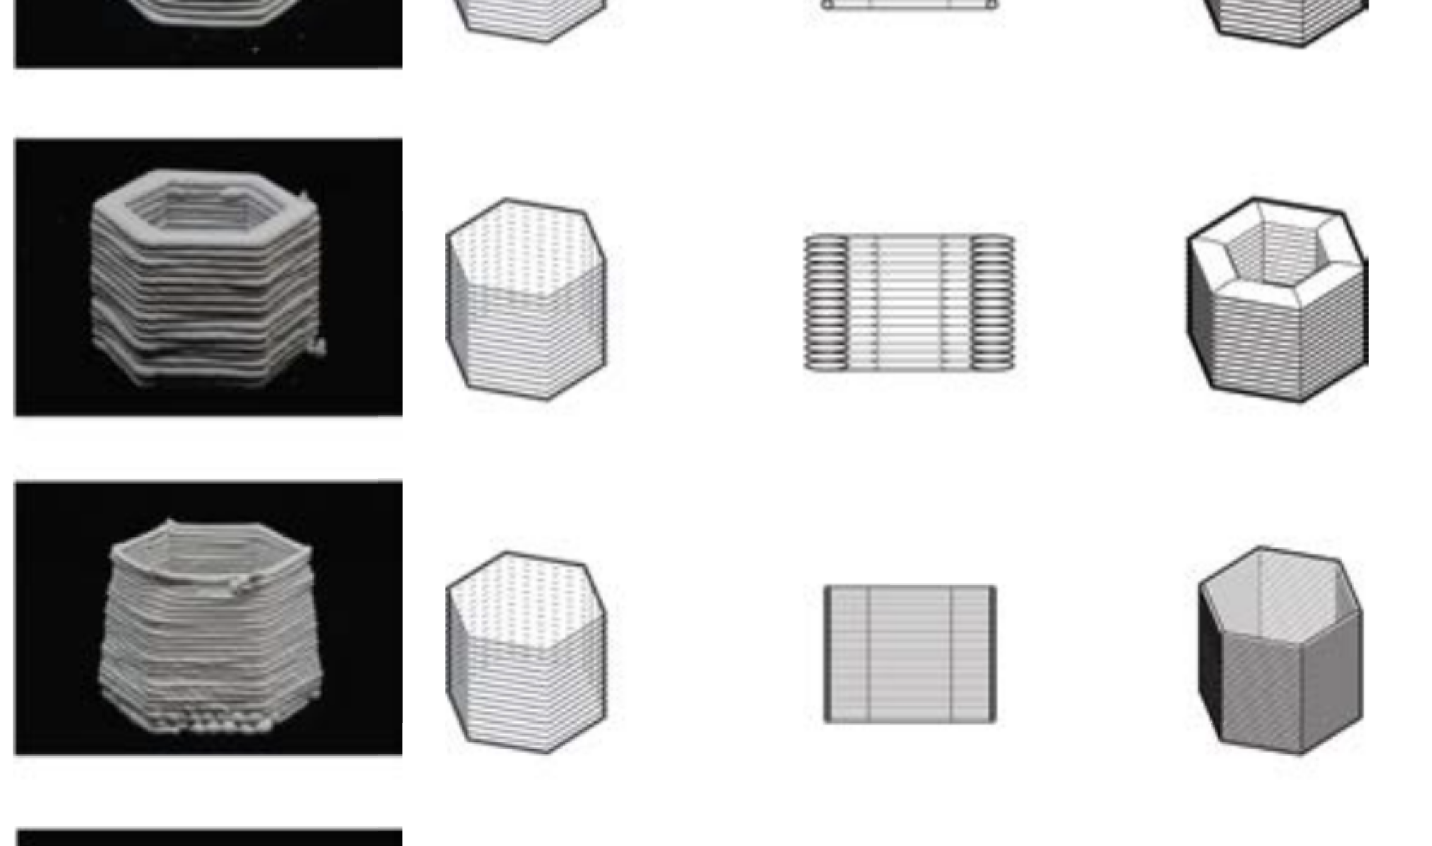
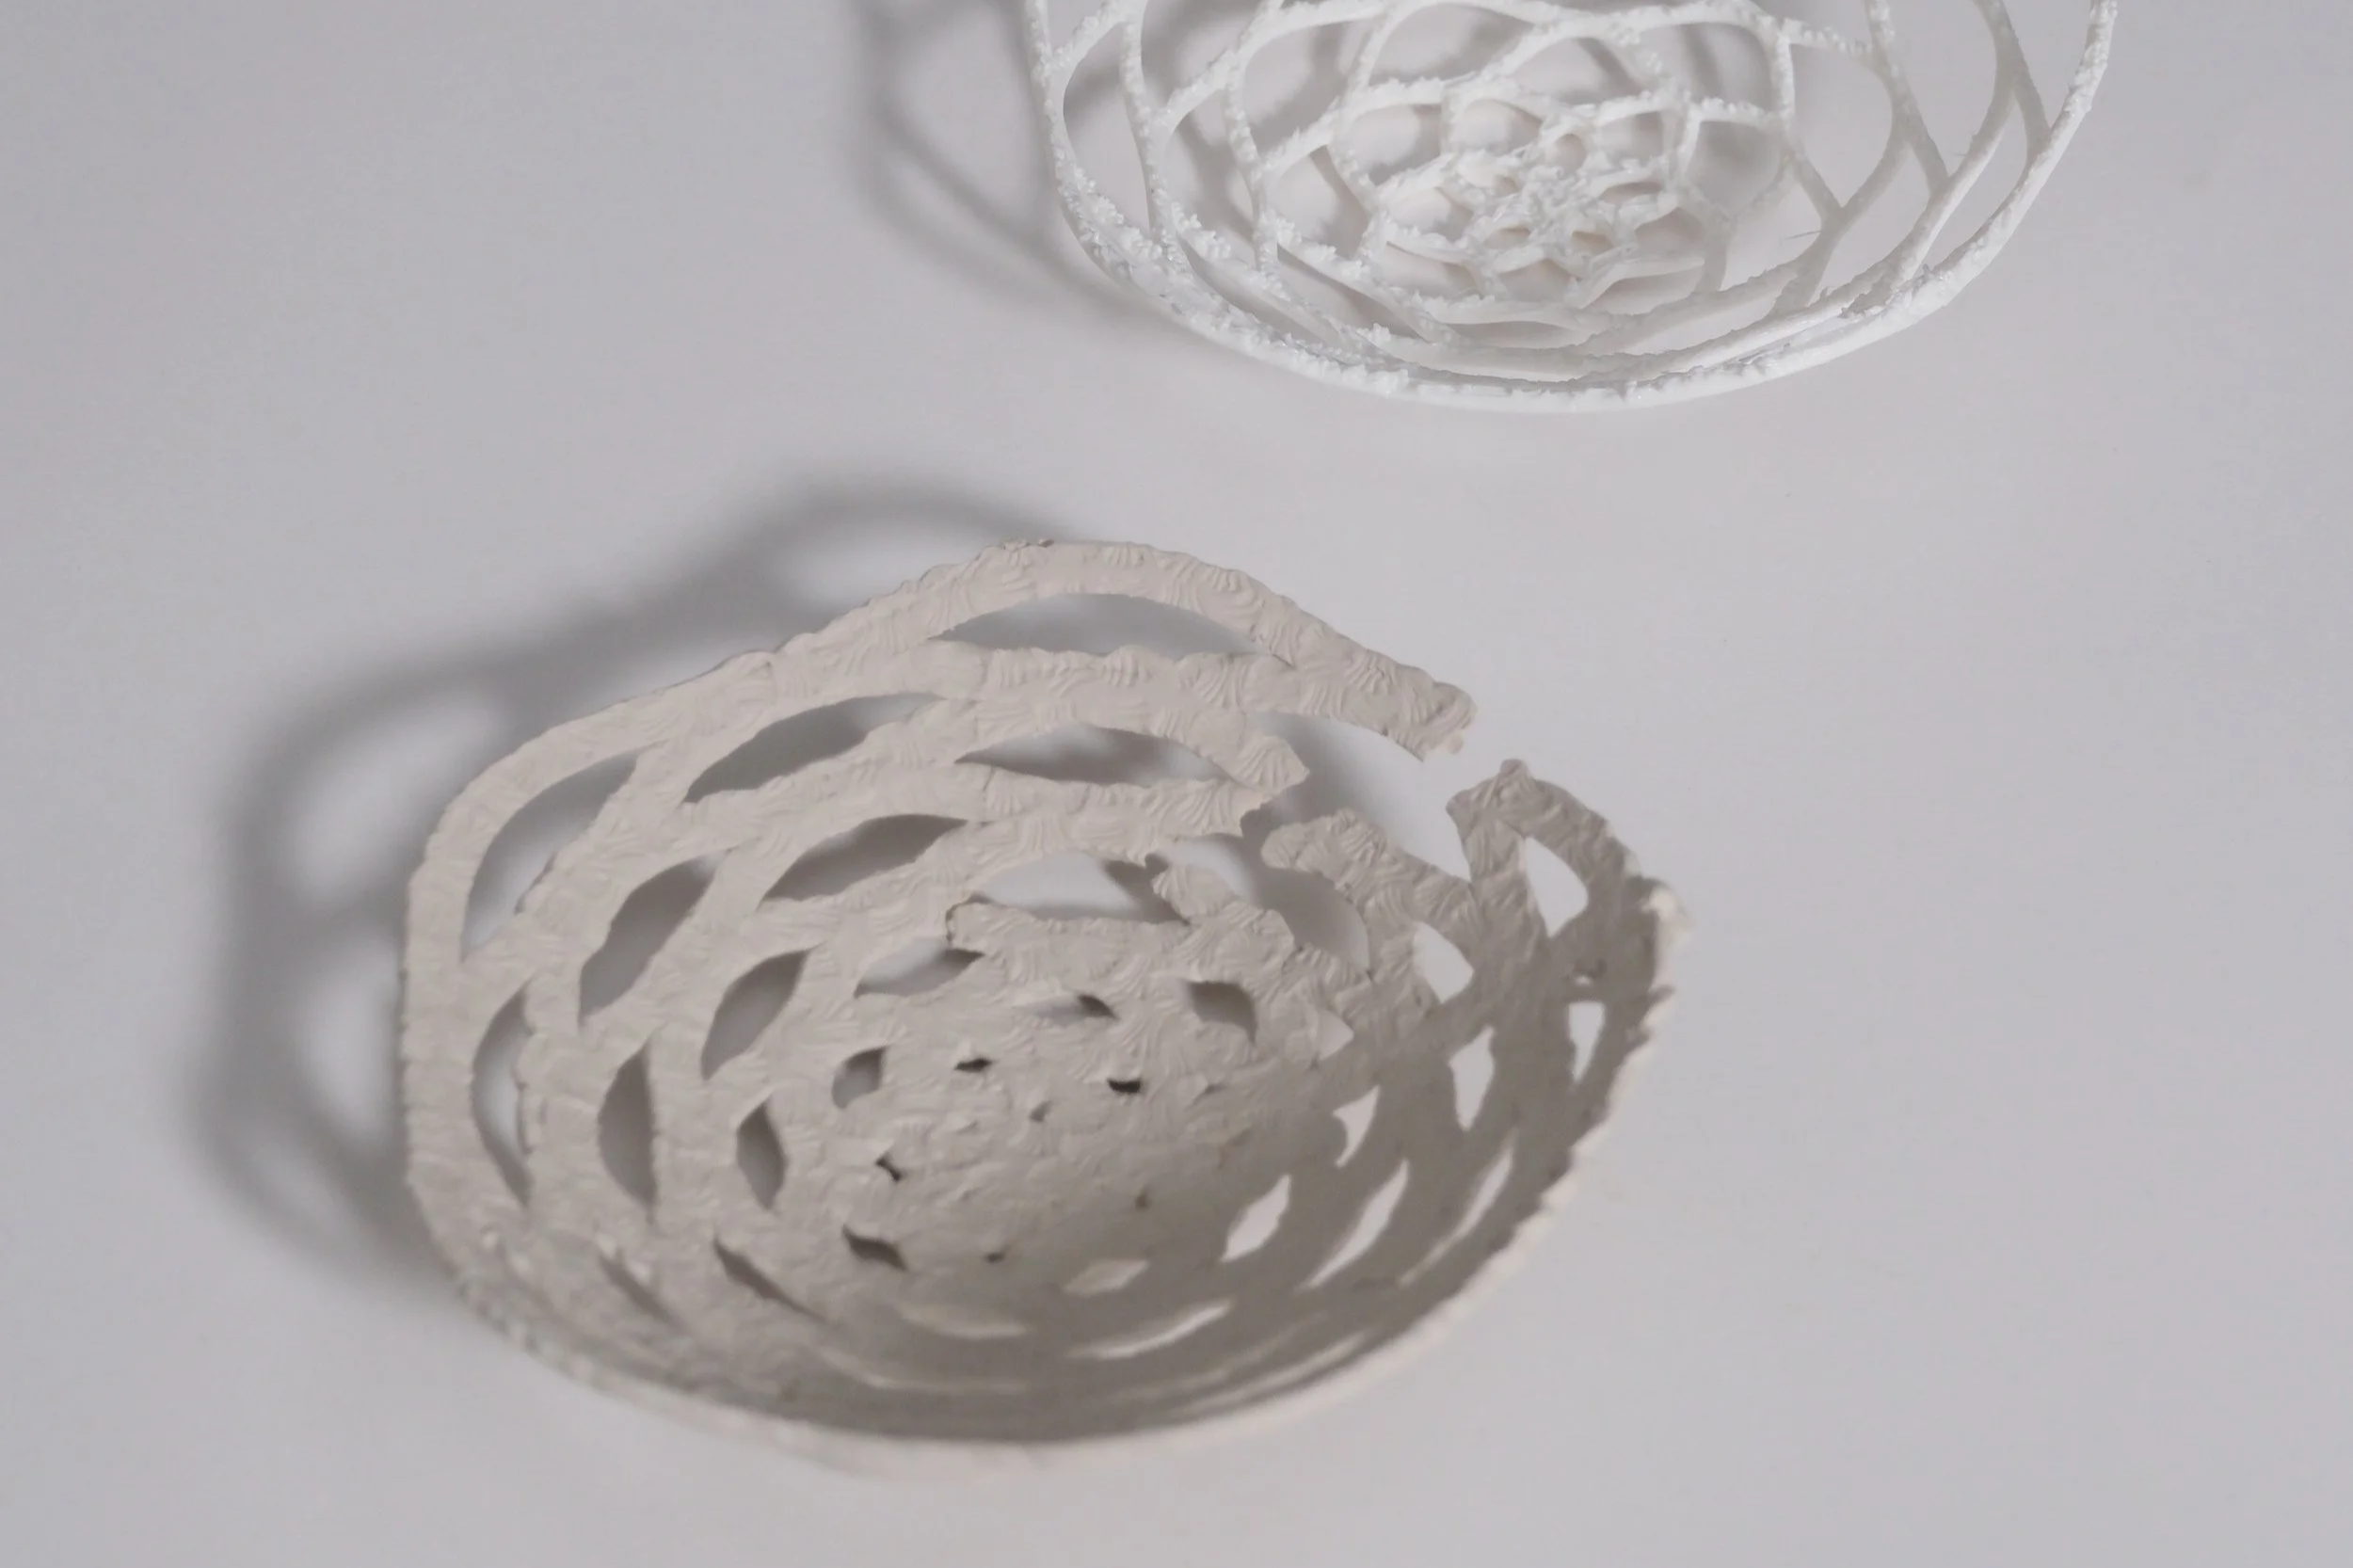
Design 3, Actual (Clay) vs. Ideal (PLA)
Design 3, Actual (Clay) vs. Ideal (PLA)
Design 3, Actual (Clay) vs. Ideal (PLA)
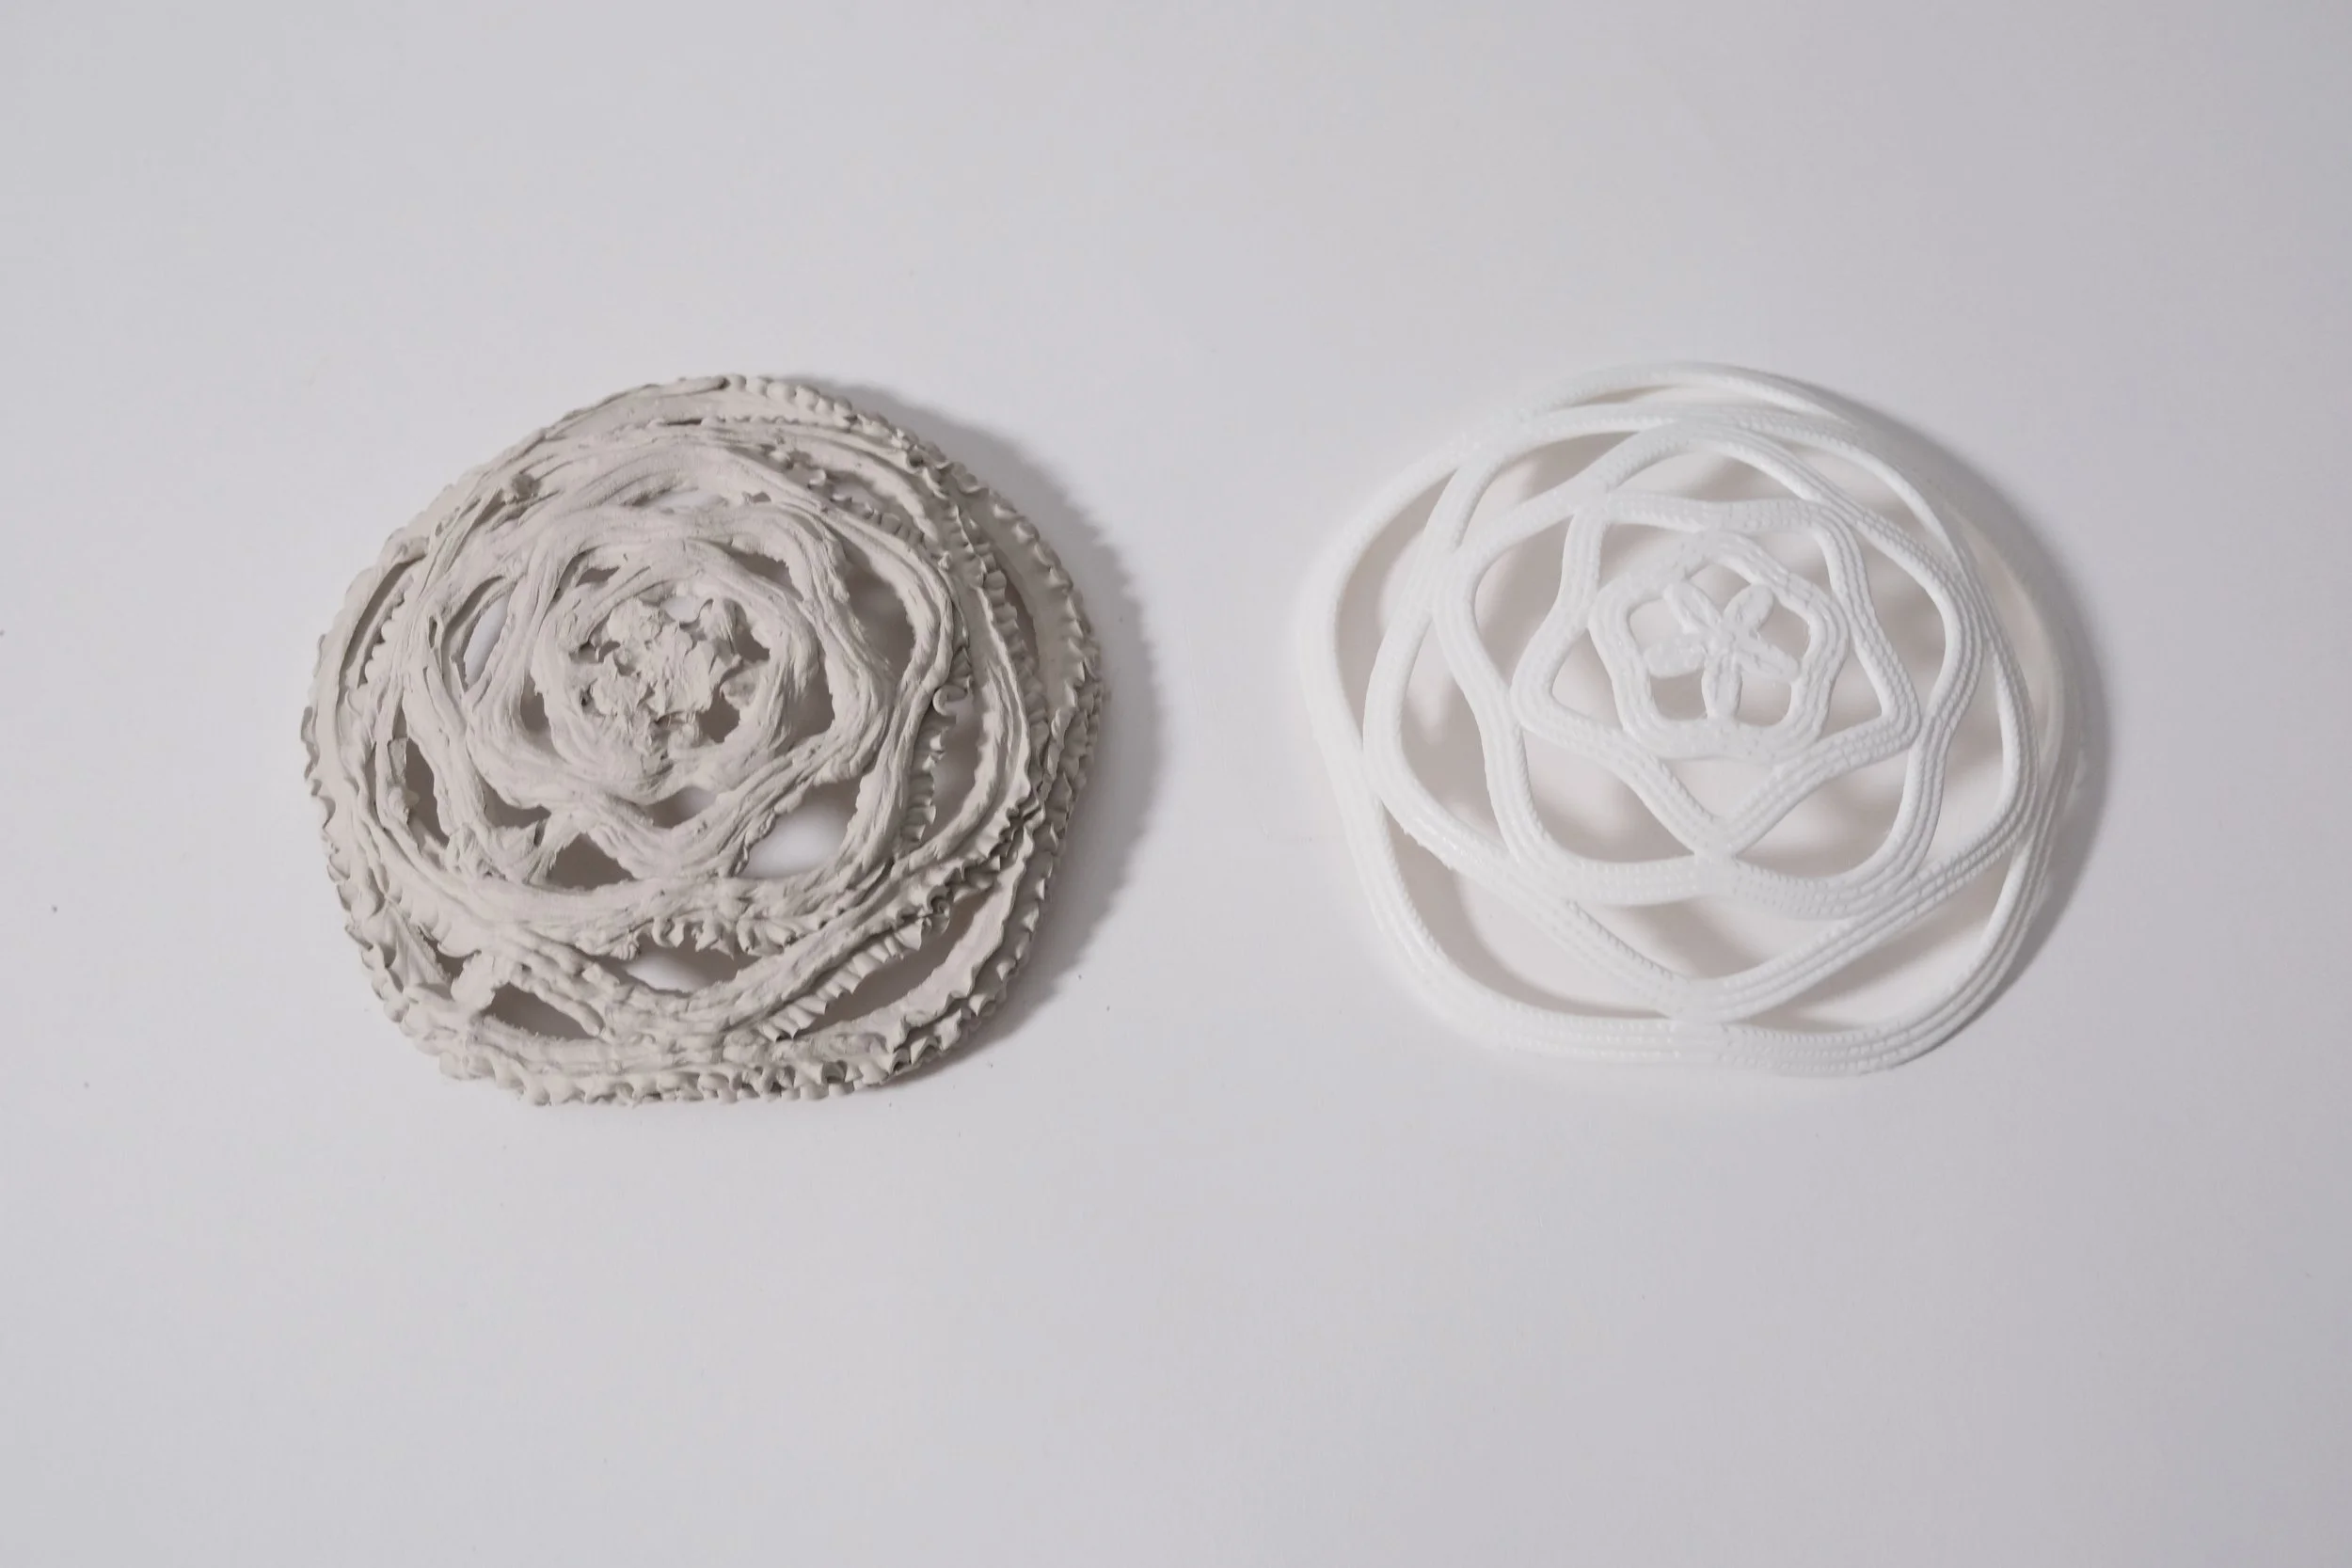
Design 3, Actual (Clay) vs. Ideal (PLA)
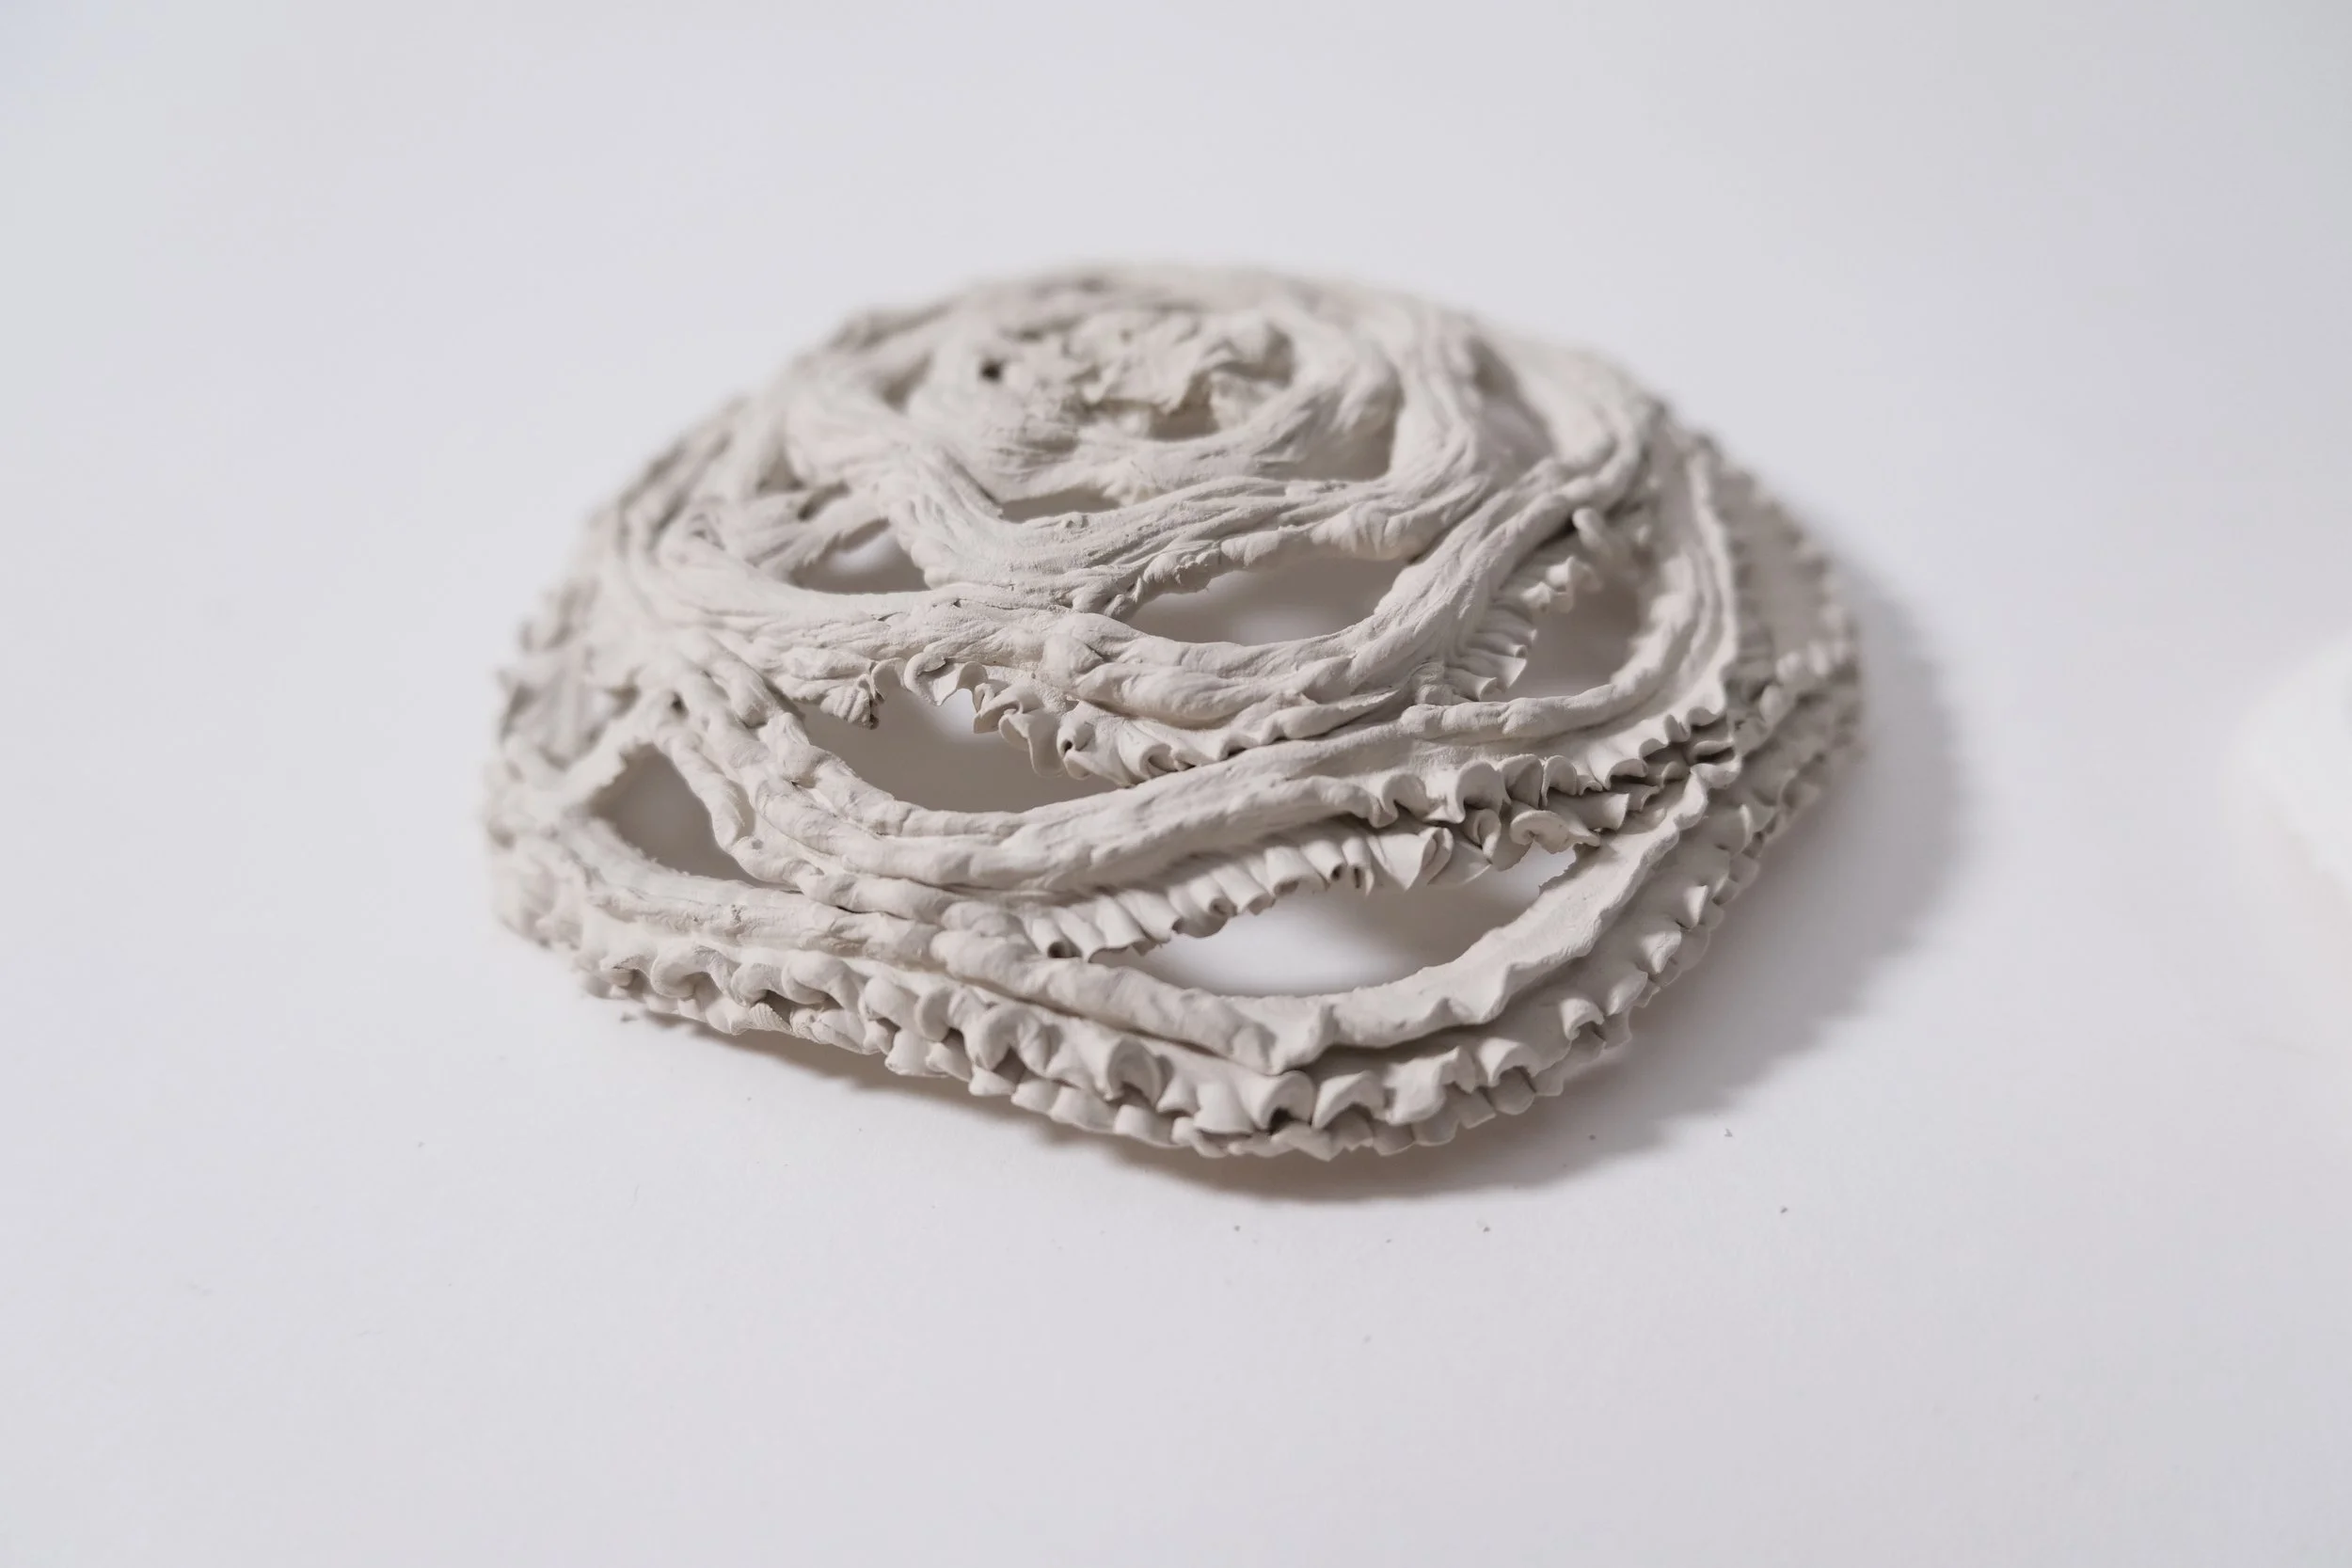
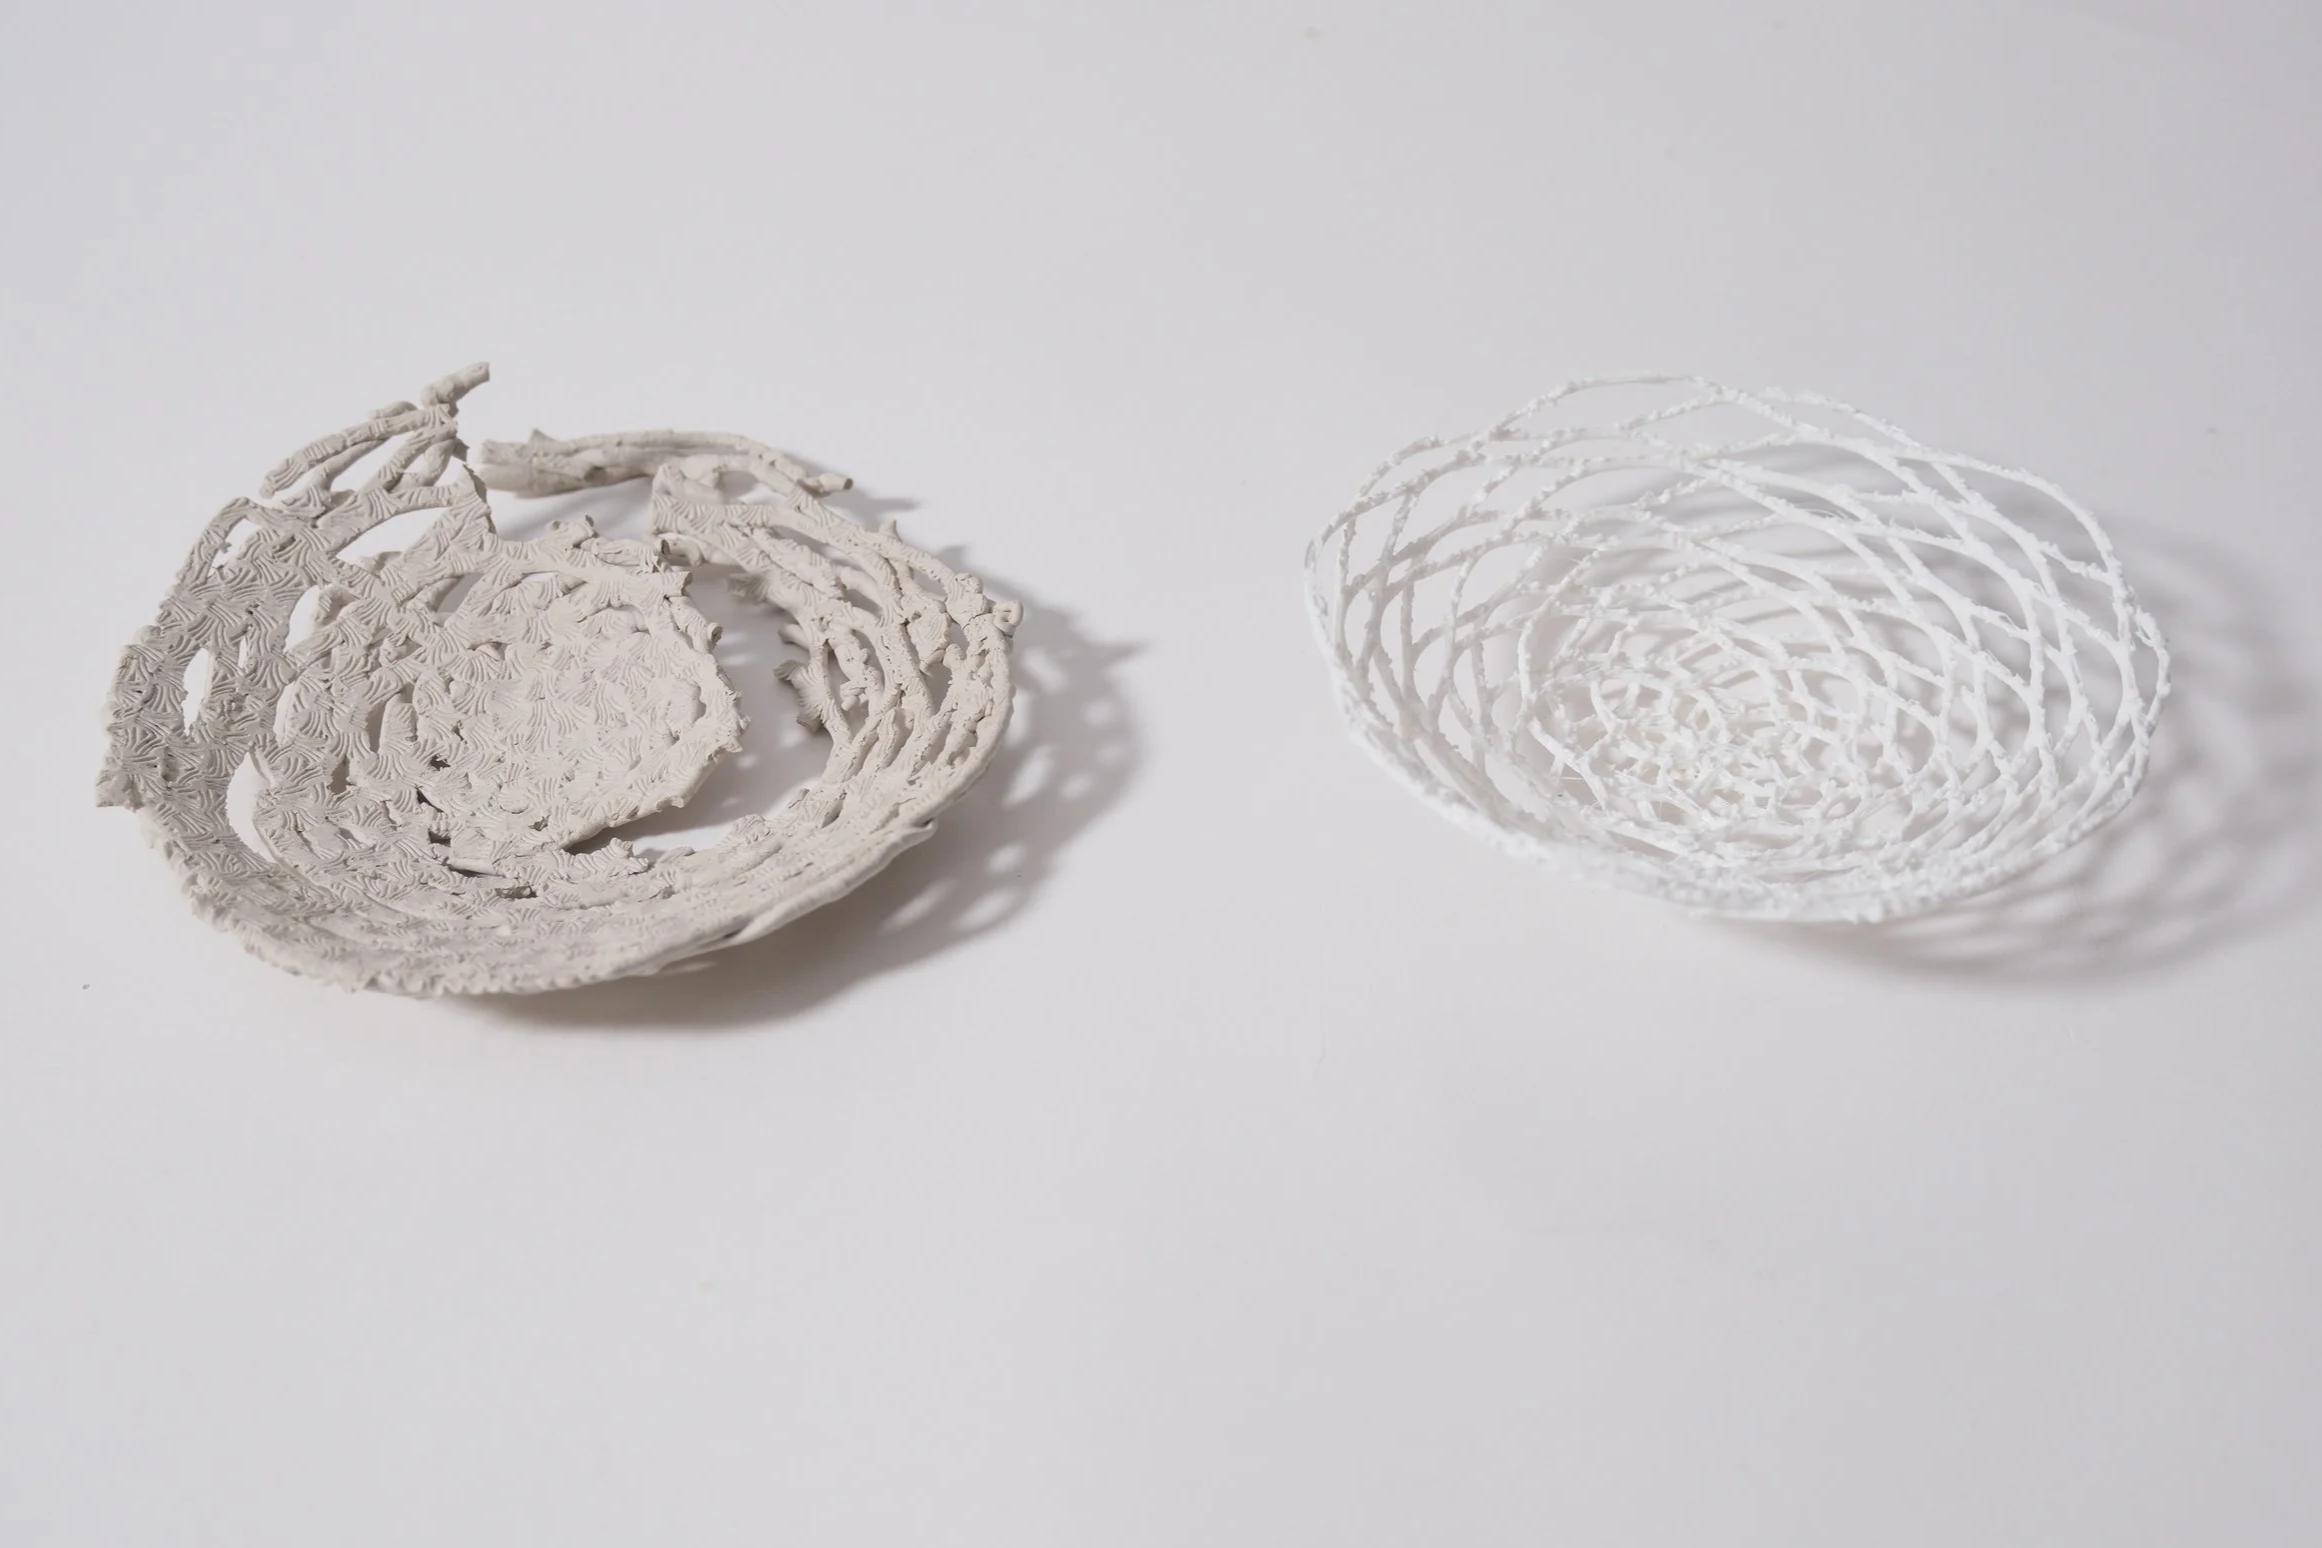
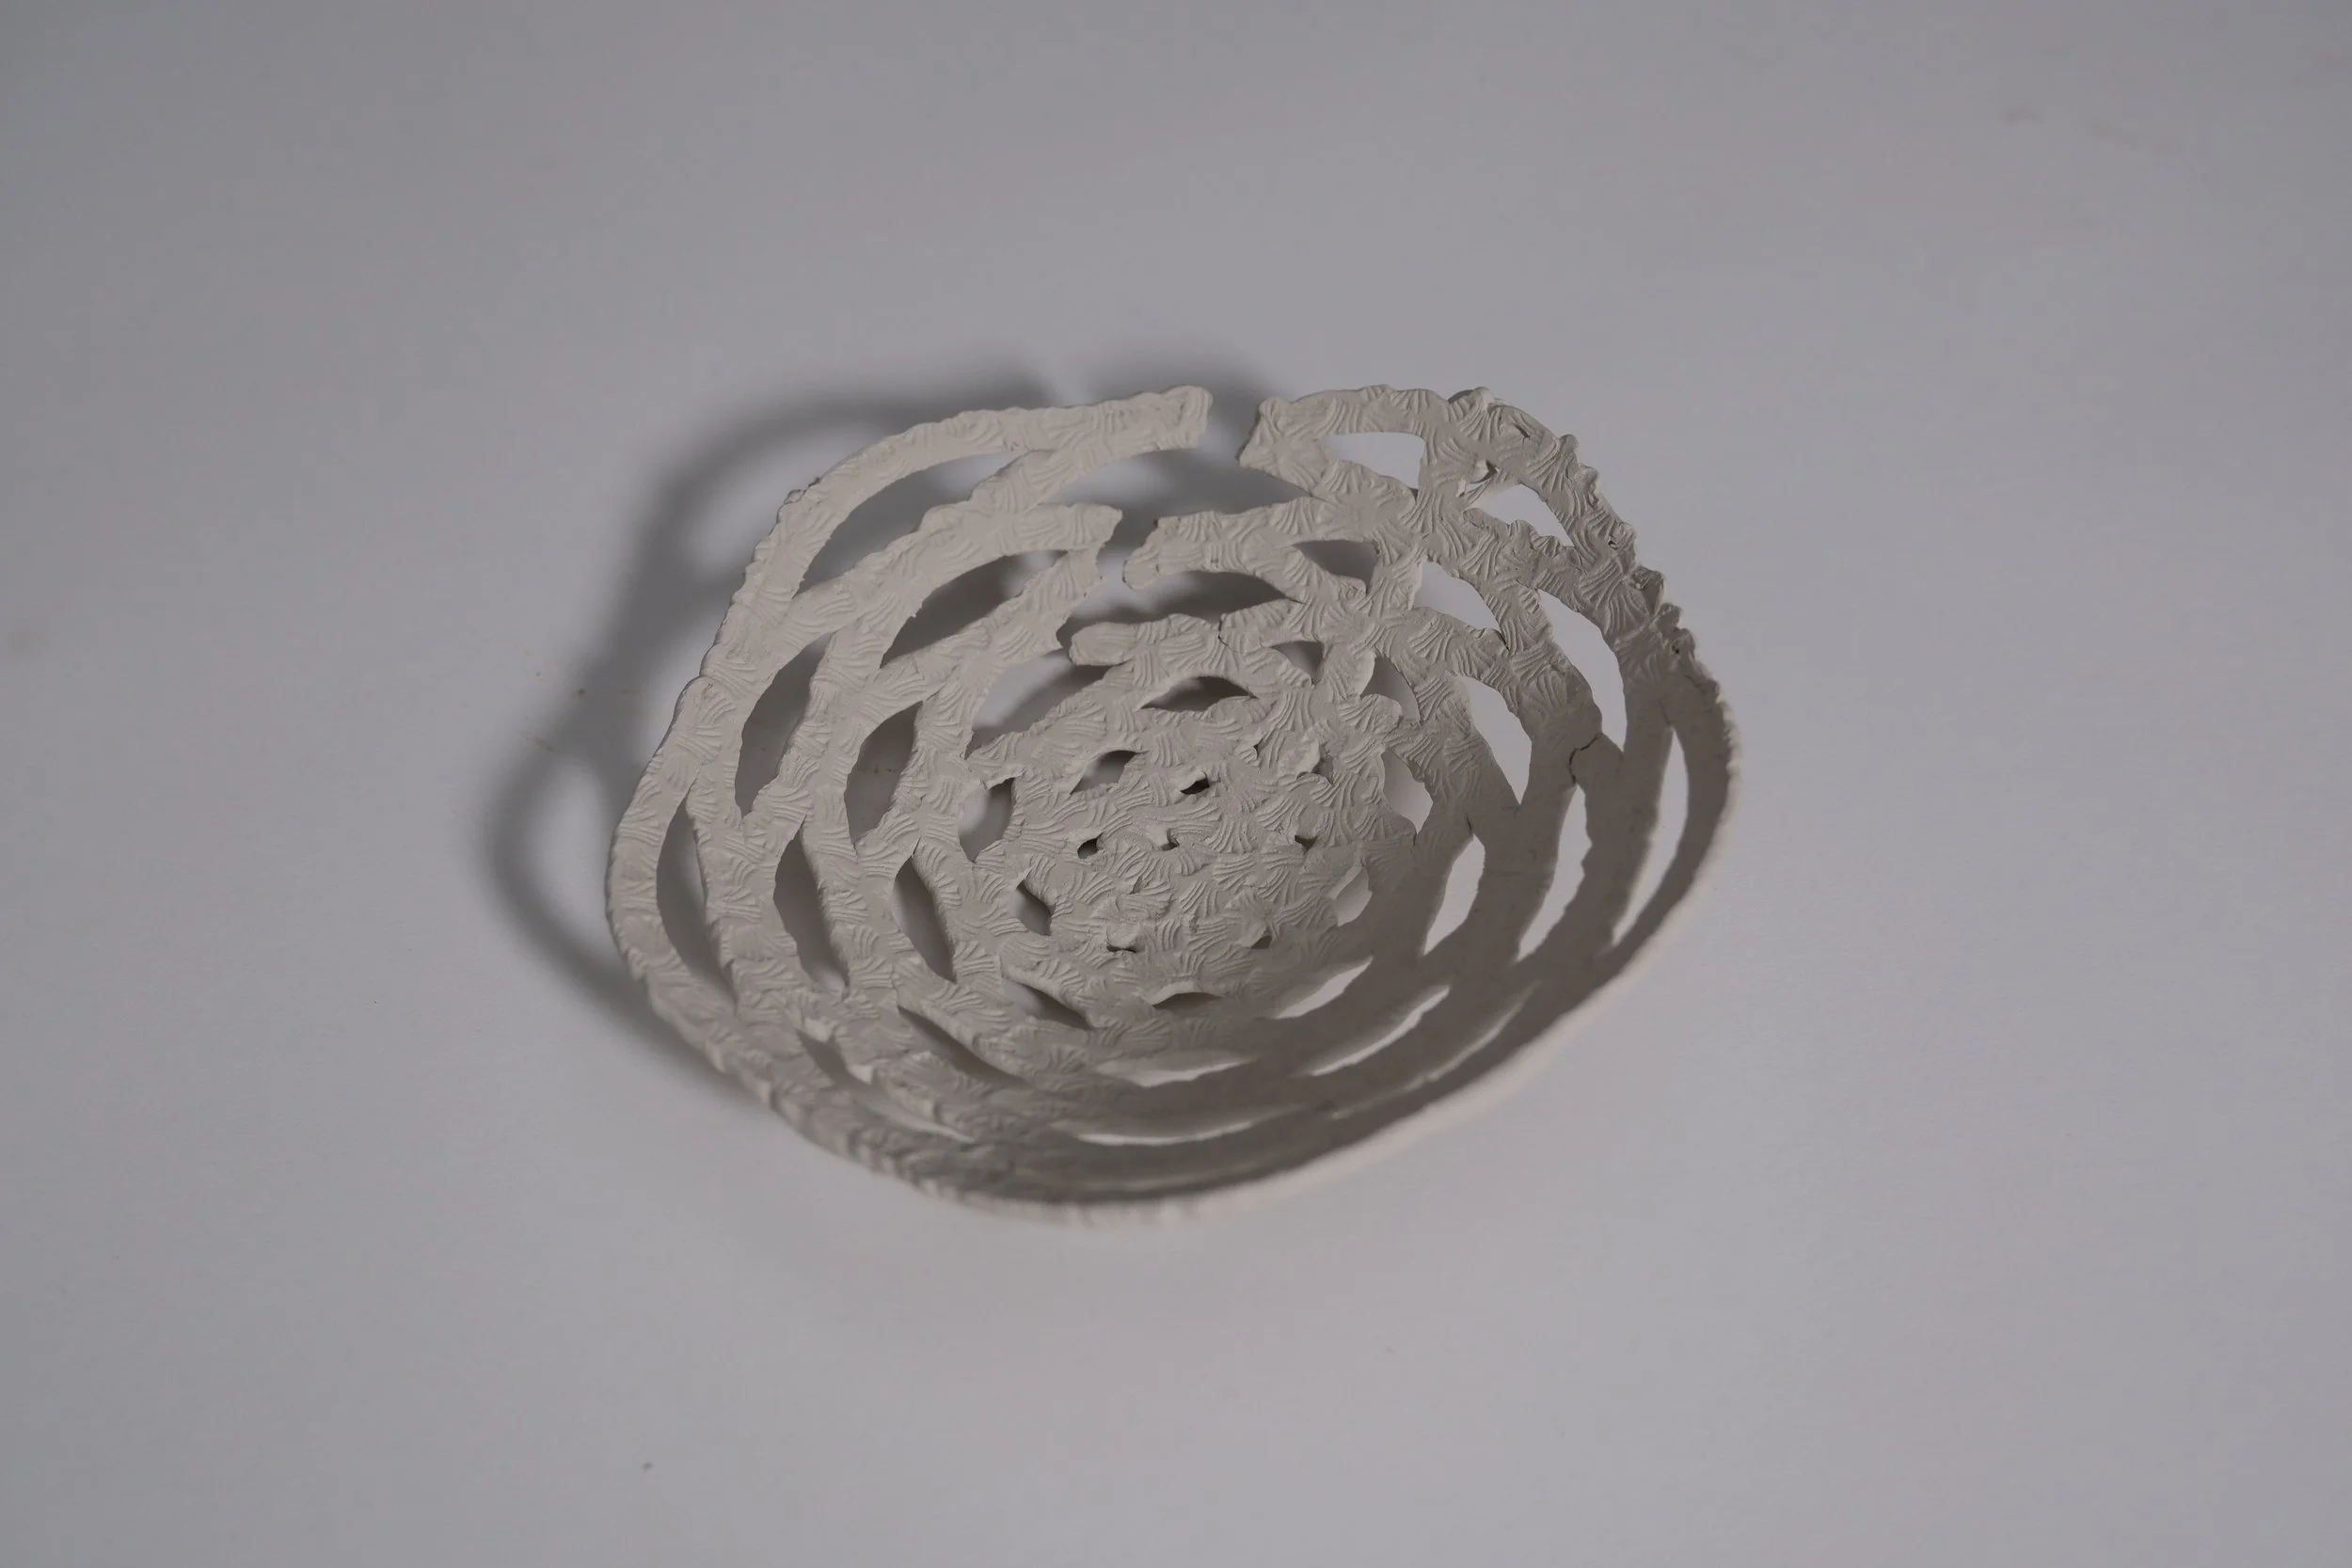
Design 3, Actual (Clay)
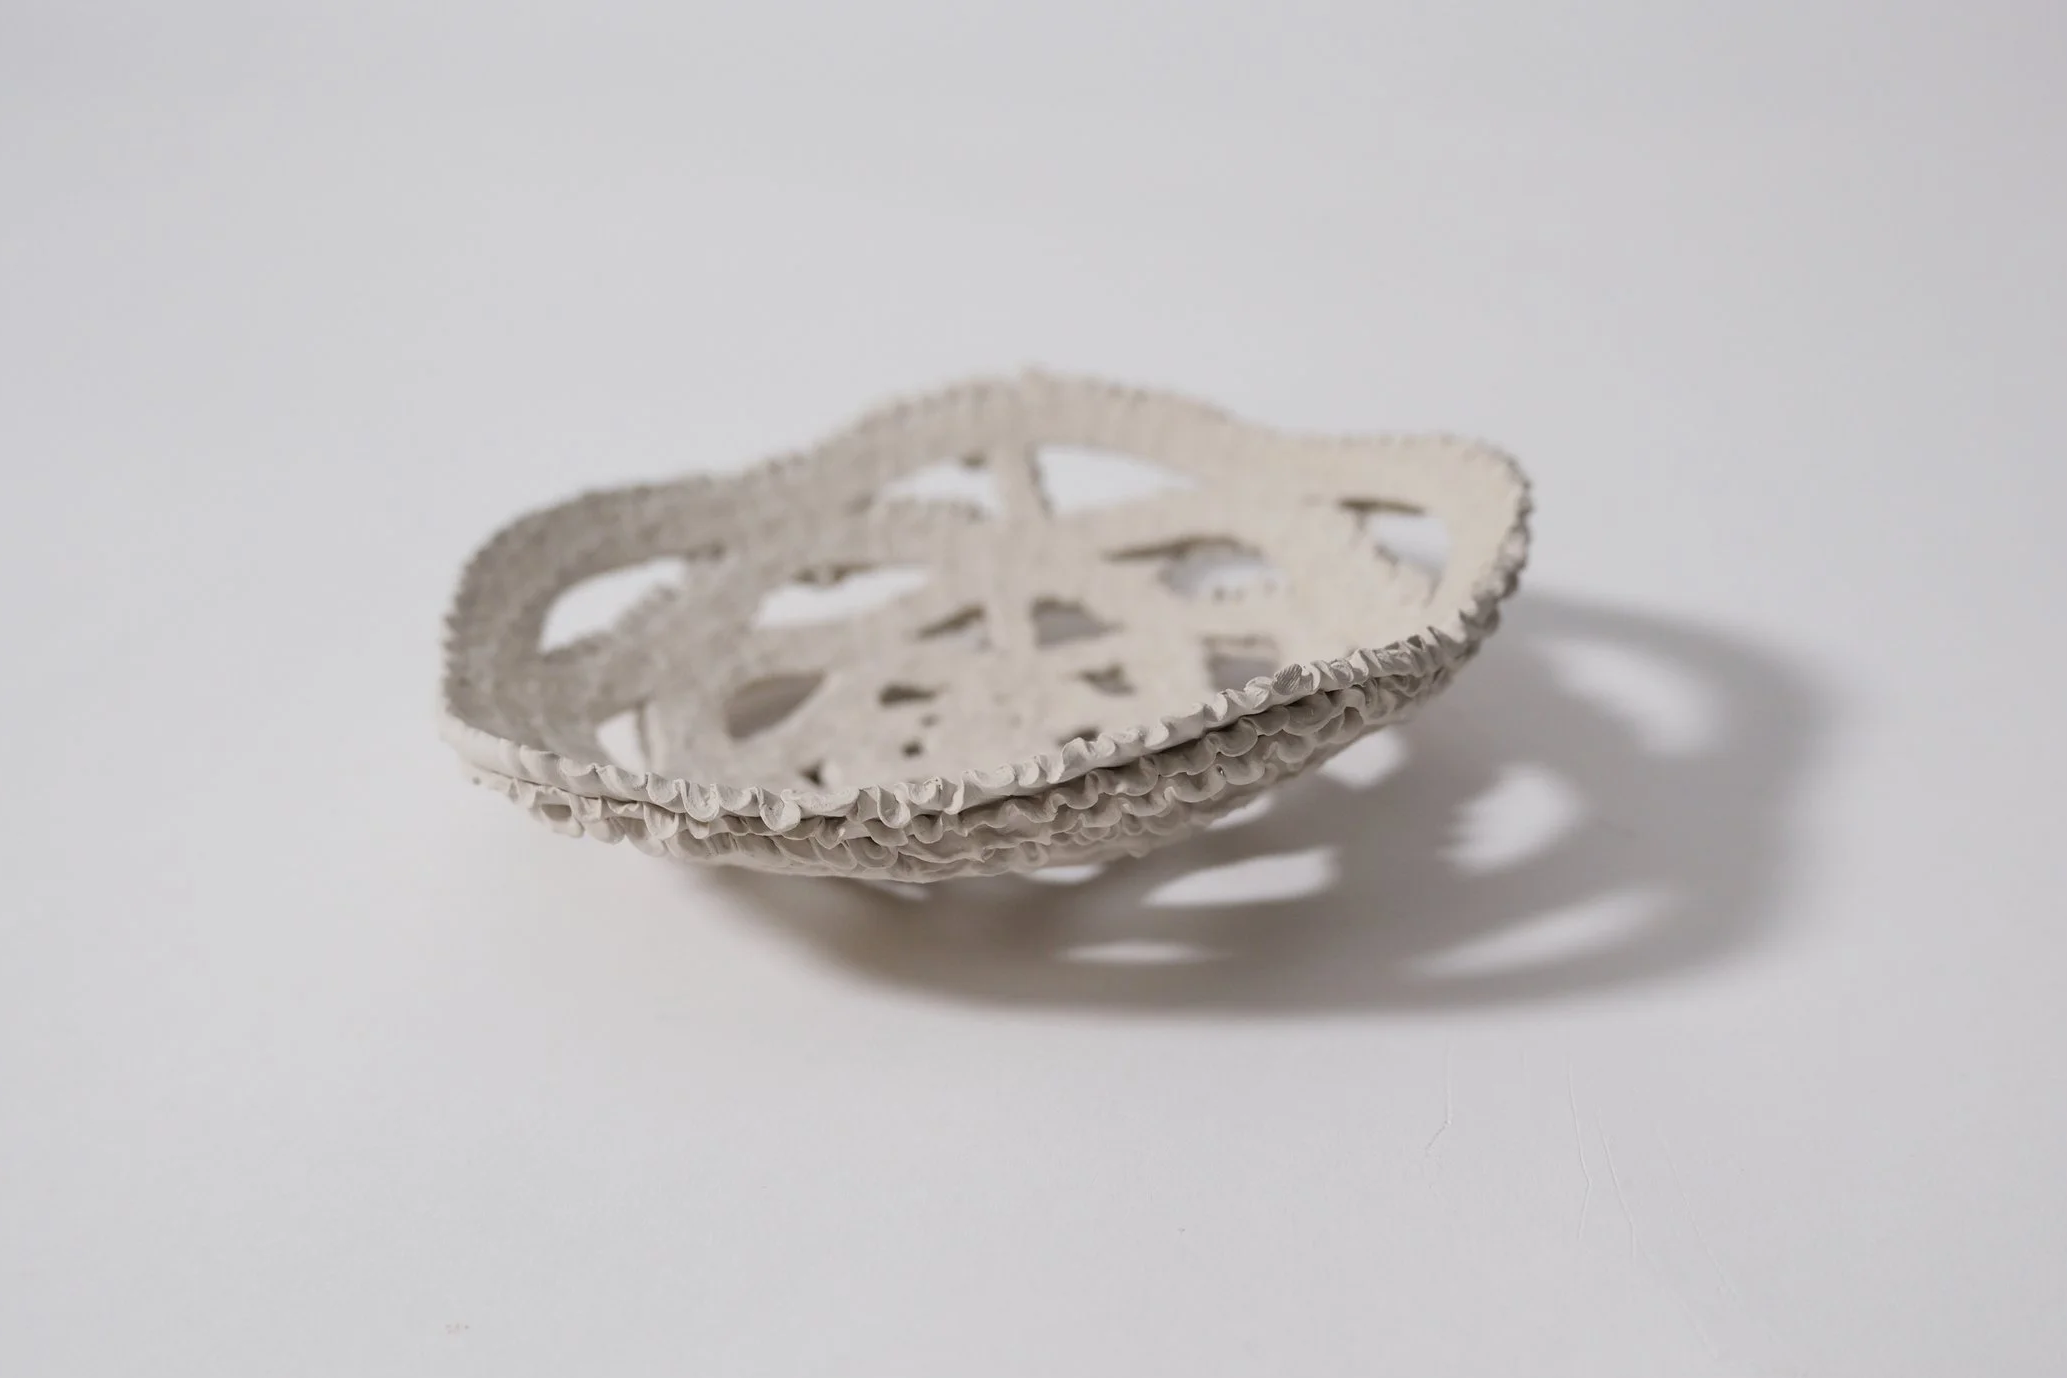
Design 3, Actual (Clay)
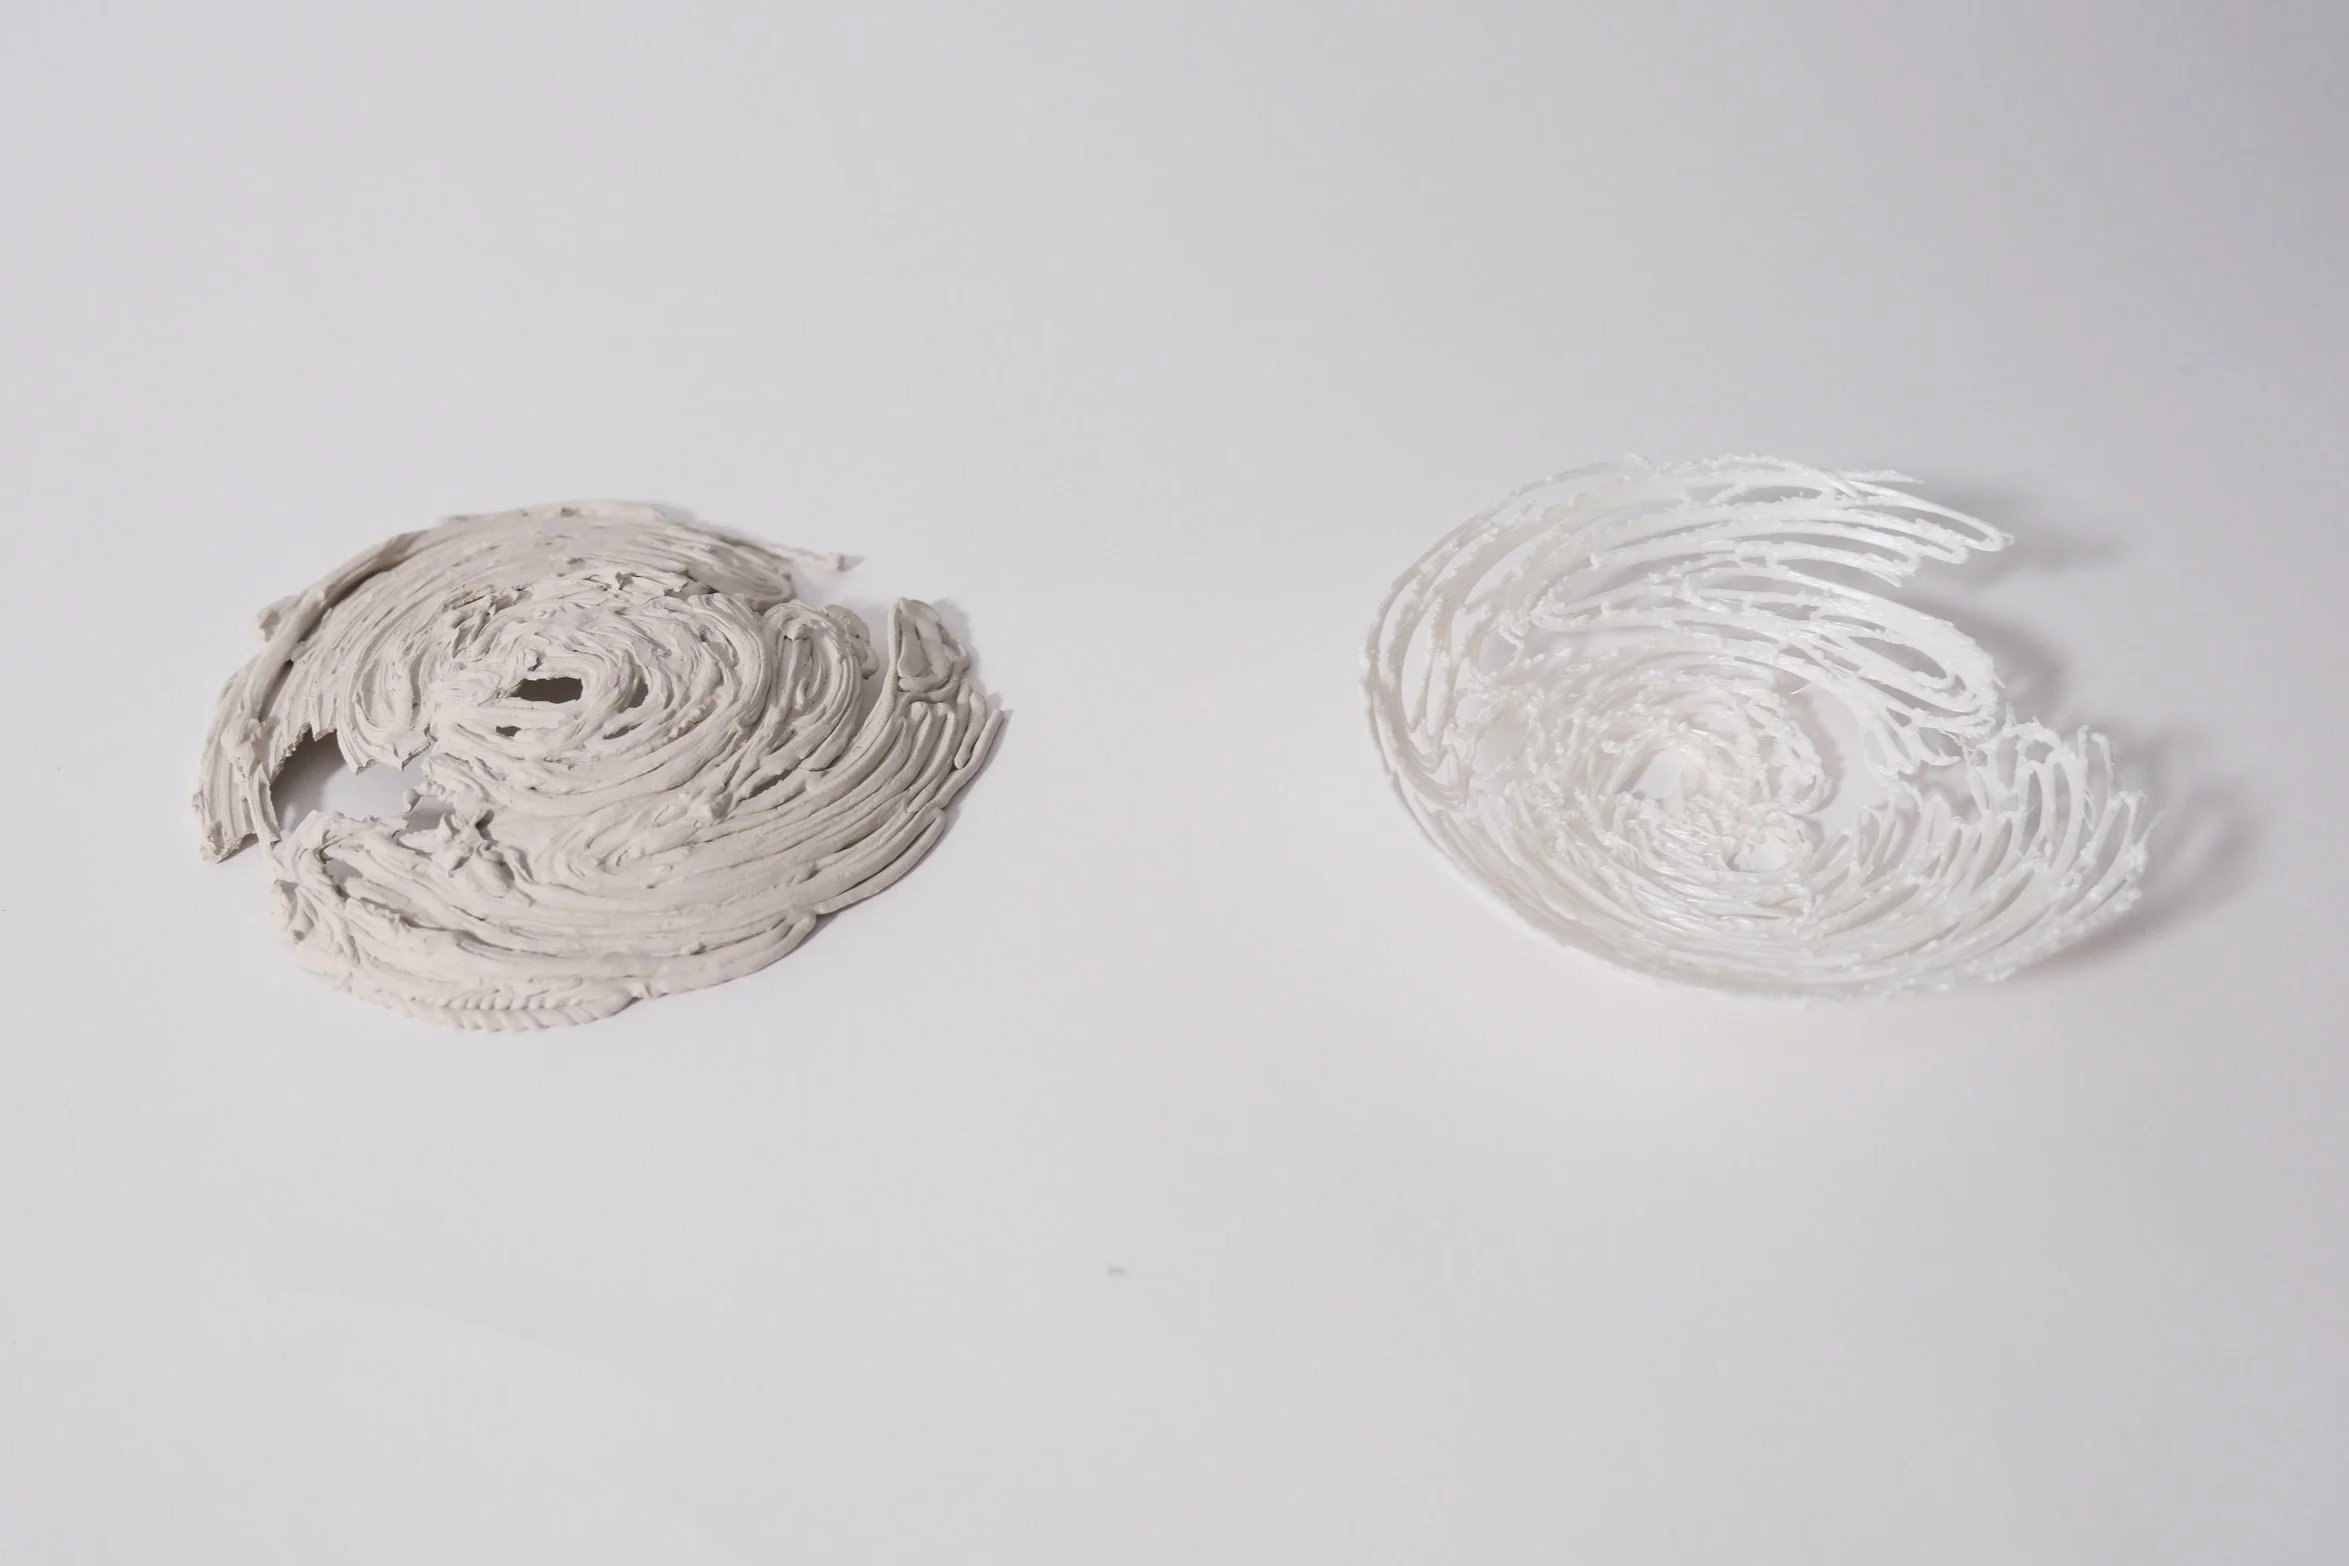
Design 1, Actual (Clay) vs. Ideal (PLA)
Design 2, Actual (Clay) vs. Ideal (PLA)
Design 4, Actual (Clay) vs. Ideal (PLA)
Approach
Discovery
Reviewed precedents in robotic clay printing and traditionally hand-crafted ceramics
Identified gaps around non-planar fabrication and soft material constraints
Define
Defined project scope around experimentation with inflatable, spherical molds and clay deposition
Outlined initial robotic fabrication workflow based on initial clay and robotic experimentation (clay consistency, extrusion parameters, etc.)
Develop & Iterate
Tested variations in design, extrusion speed, and clay consistency
Refined toolpaths in Rhino and deposition sequences to improve stability and integrity of designs
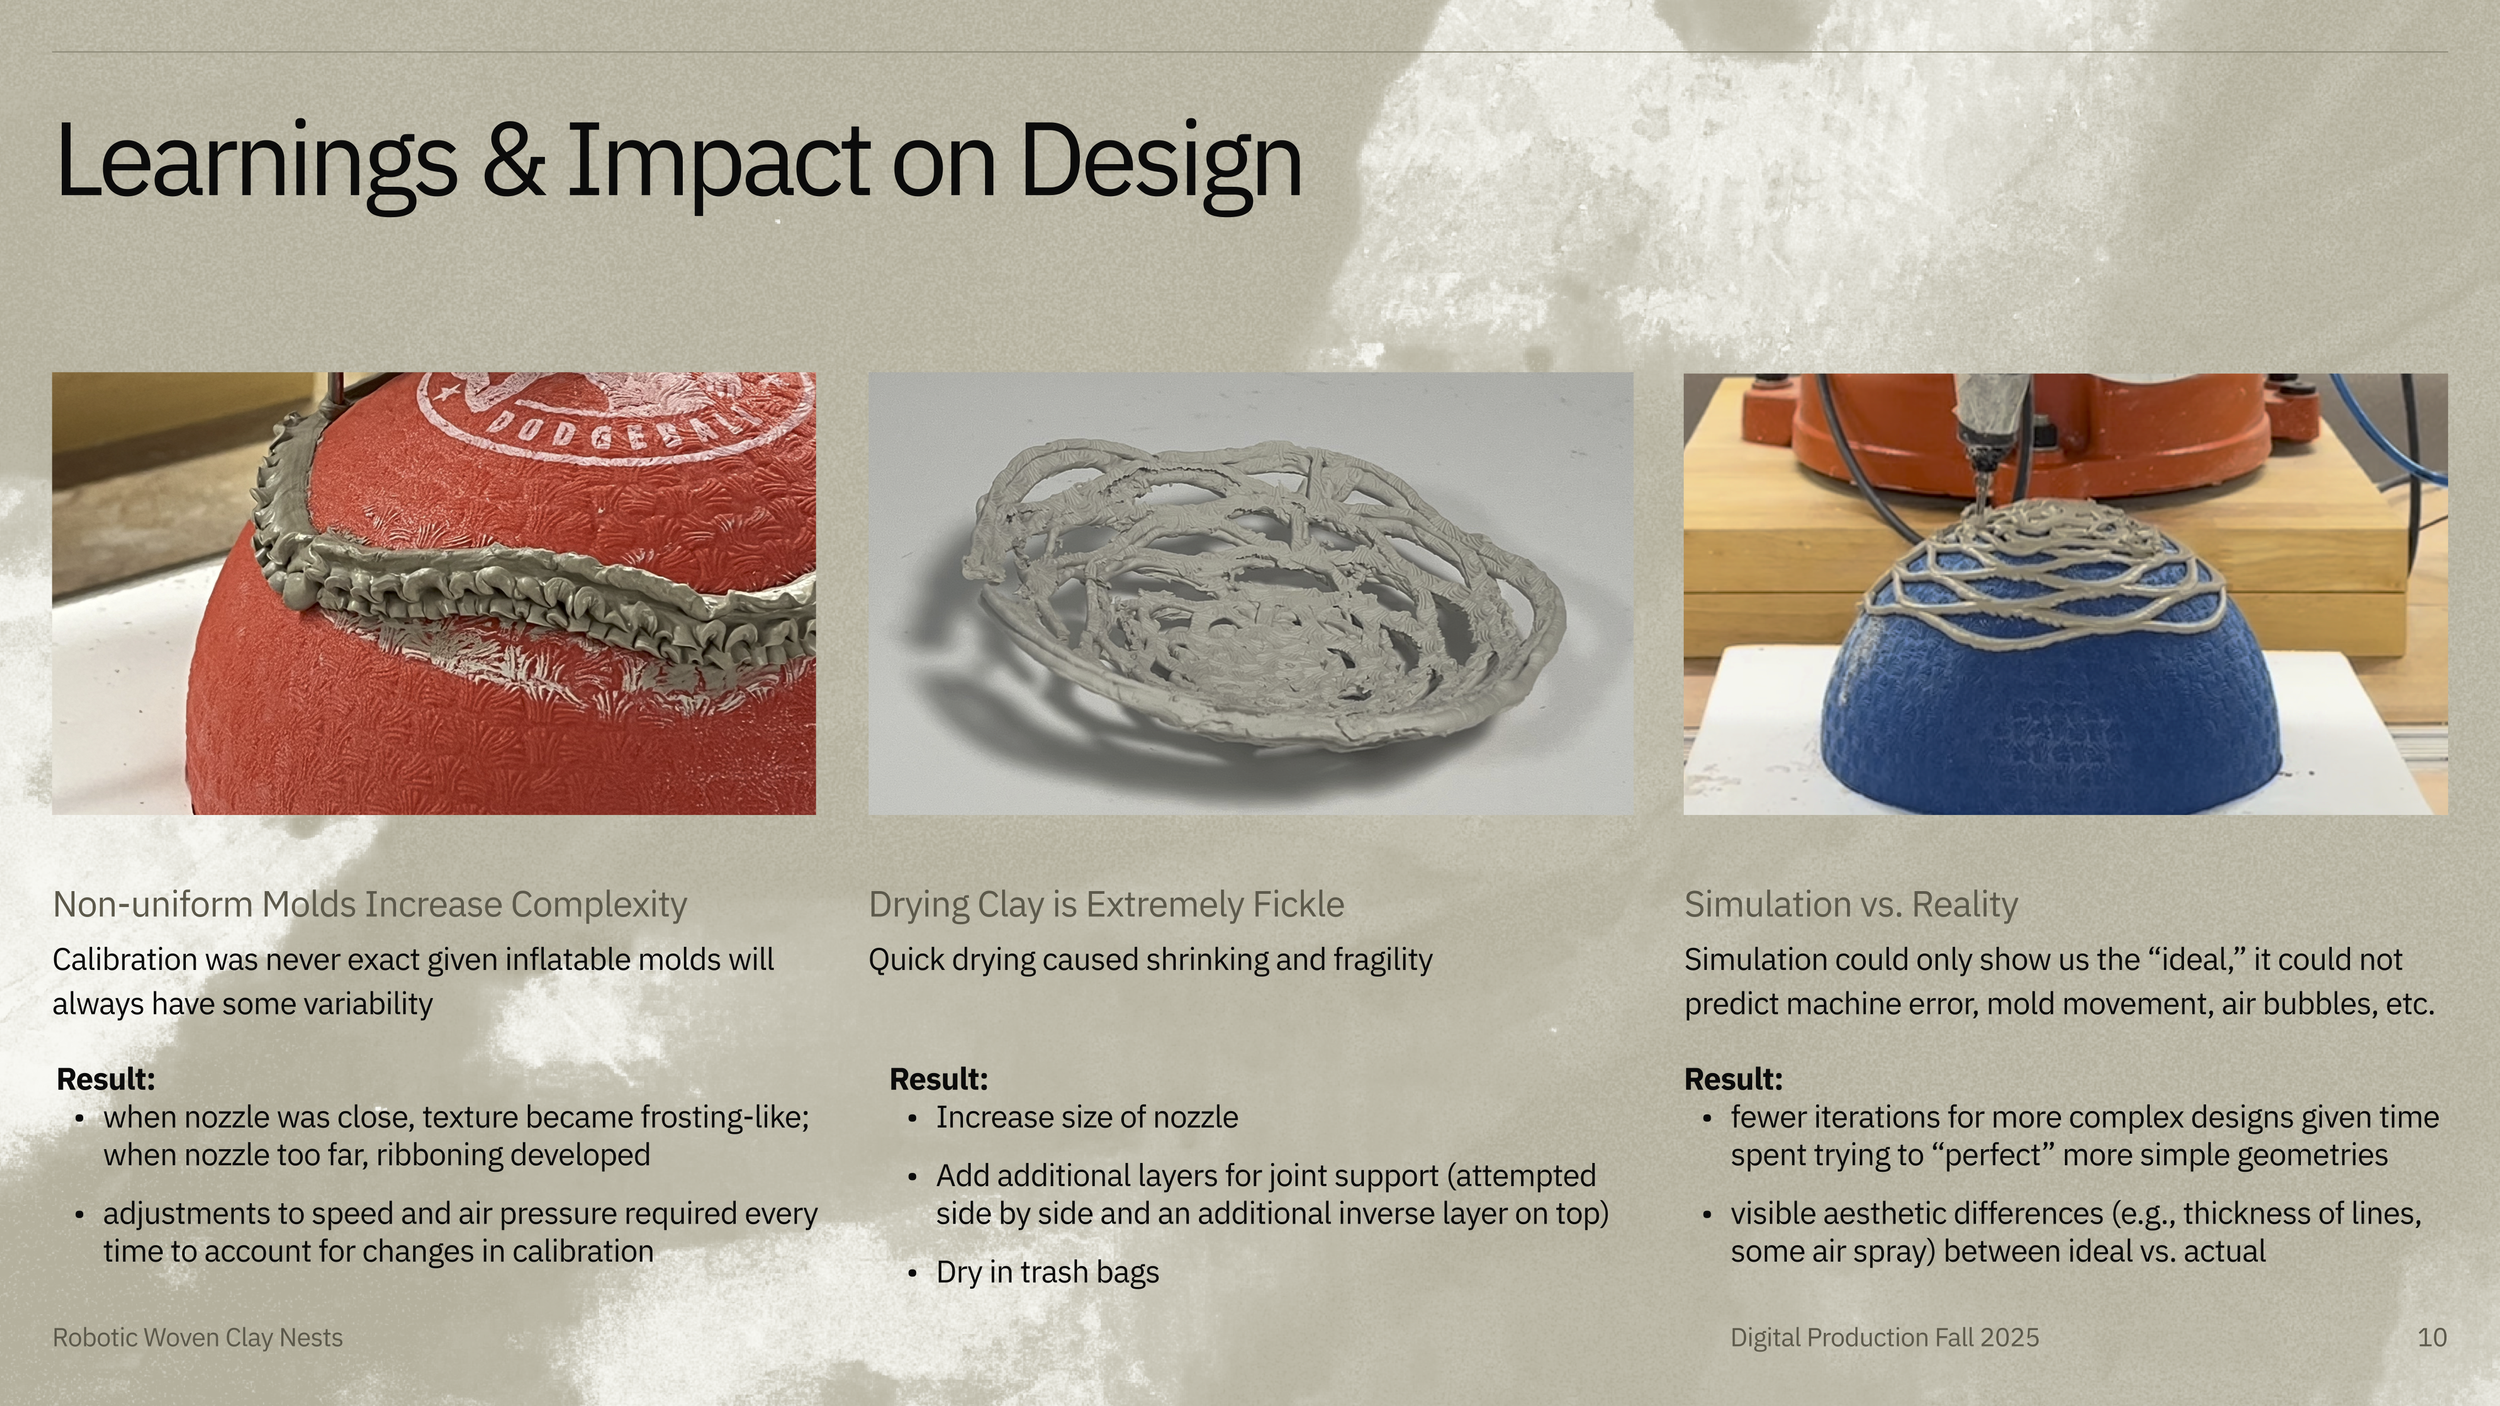
Iterated on the initial fabrication process and unanticipated variability (mold variability, clay consistency, air bubbles) revealed the need for more testing and calibration within workflow
Delivery
Fabricated four distinct clay forms using robotic extrusion on
Document results to compare optimal design
Discovery
Woven Clay (source)
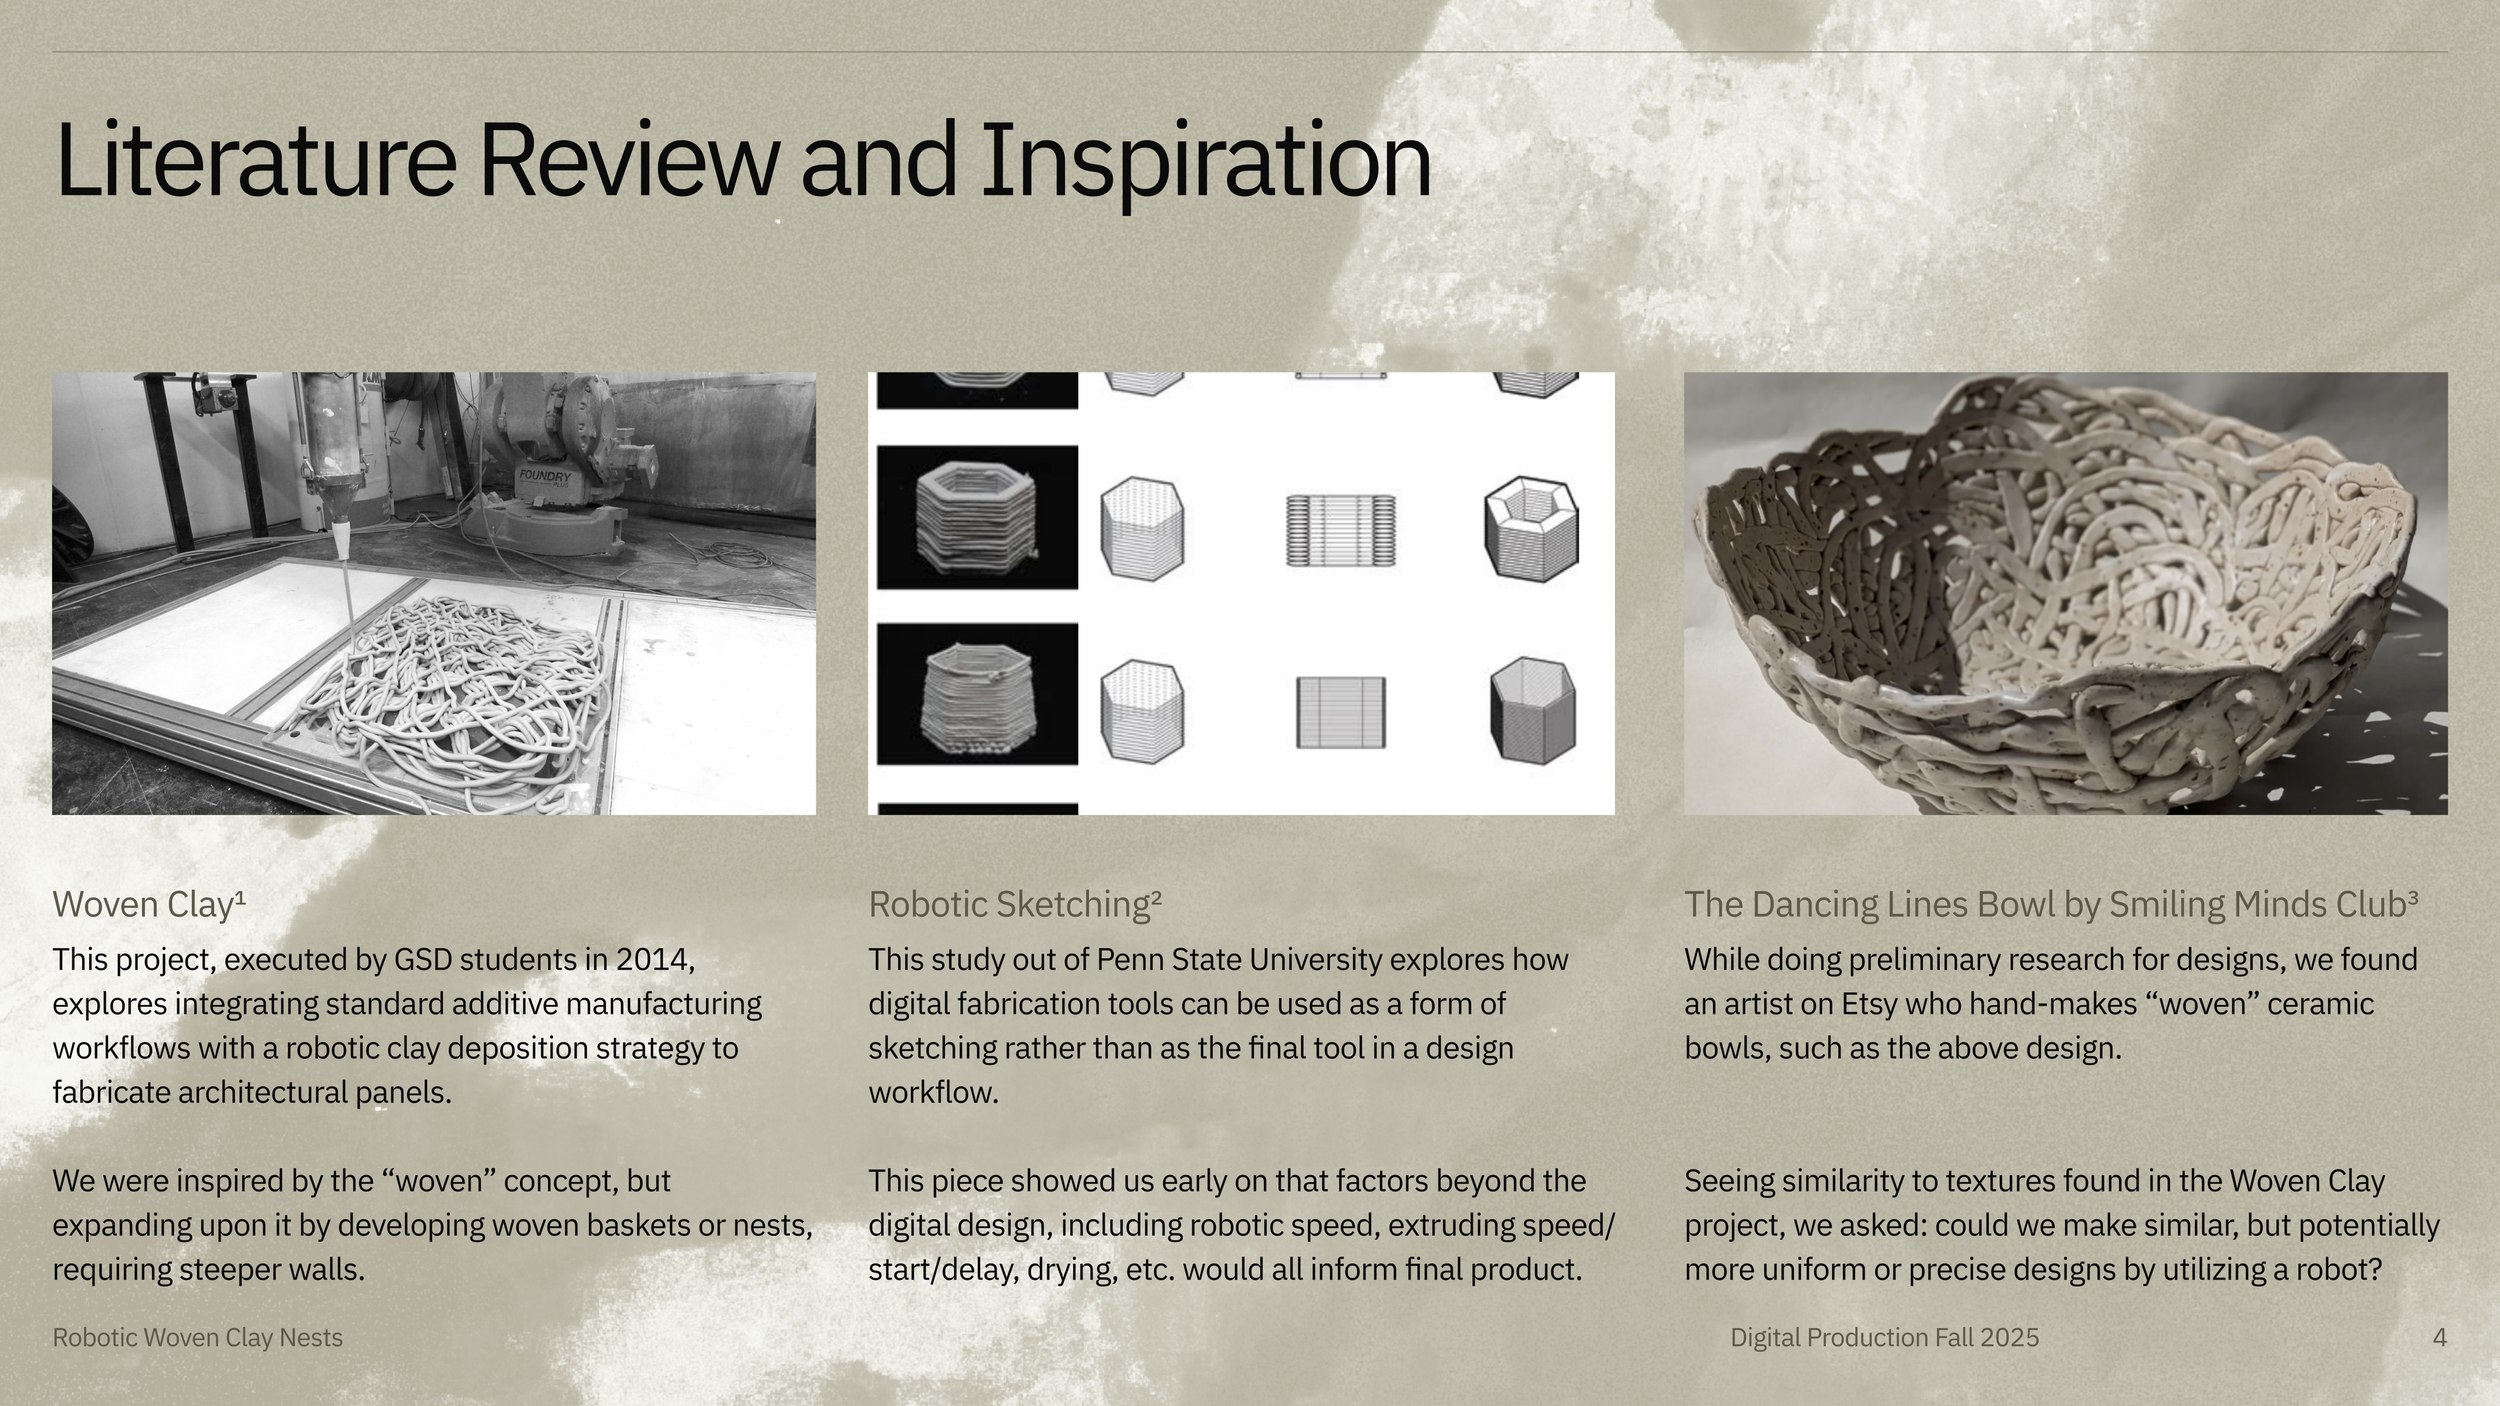
This project, executed by GSD students in 2014, explores integrating standard additive manufacturing workflows with a robotic clay deposition strategy to fabricate architectural panels.
We were inspired by the “woven” concept. Could we expand on it to develop woven baskets or nests, requiring steeper walls?
Literature Review & Inspiration
Robotic Sketching (source)
This study out of Penn State University explores how digital fabrication tools can be used as a form of sketching rather than as the final tool in a design workflow.
This piece showed us early on that factors beyond the digital design, including robotic speed, extruding speed/start/delay, drying, etc. would all inform final product.
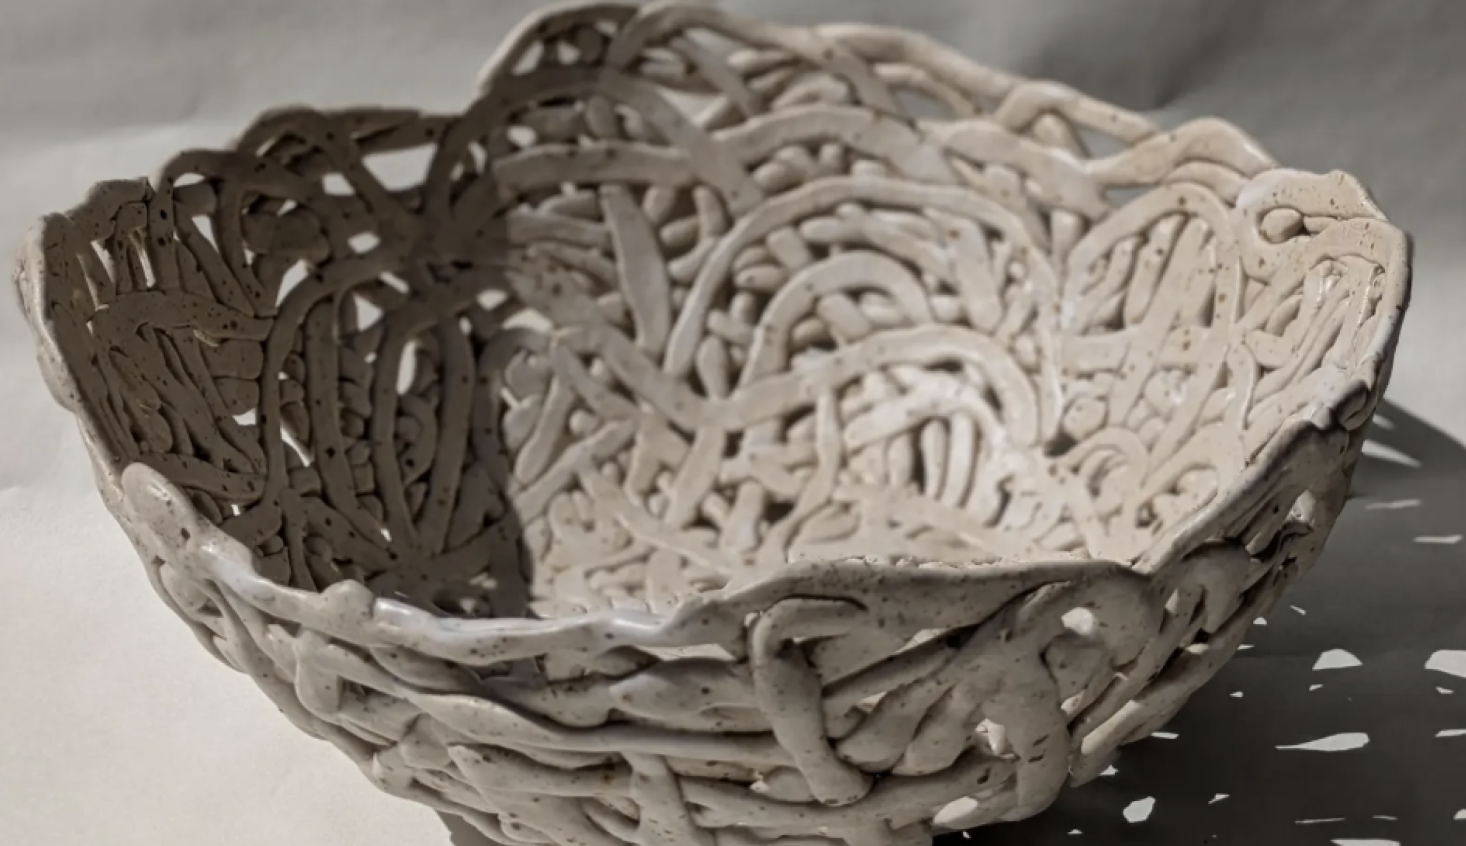
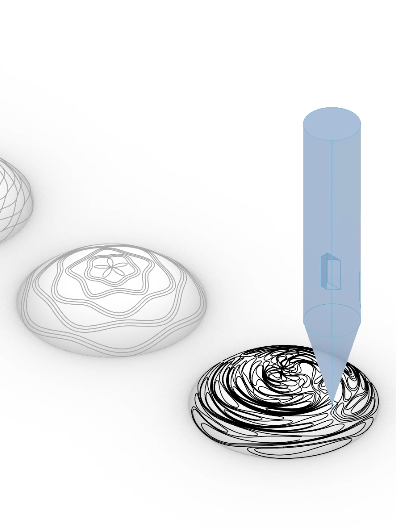
The Dancing Lines Bowl by Smiling Minds Club from Etsy (source)
While doing preliminary research for designs, we found an artist on Etsy who hand-makes “woven” ceramic bowls, such as the above design.
Seeing similarity to textures found in the Woven Clay project, we asked: could we make similar, but potentially more uniform or precise designs by utilizing a robot?
Define
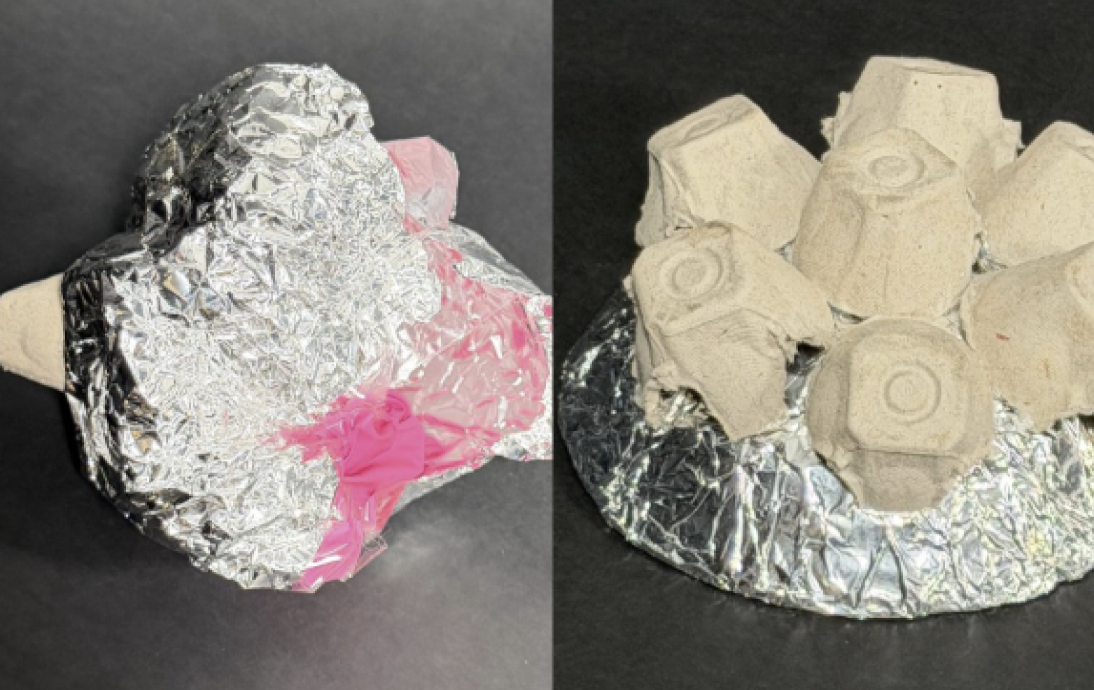
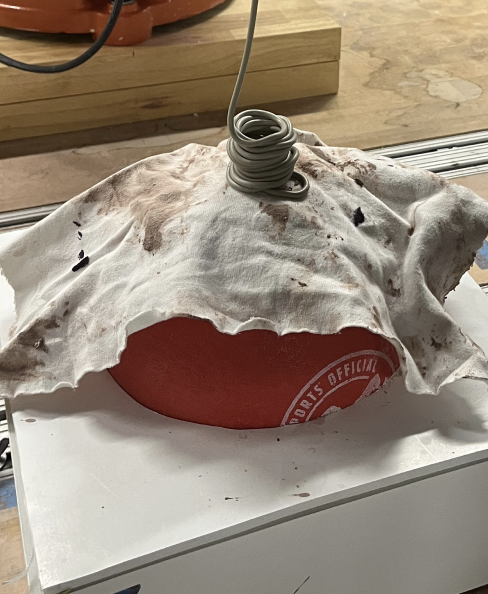
Early Prototyping with Balloons
Based on early research about clay shrinking, we proposed using balloons as the foundation of our textured molds so that we could deflate or cut them out to avoid the hurdle of undercuts after drying.
Given a balloon’s variability in shape, slippery surface, and fragile nature, we opted for a dodgeball instead.
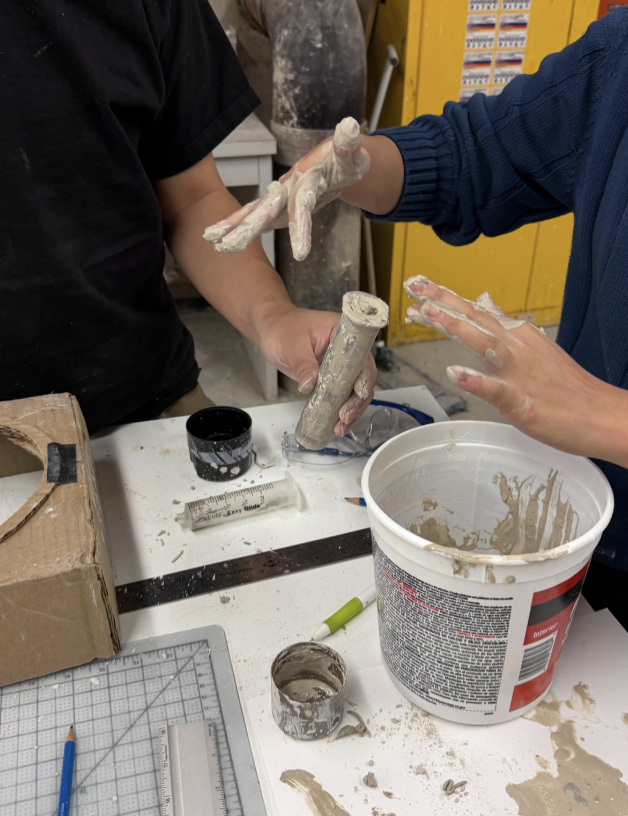
Understanding Clay Best Practices
With consultation from our professor Daniel Tish and advice from Nathan King, another GSD Professor and ceramics expert, we began our initial attempts at clay printing, first manual and then utilizing the robot (2D).
Early attempts included experimenting with clay consistency and discovering that minimizing distance between nozzle and ball would be critical to success.
Learning Basic Robot Programming
It is important to note that a light painting exercise (developing a toolpath for the robotic arm with an attached light to follow) was two out of three of our team members’ first experience with robotics.
This showed us how we could use Grasshopper to follow our toolpath from Rhino and then simulate it in RobotStudio prior to getting on the physical robot.
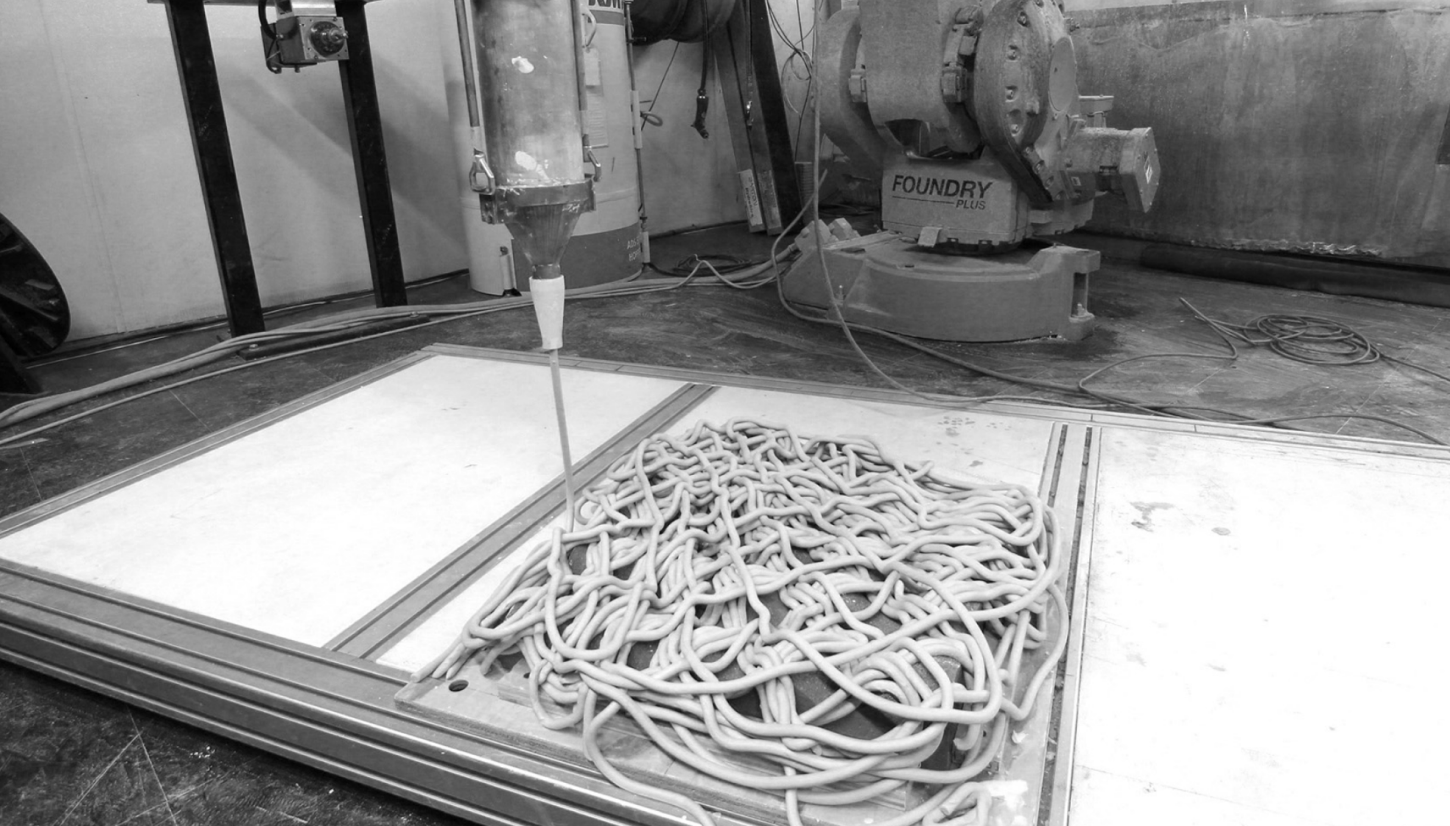
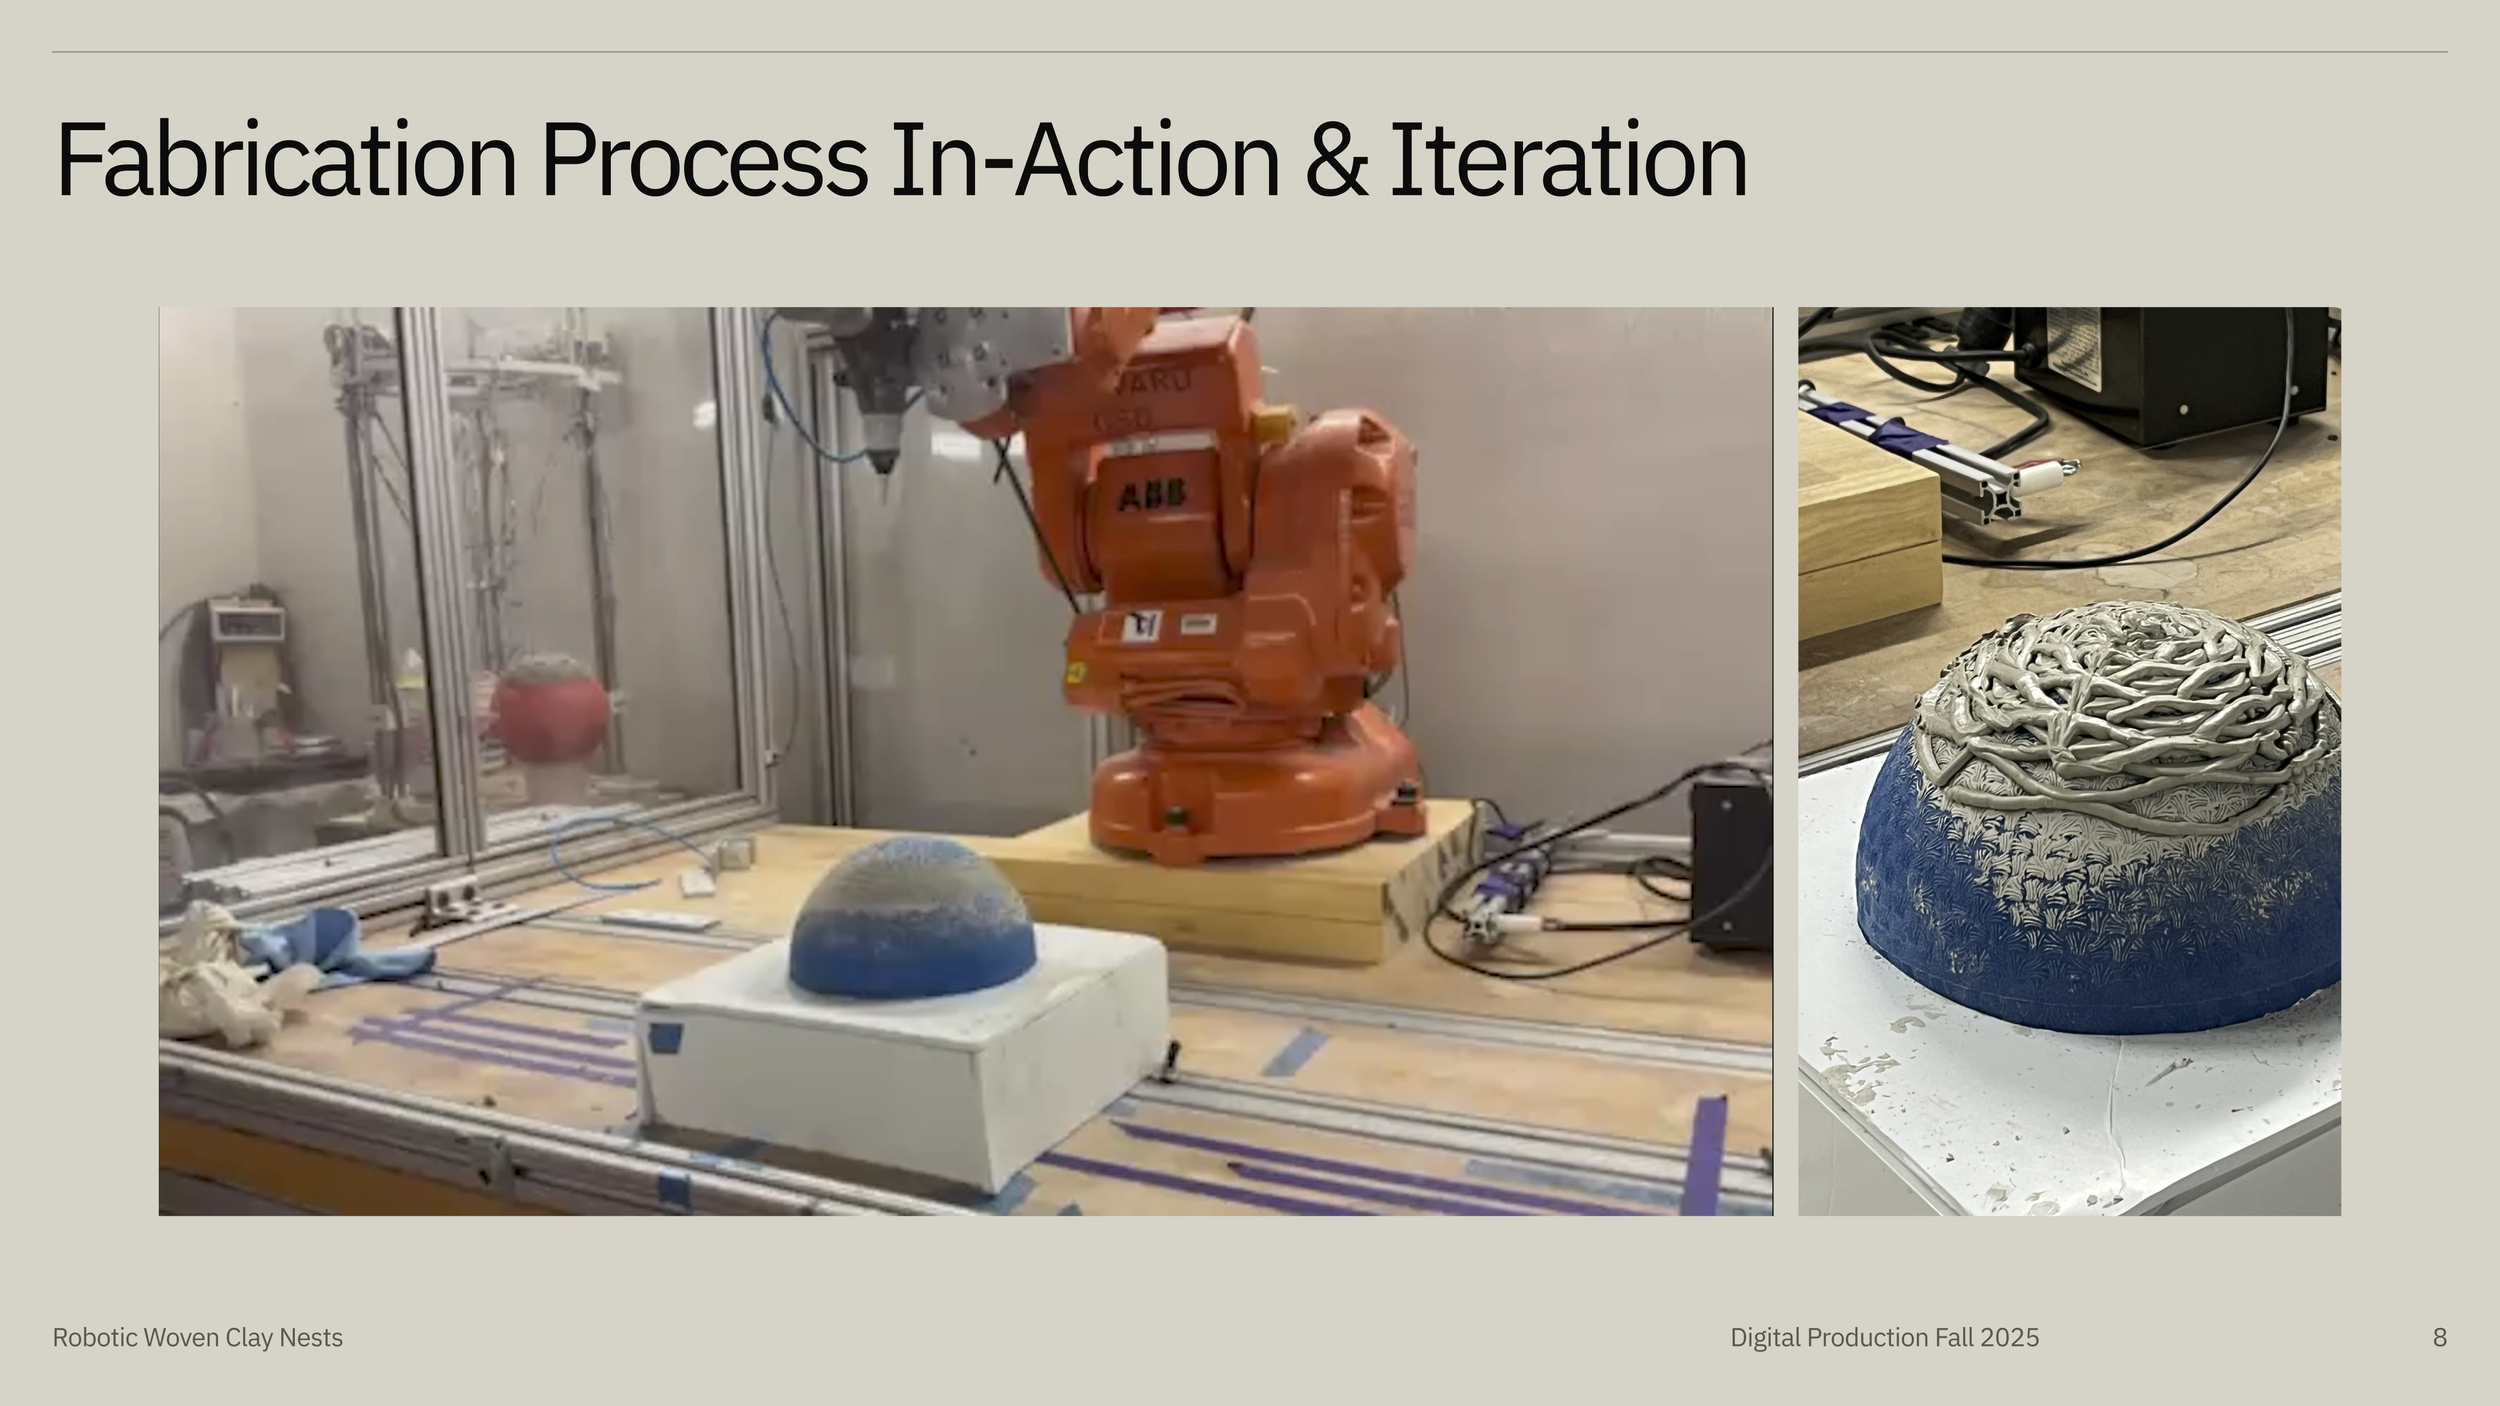
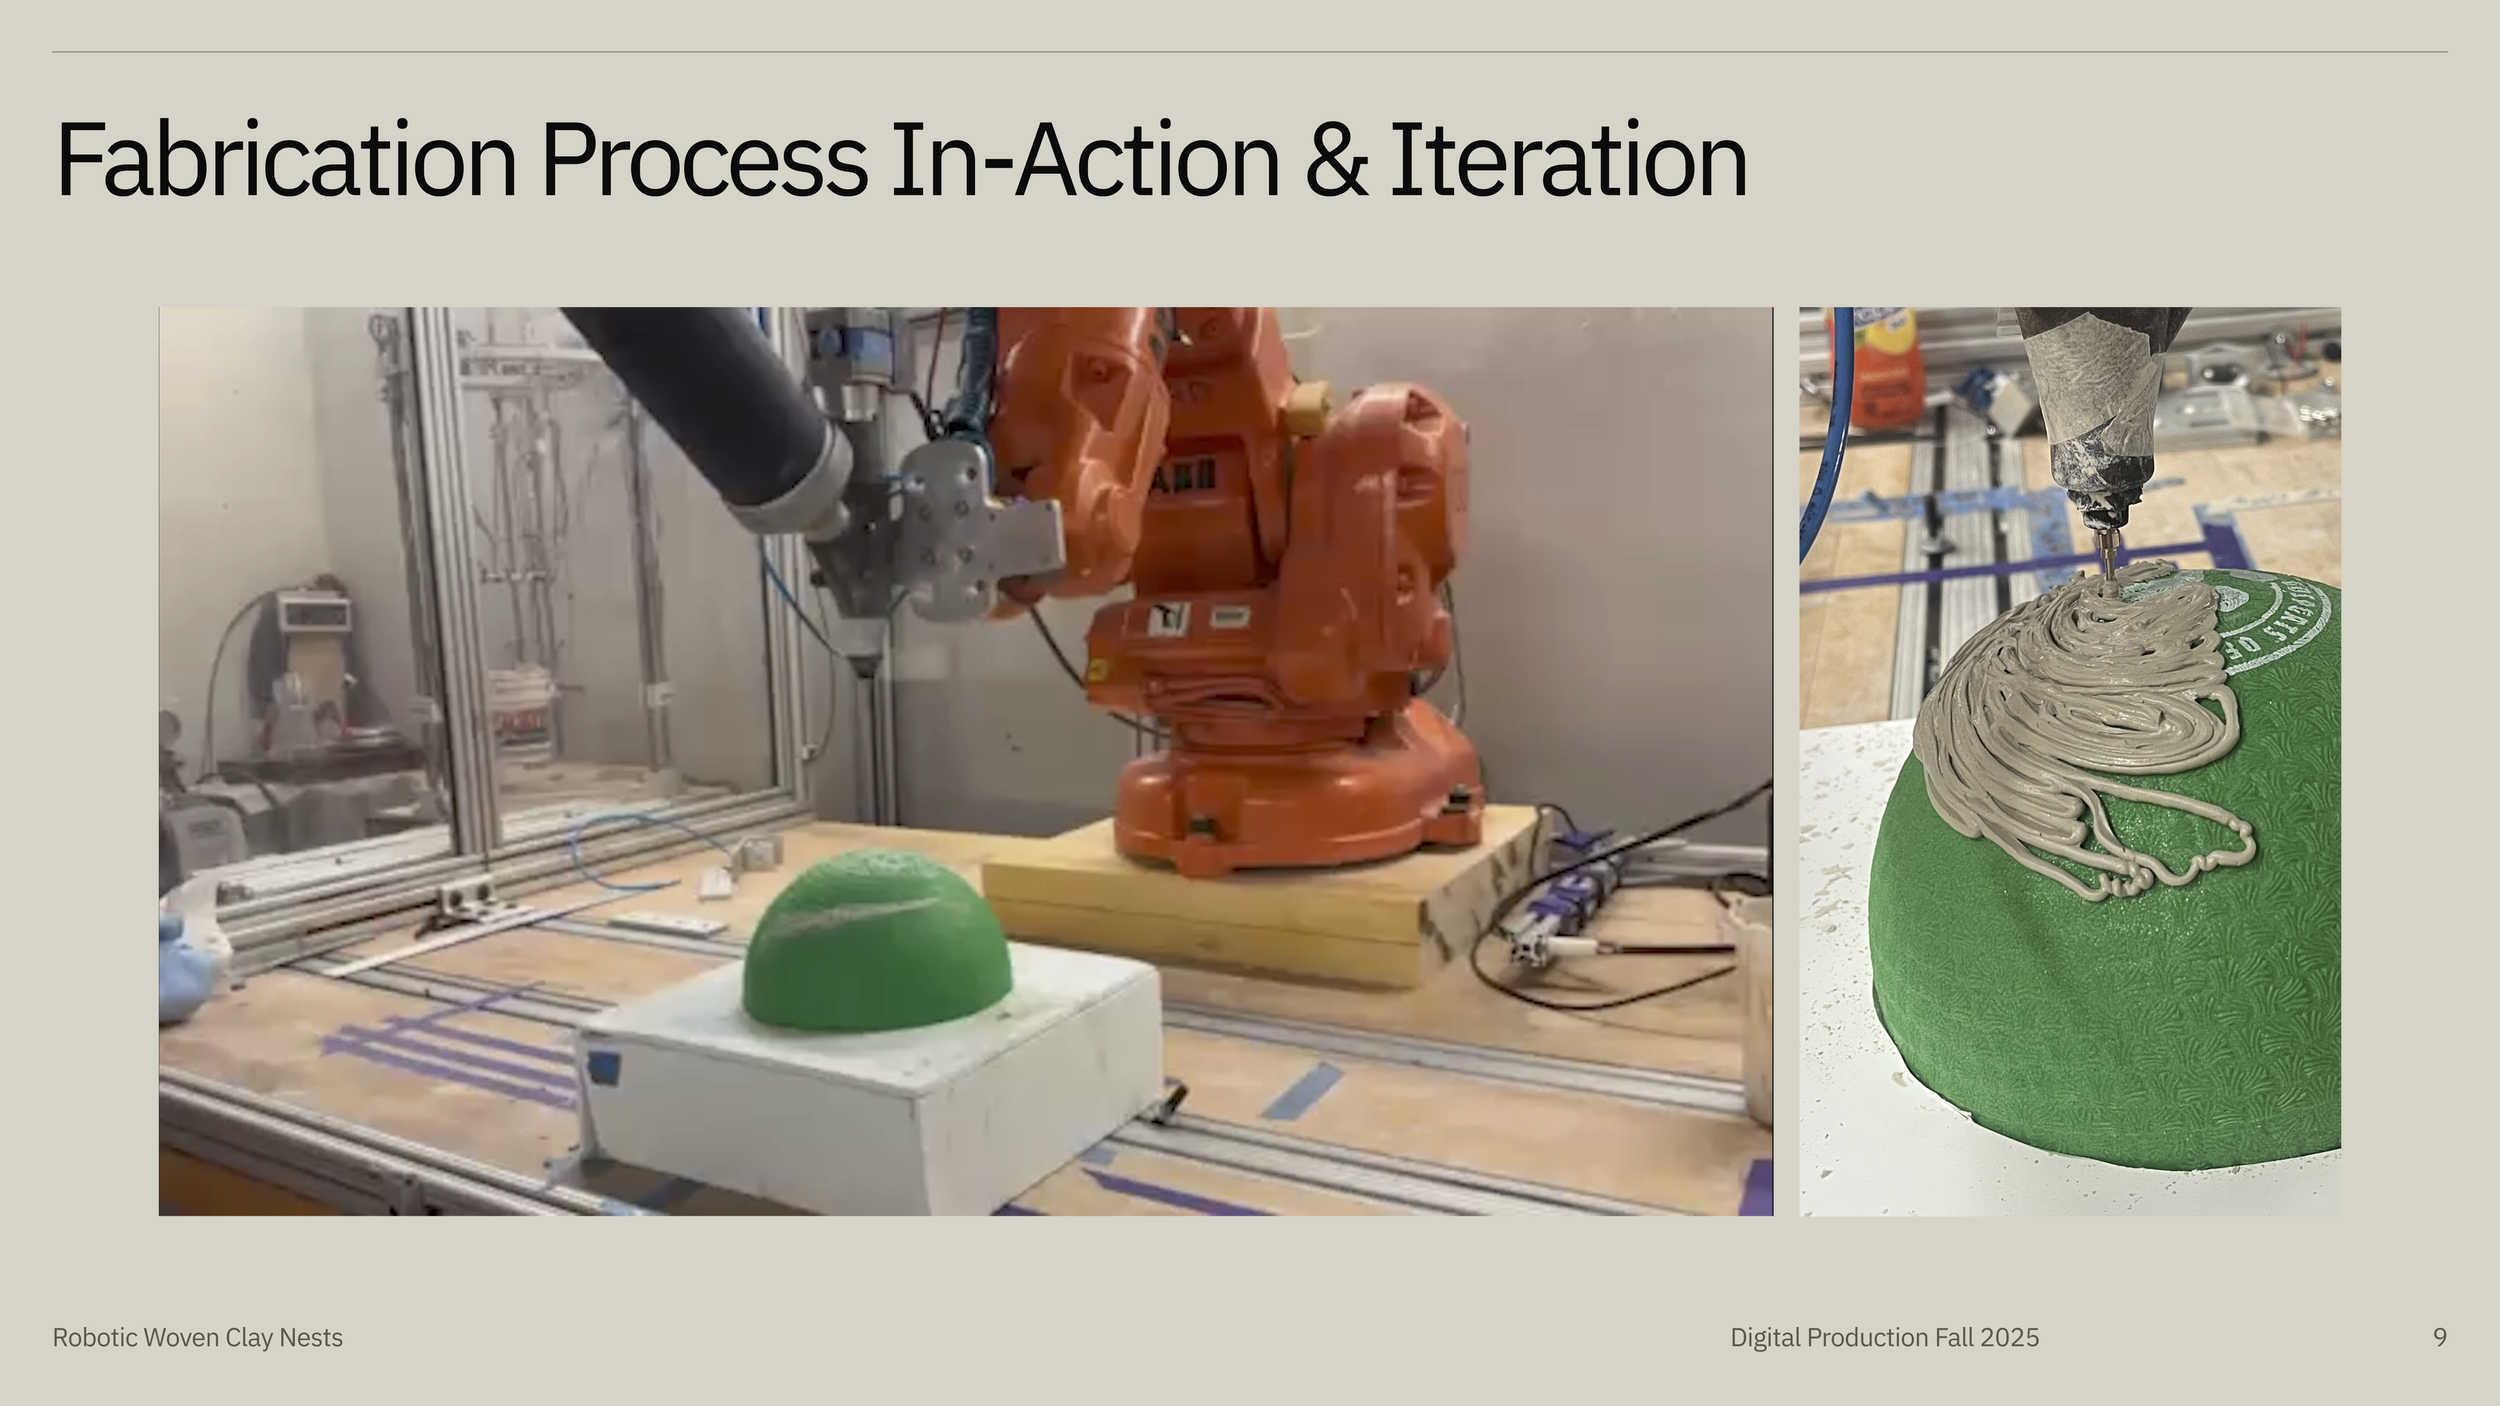
Proposed Fabrication Process
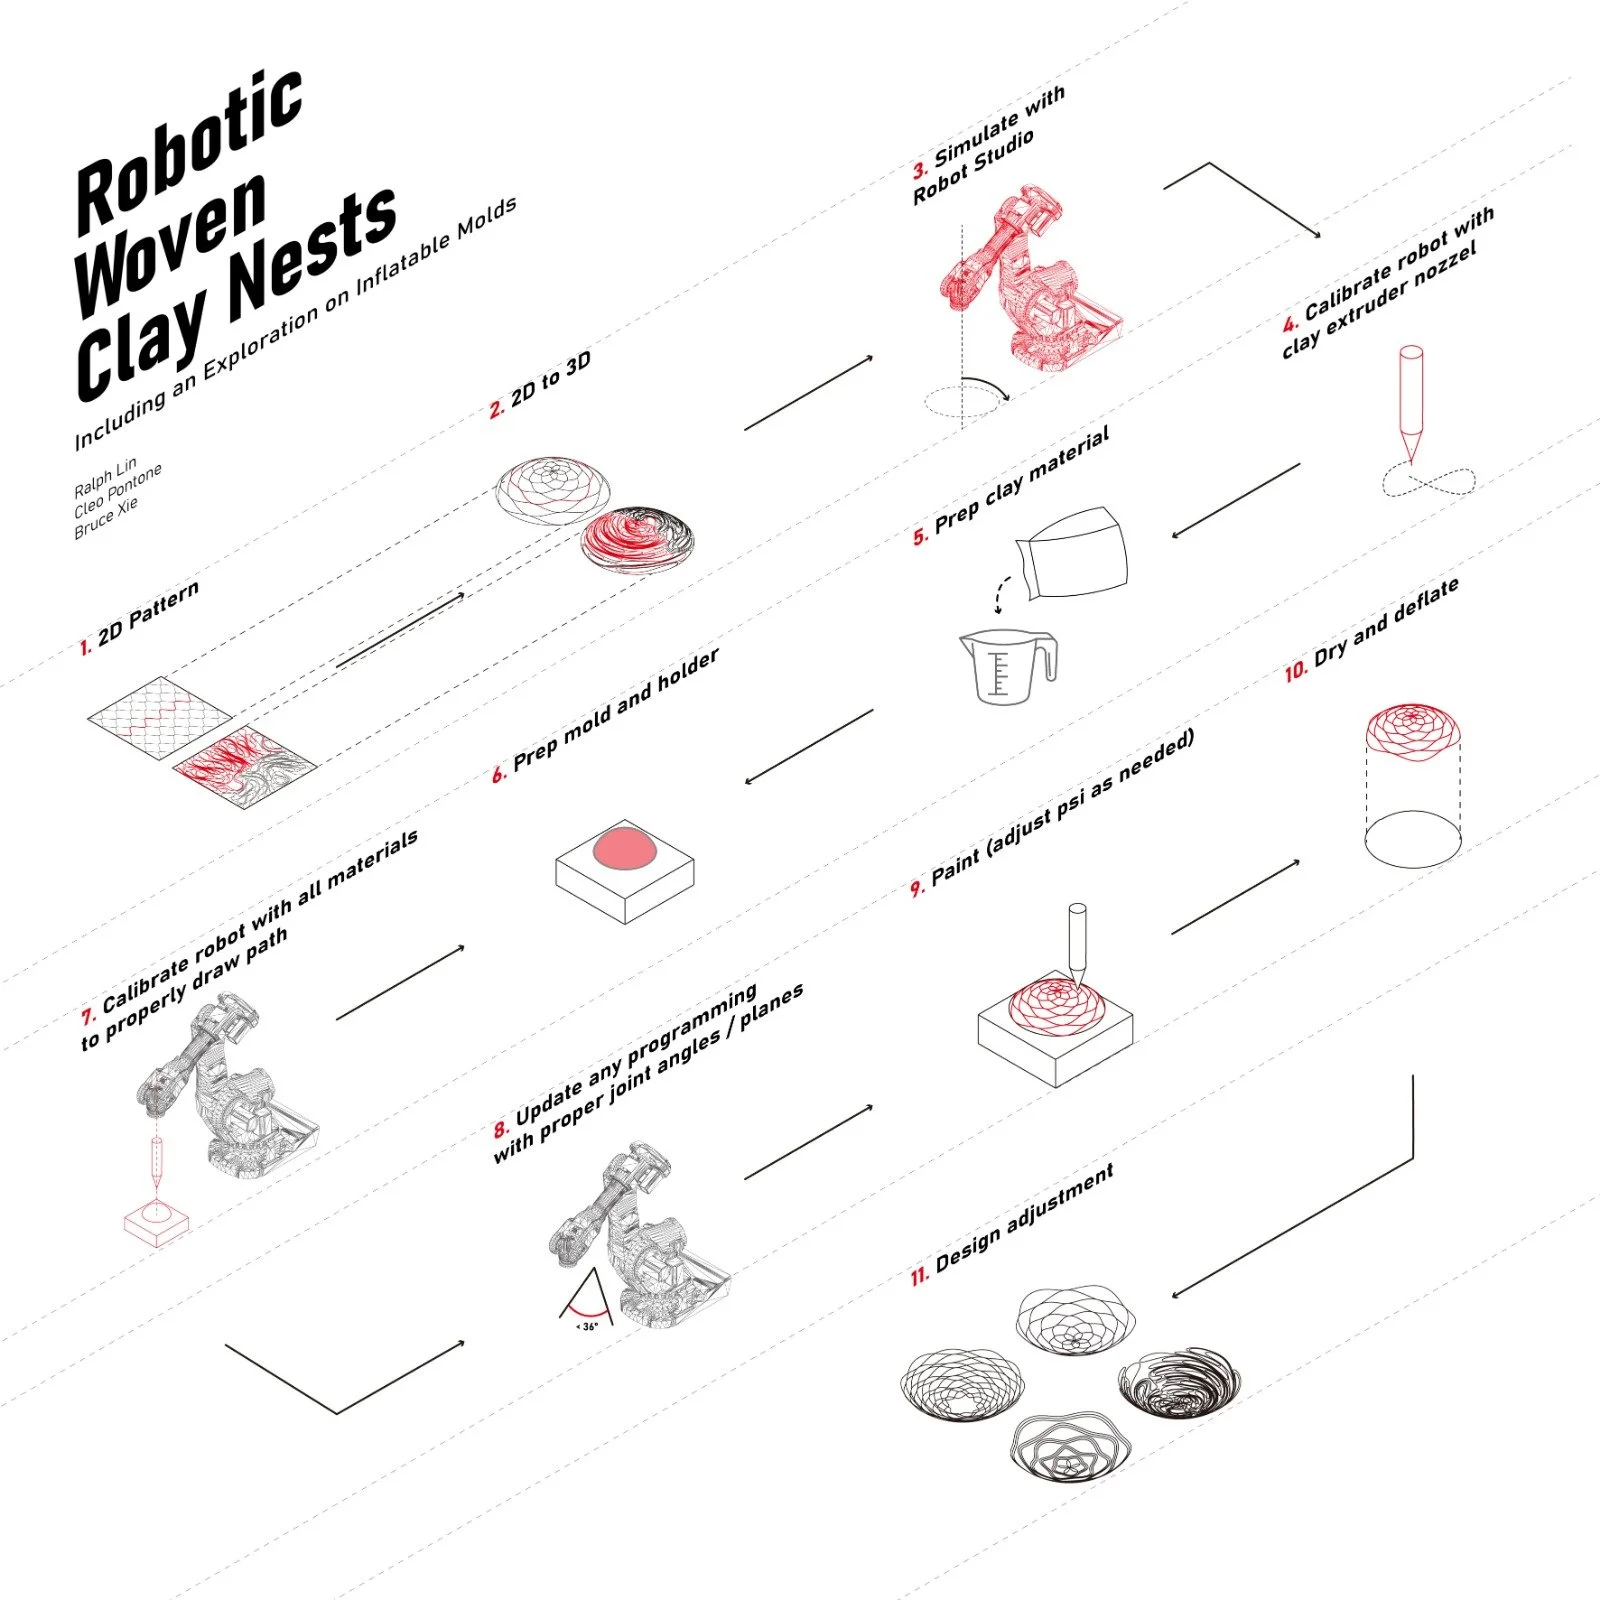
Develop & Iterate
Fabrication Process and Iteration
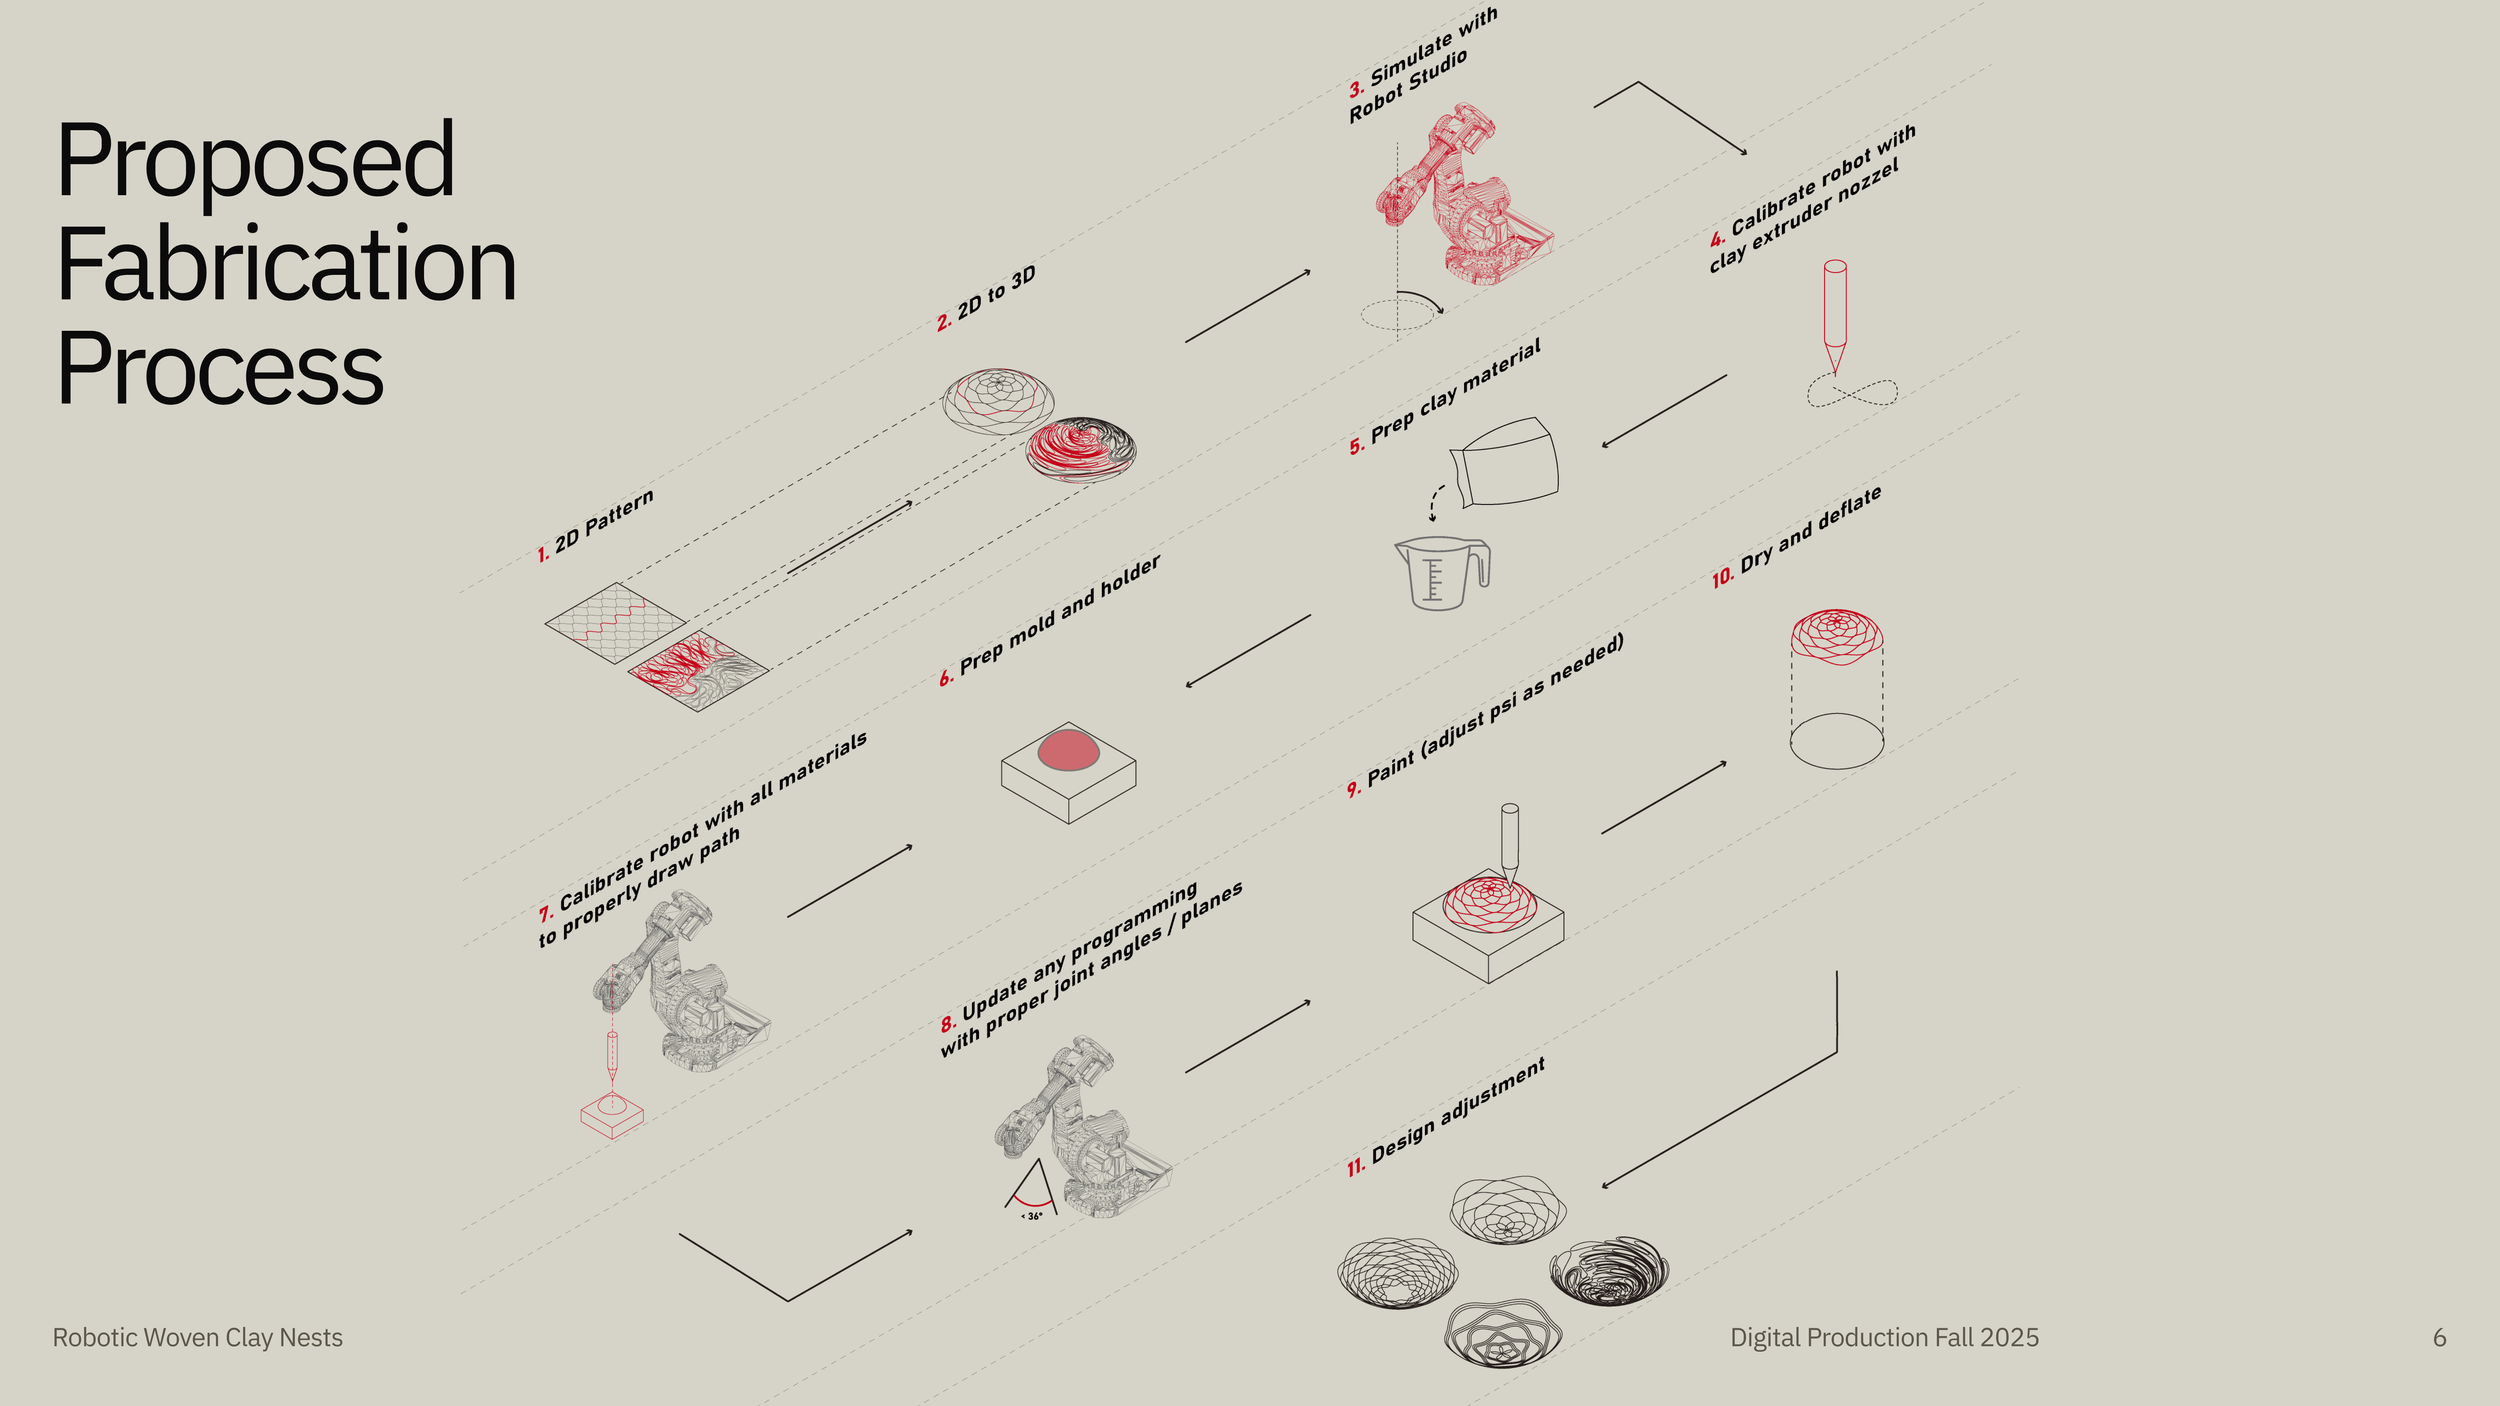
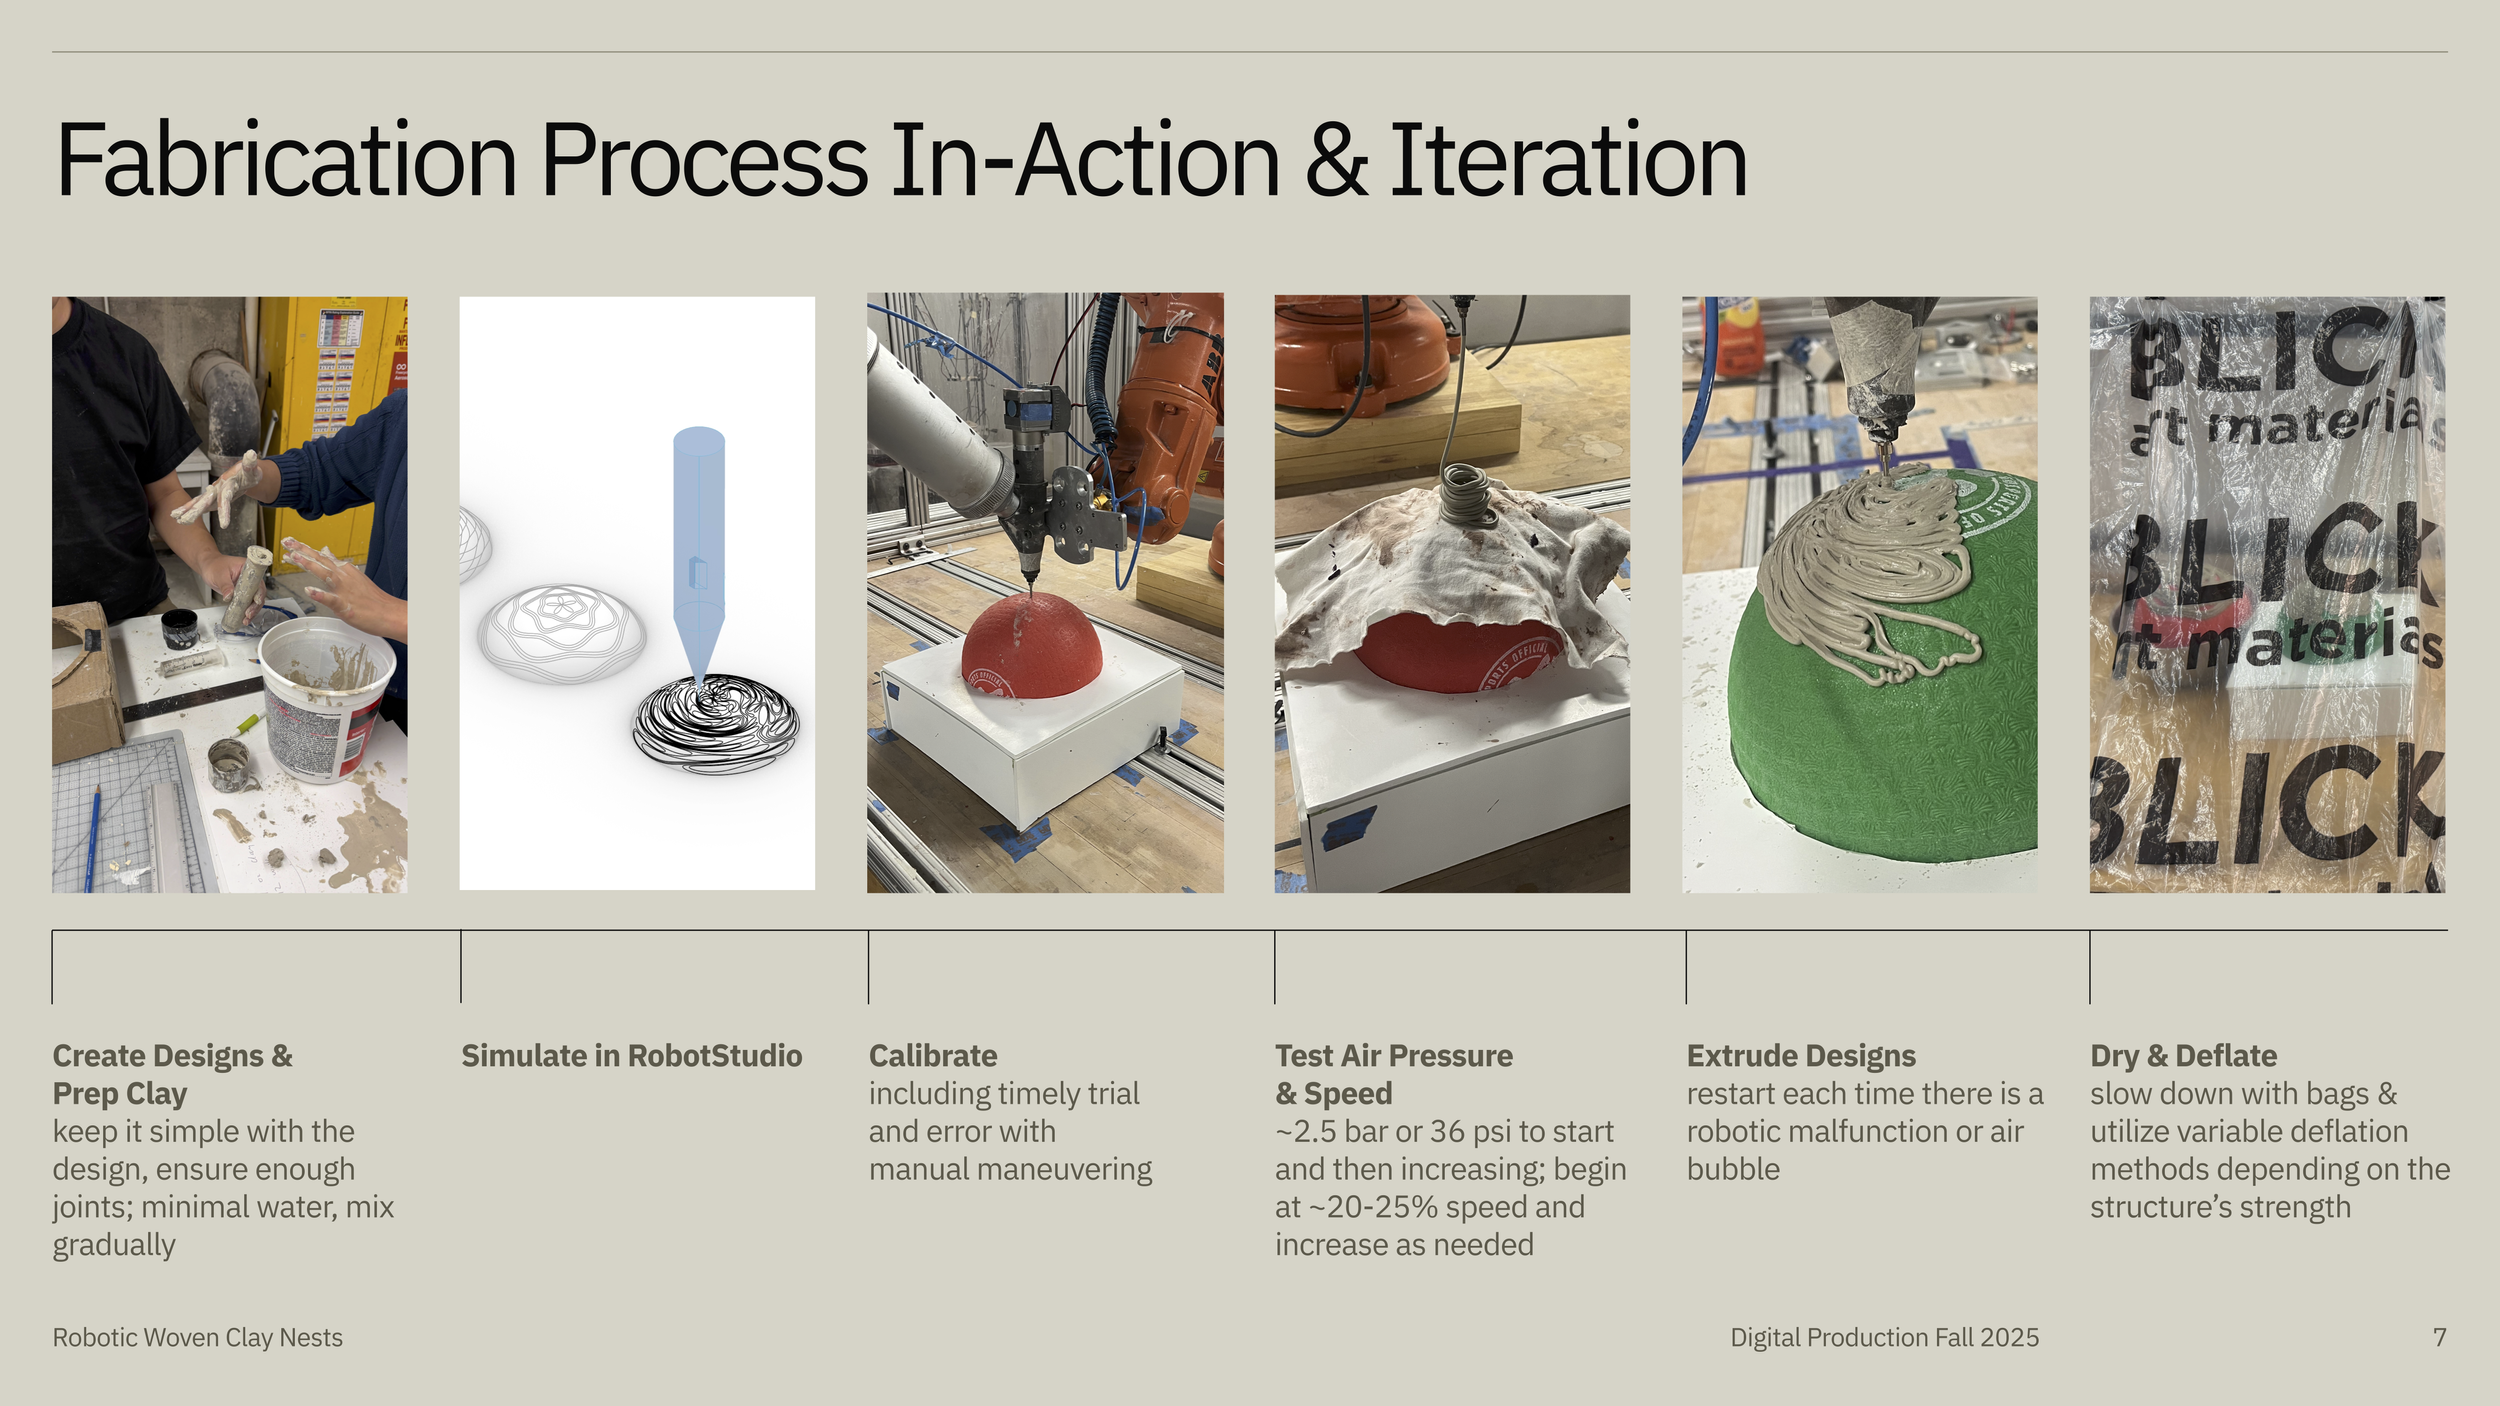
1. Create Designs and Prepare Clay
Findings: Keep design simple and ensure enough joints. For clay, use minimal water, mix gradually.
2. Simulate in RobotStudio to Test Program
Ensure robot’s end effector will properly trace the intended design’s toolpath.

3. Calibrate Iteratively Based on Ball Variability
Including timely trial and error with manual maneuvering.
4. Test Air Pressure & Speed
~2.5 bar or 36 psi to start and then increasing; begin at ~20-25% speed and increase as needed.
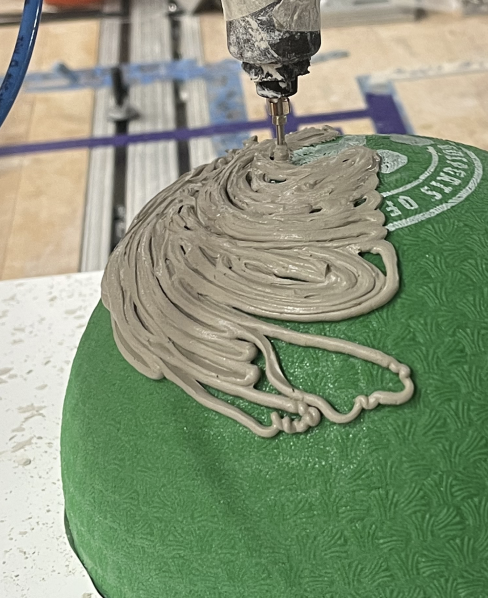
5. Extrude Designs onto Dodgeball Molds
Restart each time there is a robotic malfunction or air bubble.
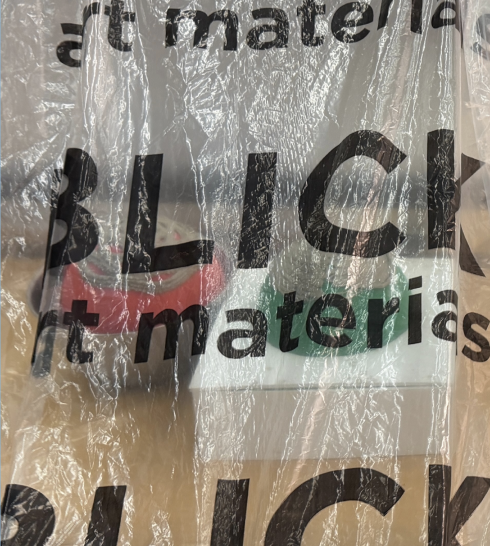
6. Dry Gradually and Deflate with Care
Slow down with bags & utilize variable deflation methods depending on the structure’s strength.
Example
Delivery
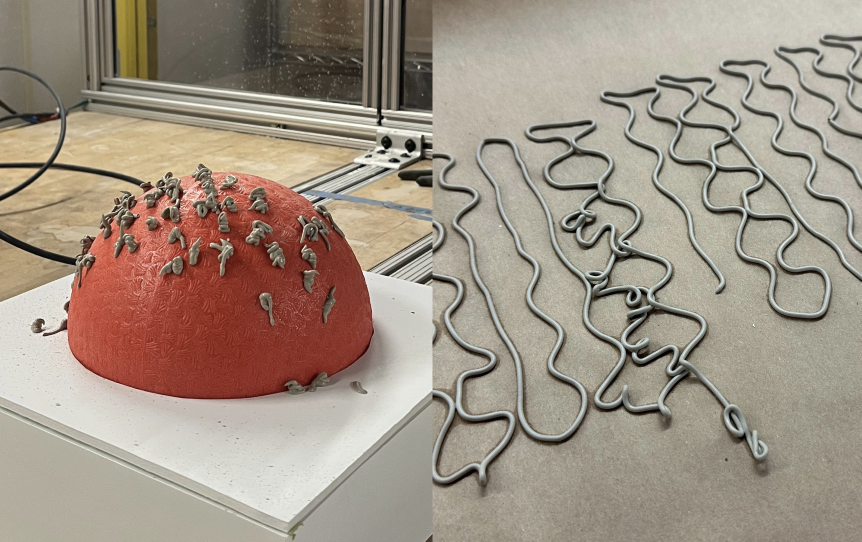
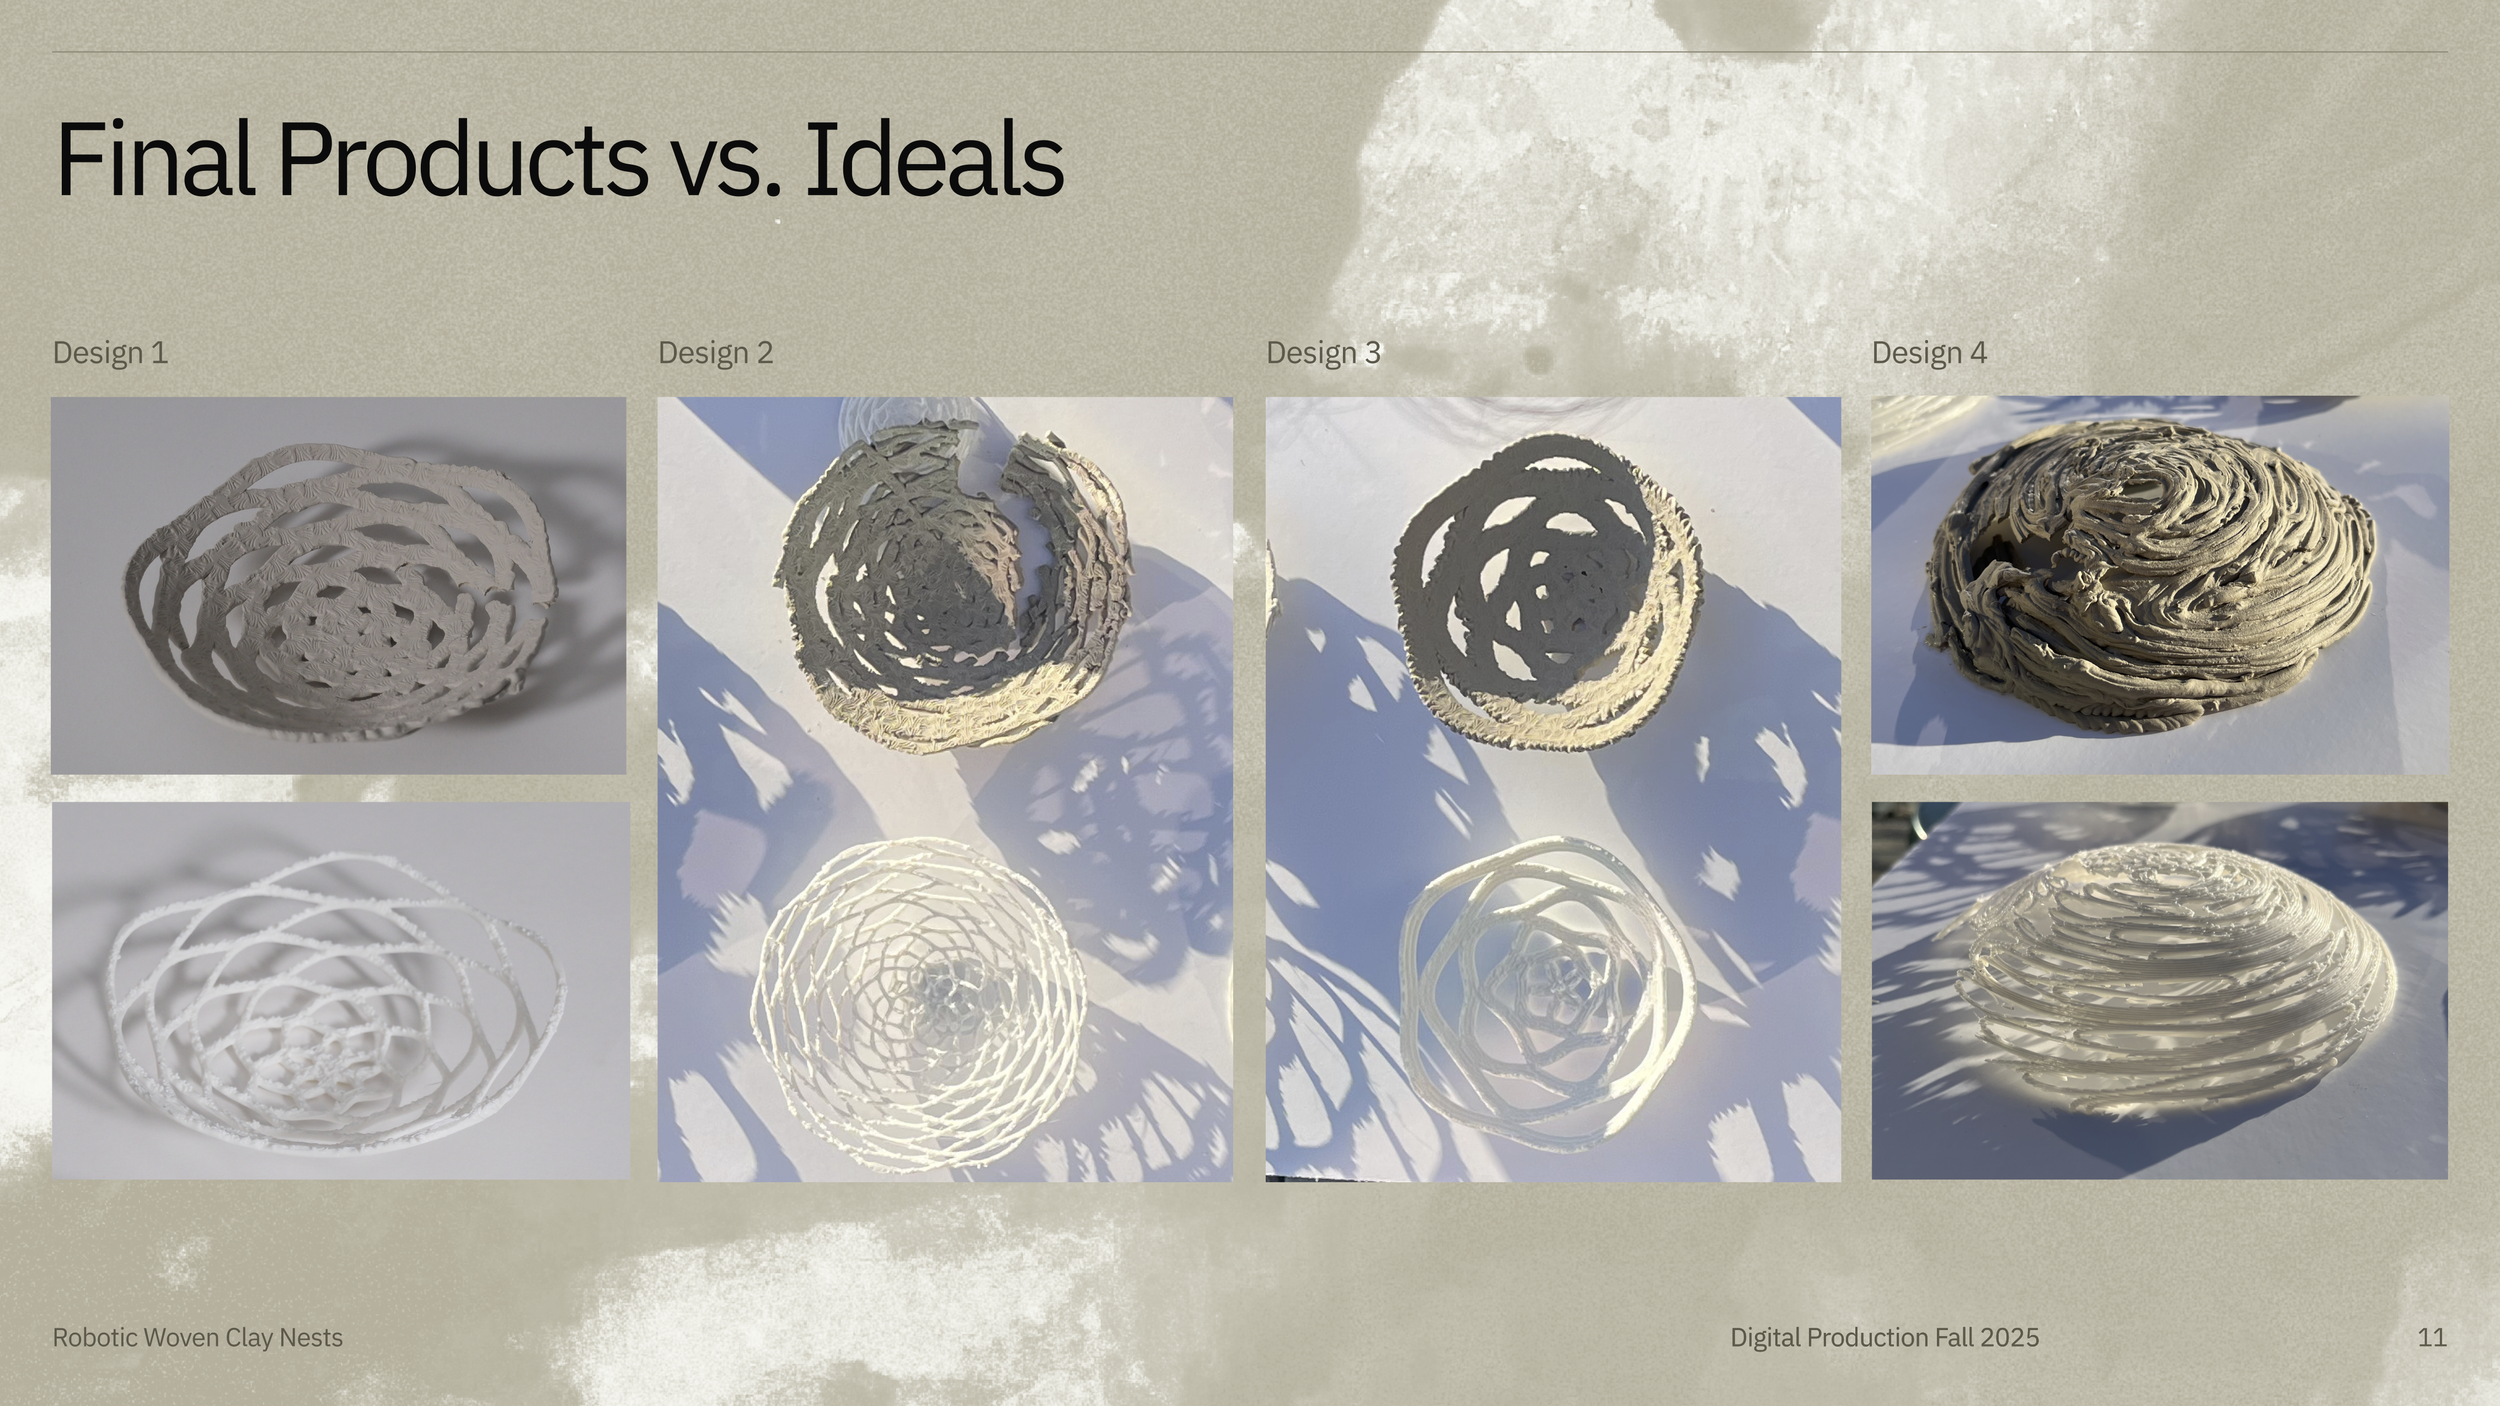
Ultimately, we created a series of four robotically fabricated clay “nests” (find gallery here or scroll to top), each exploring how different combinations of structural reinforcement (layer design and deposition sequence), extrusion speed, and clay viscosity influence structural integrity and form.
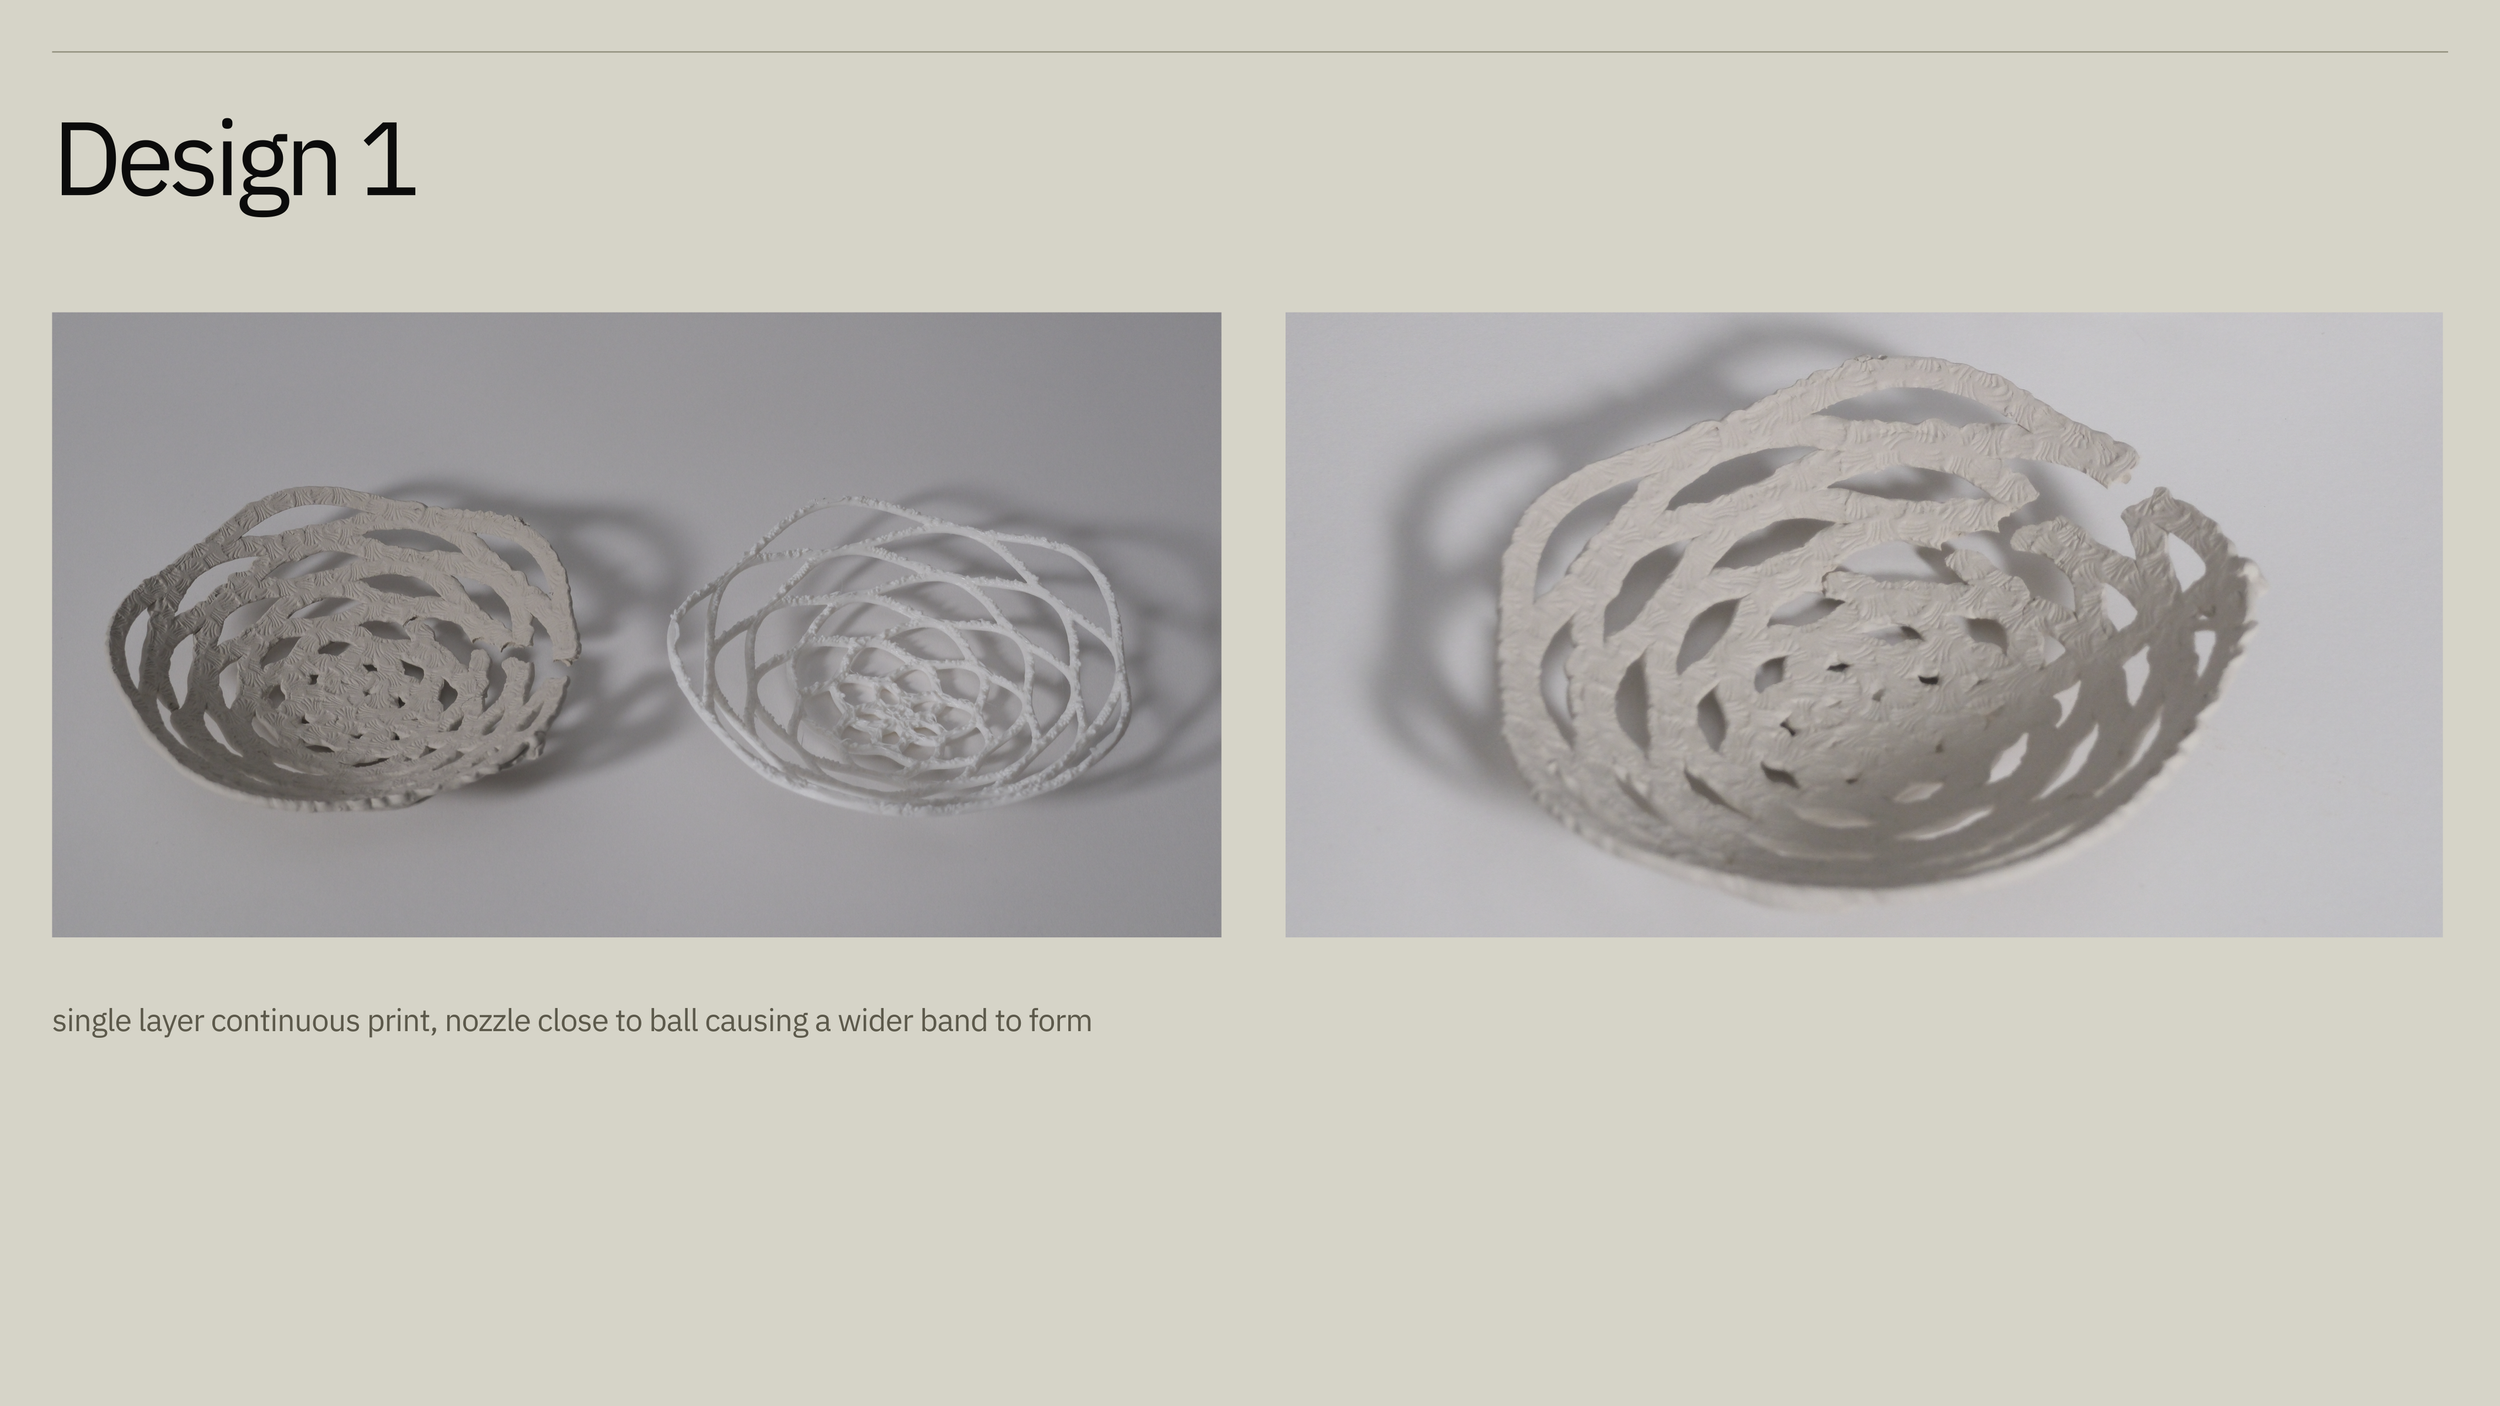
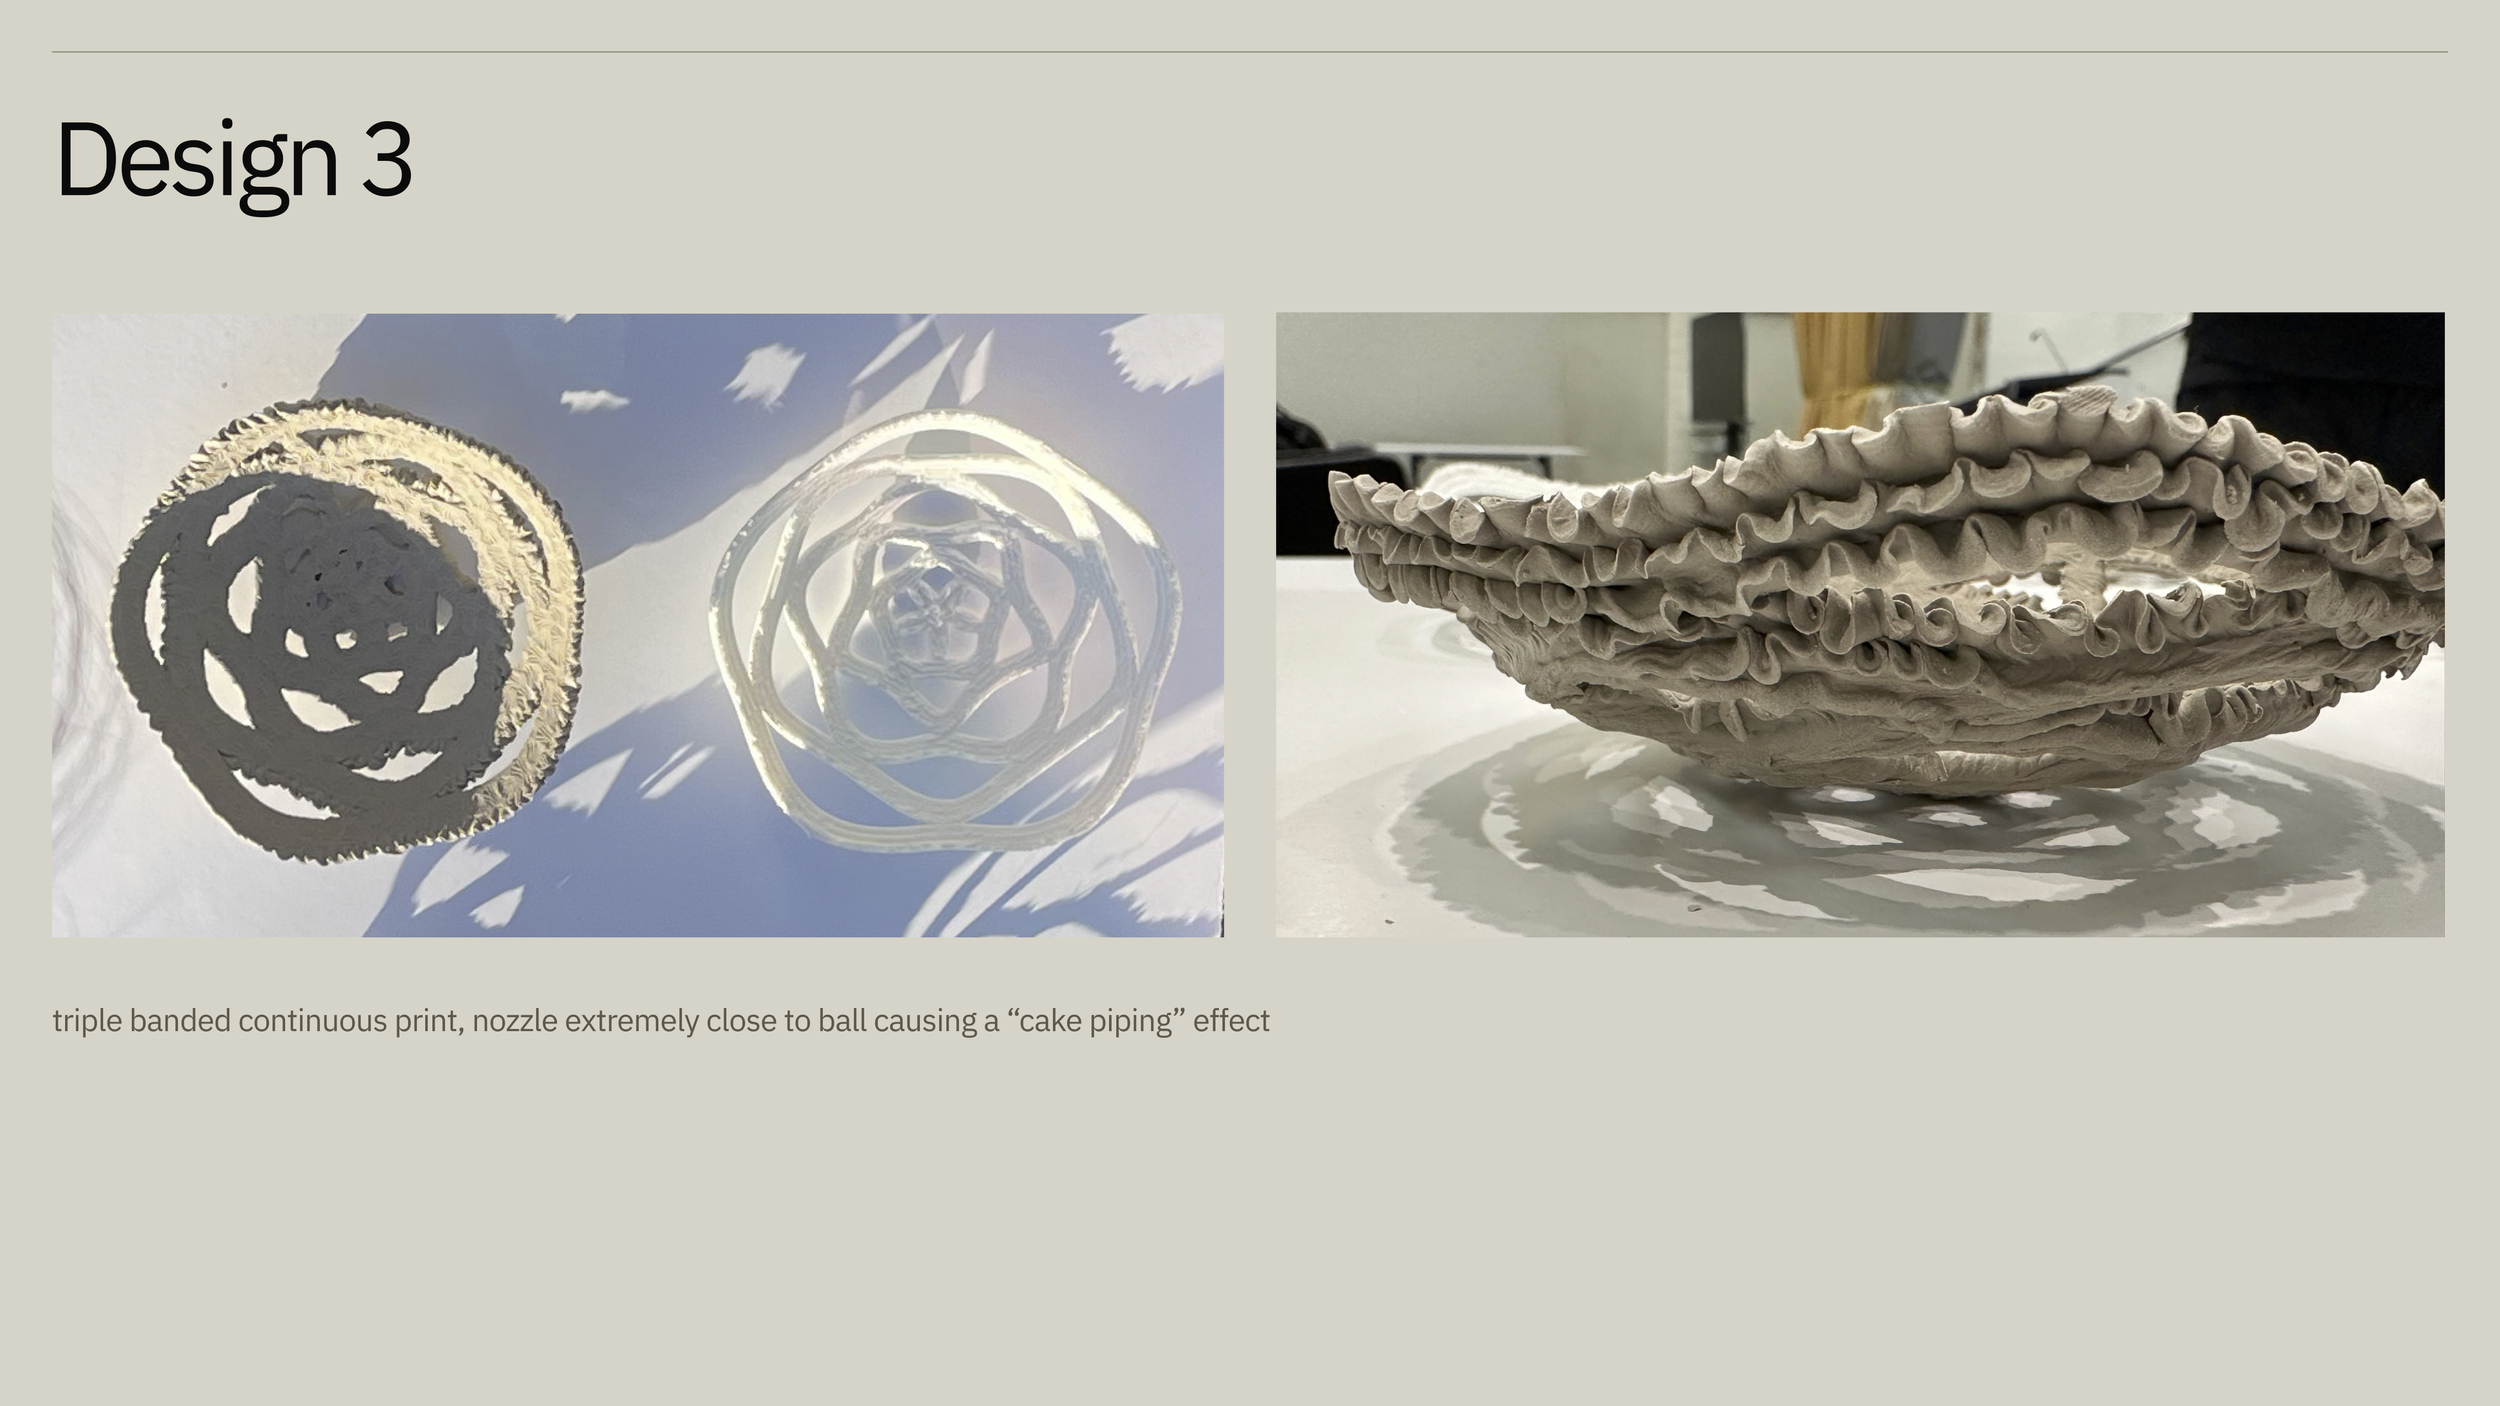
Design 1 and Design 3 were our most successful prints whereas Design 2 and Design 4 crumbled during drying. We believe Design 1 and 3 maintained more structural integrity as they dried because of the wider bands that were created from the end effector being calibrated extremely close to the ball. The clay dispersed outward rather than just sitting below the nozzle. As the extruder then went around the ball, this allowed each band to merge with one another, which did not occur for the thinner more intricate designs, even with multiple deposition layers as no blending occurred.
Conclusion
Design 1
single layer continuous print (no overlapping) with nozzle close to ball causing a wider band to form
Design 3
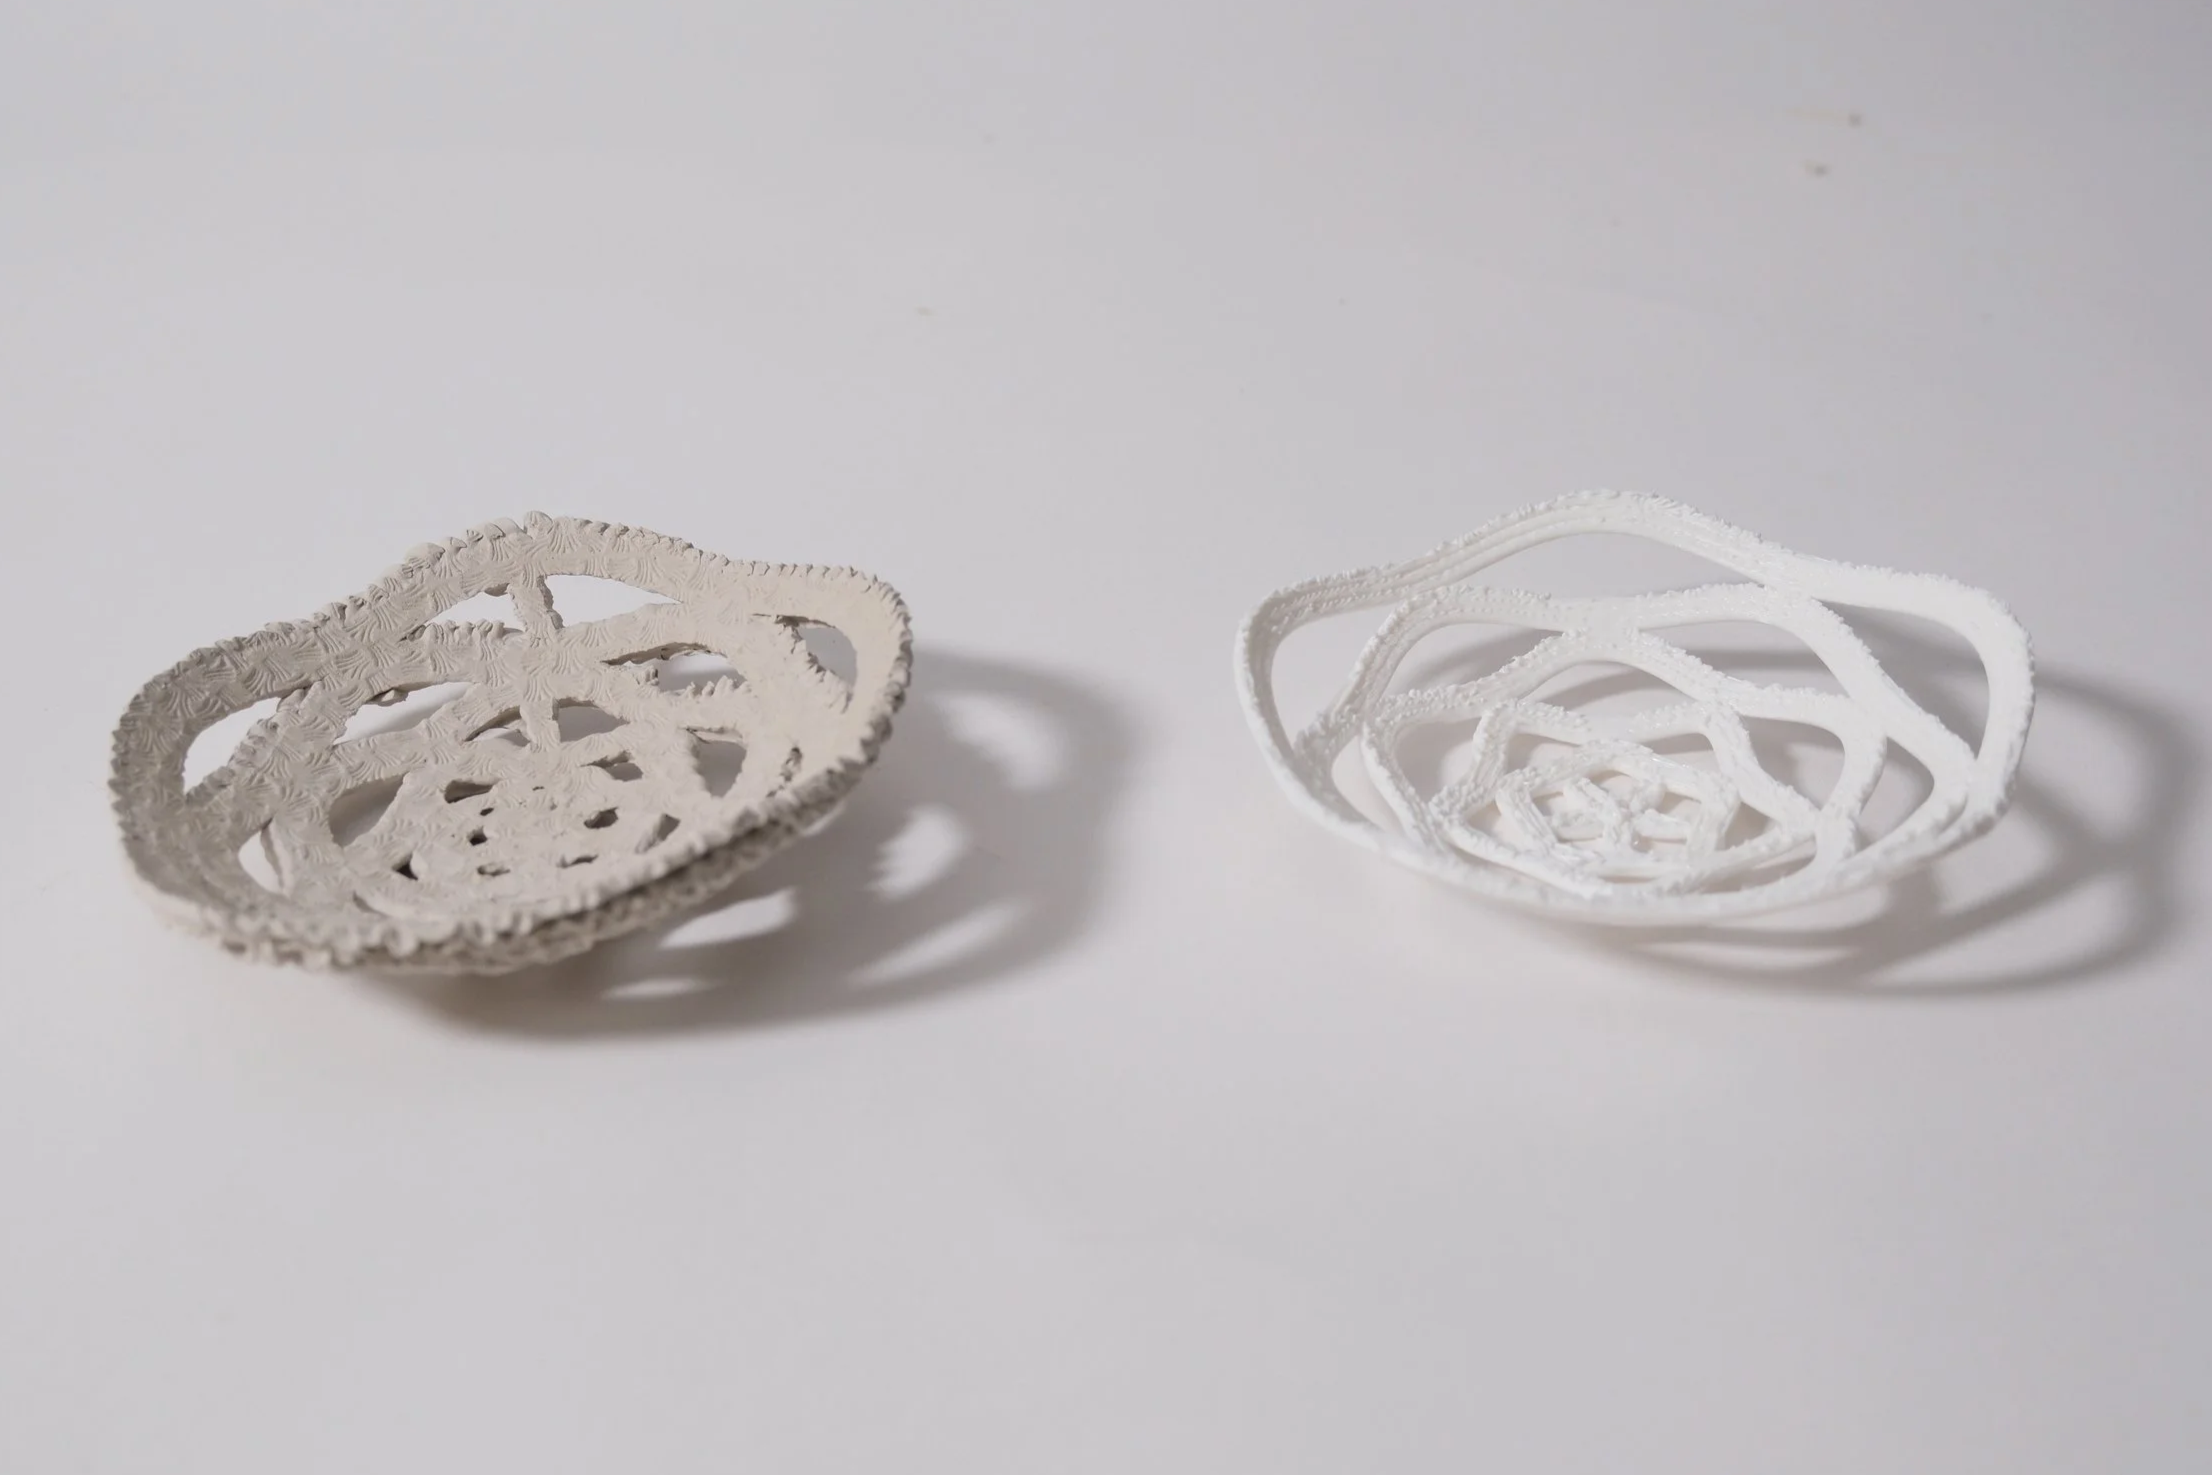
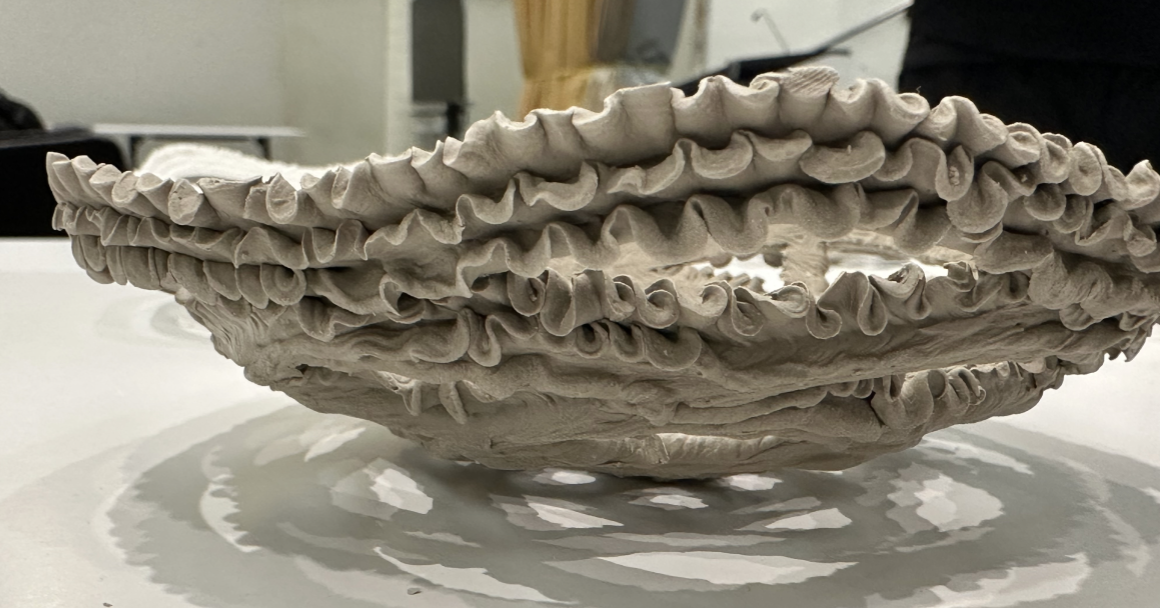
triple banded continuous print (no overlapping) with nozzle extremely close to ball causing a “cake piping” effect, which we believe dispersed drying and potentially acted as a joint adhesive to merge layers together
Final Presentation & Feedback
In our final presentation to design critics, we received positive feedback, particularly commending our ambitions to tackle use of robotics, clay, and experimentation with non-uniform molds.
They found the use of a dodgeball to be very novel, including the unique texture of the dodgeball engrained onto the clay to be an unlikely, but beautiful result.
If further developed, this approach could be extended to larger-scale applications, building on existing construction methods that use inflatable PVC air forms as scaffolding for sprayed concrete structures.
In response to the challenges our group faced with constant recalibrations, critics also suggested exploring whether designs could be extruded in a planar (2D) format and then inflated, potentially reducing variability introduced by the non-uniform molds.

Retrospective & Learnings for Future
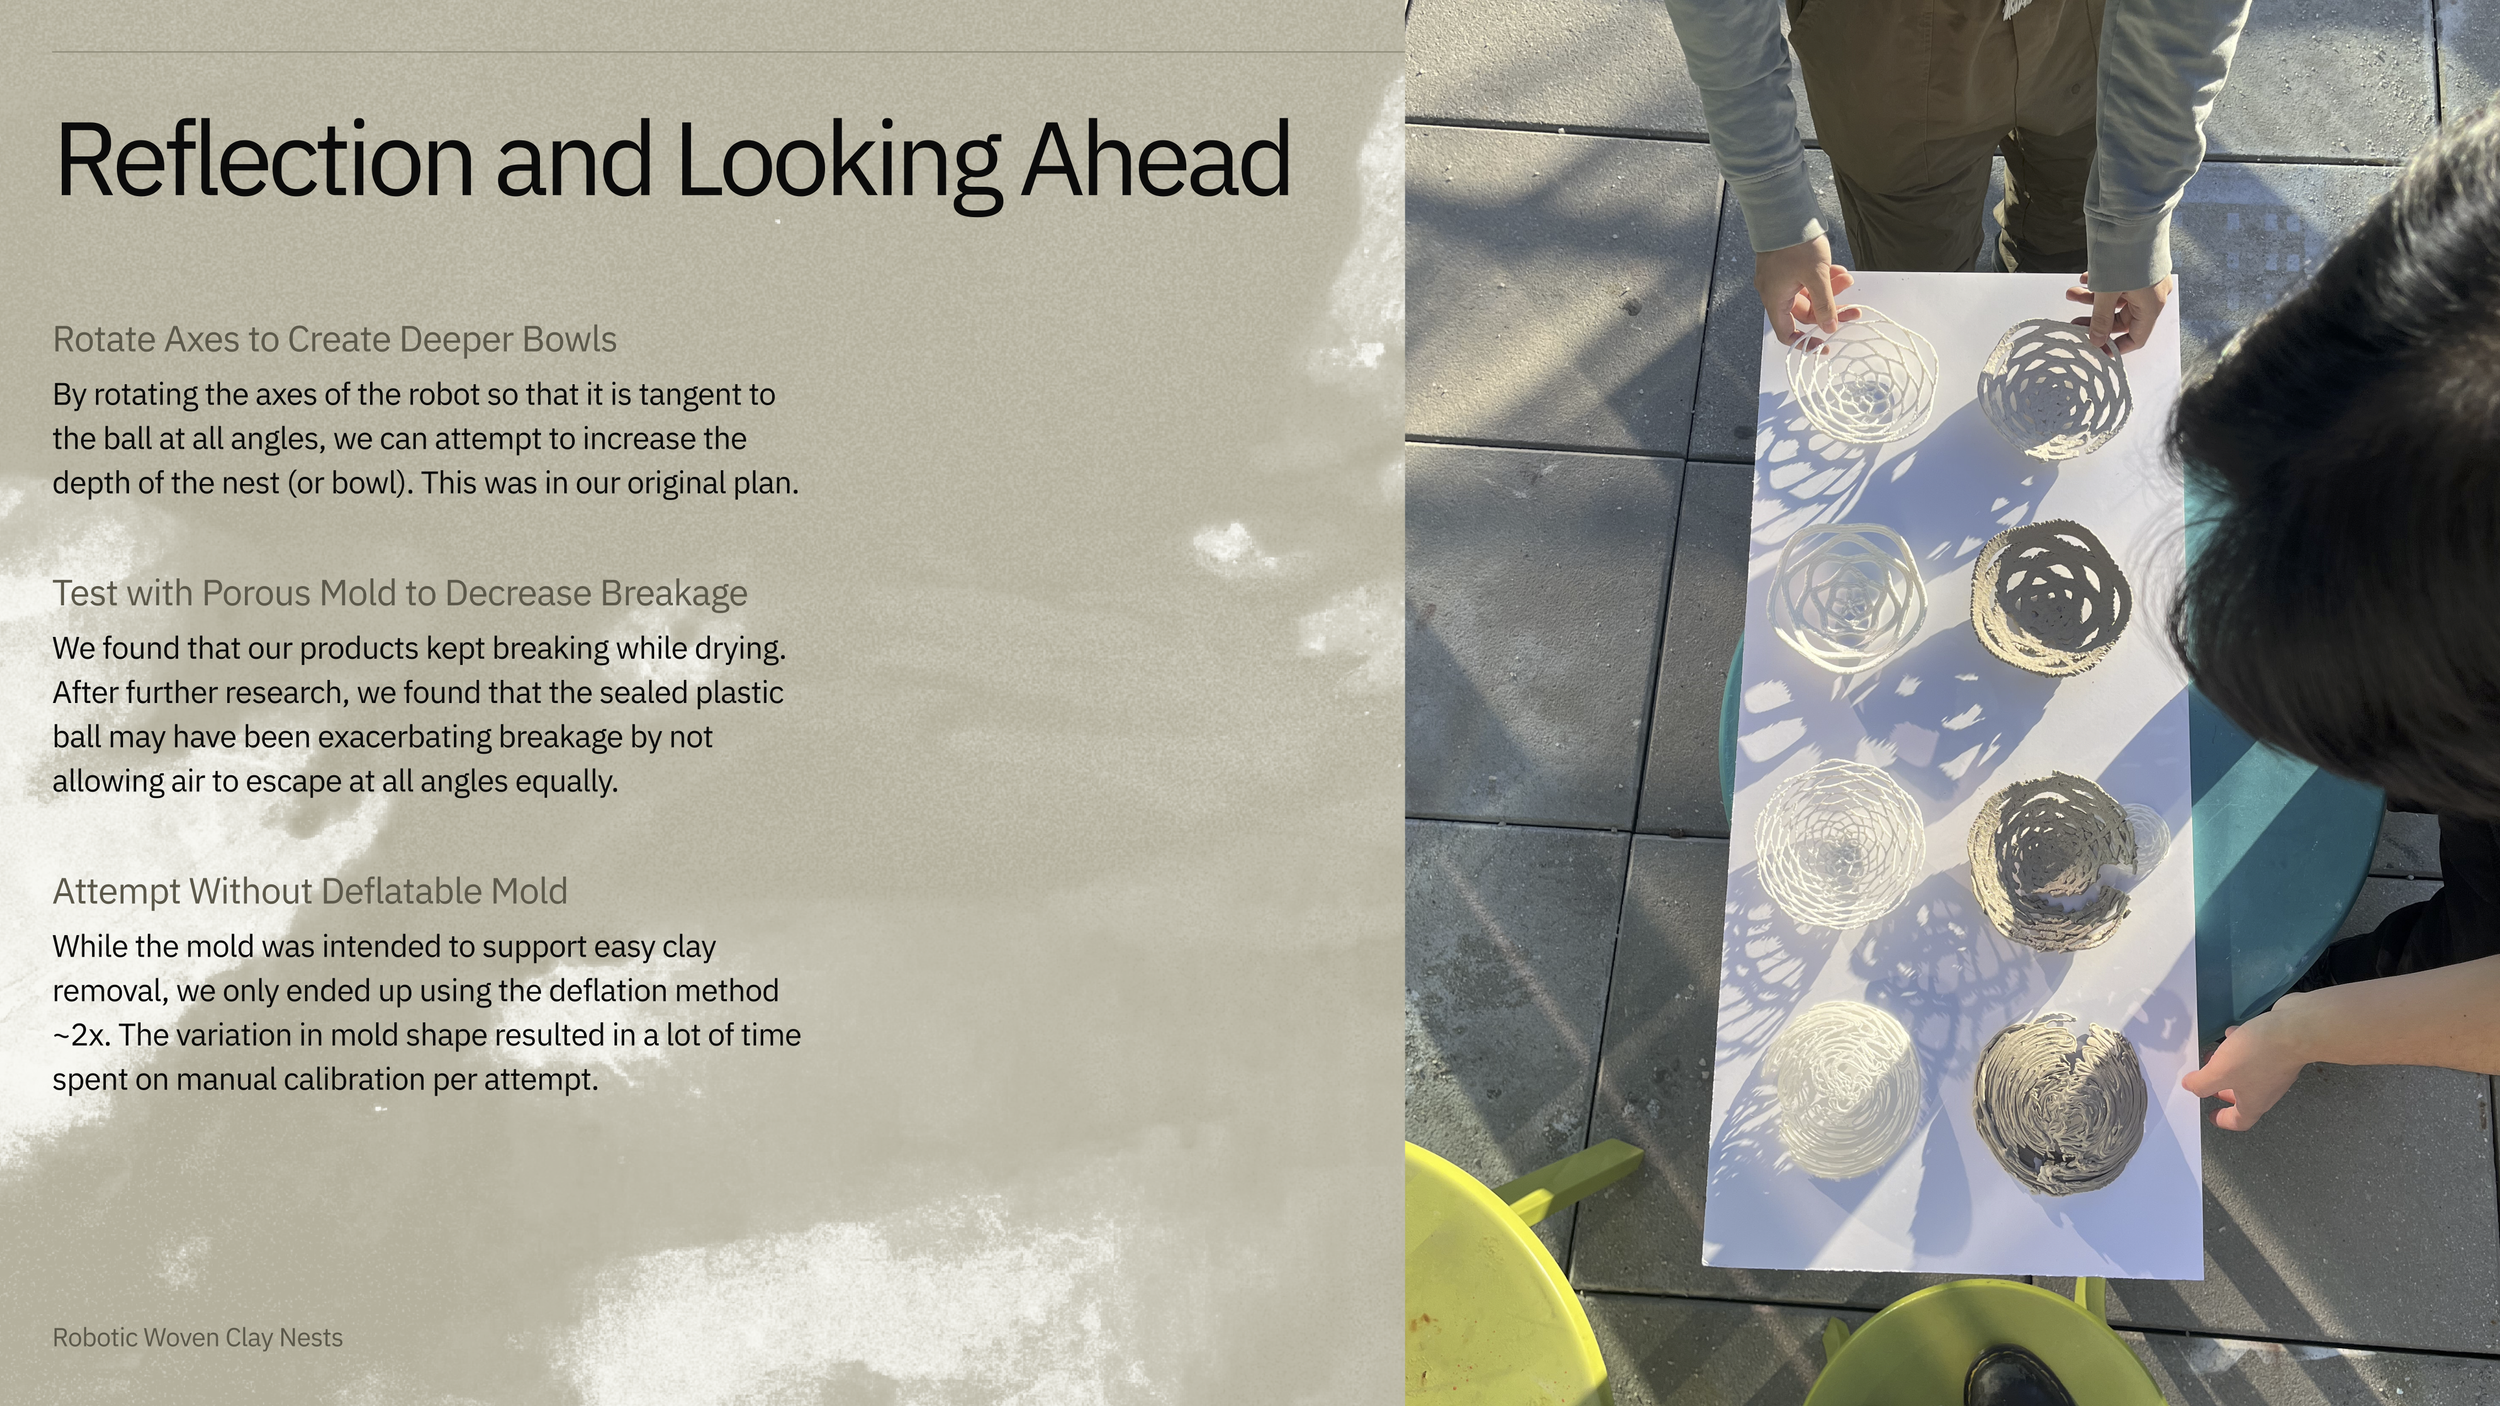
Rotate Axes to Create Deeper Bowls
By rotating the axes of the robot so that it is tangent to the ball at all angles, we can attempt to increase the depth of the nest (or bowl). This was in our original plan.
Test with Porous Mold to Decrease Breakage
We found that our products kept breaking while drying. After further research, we found that the sealed plastic ball may have been exacerbating breakage by not allowing air to escape at all angles equally.
Attempt Without Deflatable Mold
While the mold was intended to support easy clay removal, we only ended up using the deflation method ~2x. The variation in mold shape resulted in a lot of time spent on manual calibration per attempt.